Performing Security and Operational Scans
- Executing Scans in CloudOps
- Conducting Cloud Security Assessments
- Performing Cyber Security Evaluations
- Workload Security
Executing Scans in CloudOps
Running Scans in Cloud Operations
- Log in to the Platform
- Access the platform and sign in using your credentials.
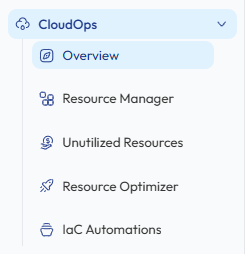
- Navigate to CloudOps
-
Locate the Side Navigation Bar on the left-hand side of the screen.
-
Click on the CloudOps module to expand the available options.
-
- Verify Cloud Account
-
Ensure that an AWS or Azure account has already been connected to the platform.
-
If no account is available, add a cloud account through the Cloud Account Integration process before initiating a scan.
-
- Select a Scan Type
-
From the CloudOps module, select the scan you want to perform.
-
Resource Manager - Provides a centralized inventory of cloud assets across AWS and Azure services. It allows users to fetch and view infrastructure resources such as compute, networking, storage, and identity services to monitor and manage cloud infrastructure efficiently.
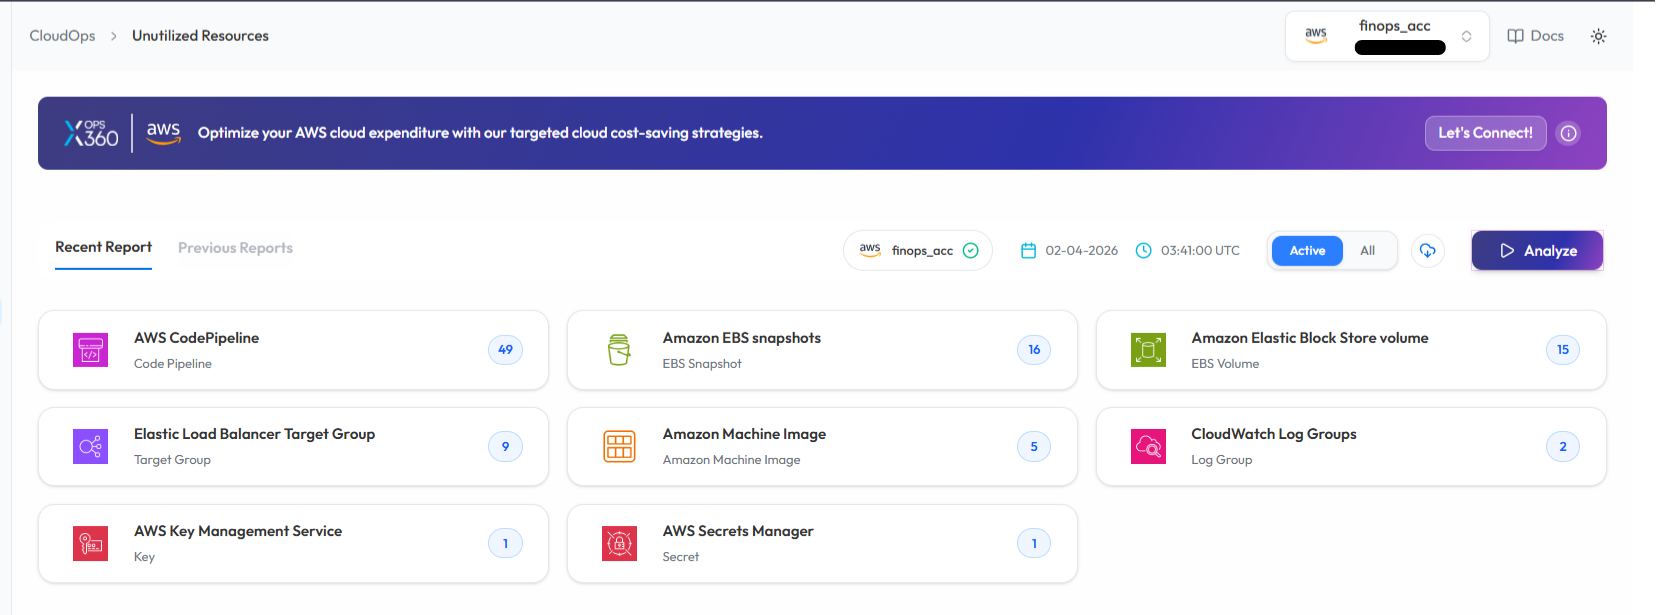
- Unutilized Resources - Detect unused AWS resources.
-
Resource Optimizer - Identify optimization opportunities across AWS resources.
- Azure WAR (Well-Architected Review) – Evaluate Azure cloud architecture against Microsoft best practices.
-
-
- Initiate the Scan
-
Select the cloud account from the available account list.
-
Click Analyze or Scan to initiate the scan for the selected account.
- The platform will begin analyzing the selected cloud resources.
-

- Monitor and Review Results
The scan will start processing the selected cloud account.

Once the scan is complete:
-
-
A report will be generated automatically.
-
Results will display identified optimization opportunities or unused resources.
- Users can review detailed findings directly within the dashboard.
-
These results help identify opportunities to reduce cloud costs and improve infrastructure efficiency.

Note:
-
To receive recommendations for optimizing your resources in Resource Optimizer, kindly ensure that the AWS Compute Optimizer service is enabled in the AWS account linked with the Xops 360 portal.
Running a Scan in Resource Manager (Assets)
- Log in to the Platform
-
- Access the platform and sign in using your credentials.
-
- Navigate to Resource Manager
-
From the Side Navigation Bar, click :
CloudOps → Resource Manager
This page provides a comprehensive inventory of cloud assets across multiple services.
-
- Verify AWS or Azure Account
-
Ensure that an AWS account or Azure account has already been added to the platform.
-
If no account is available, add the account before initiating the scan.
-
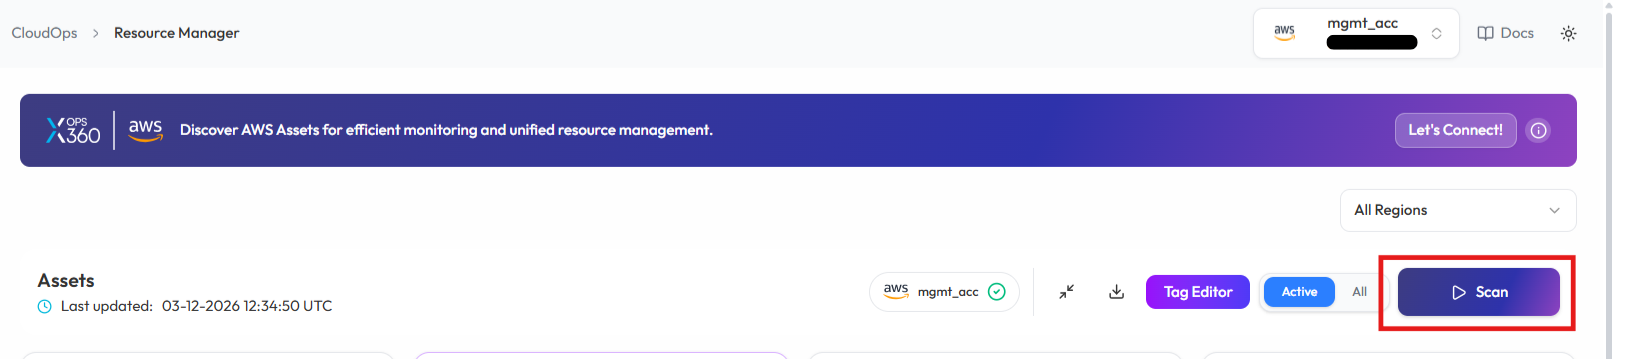
- Run the Scan
On the Resource Manager (Assets) page
-
Select the desired cloud account.
-
Click Scan to fetch the latest cloud asset information.
-
The platform will begin retrieving resources from the selected cloud account.

-
- Monitor and Review Results
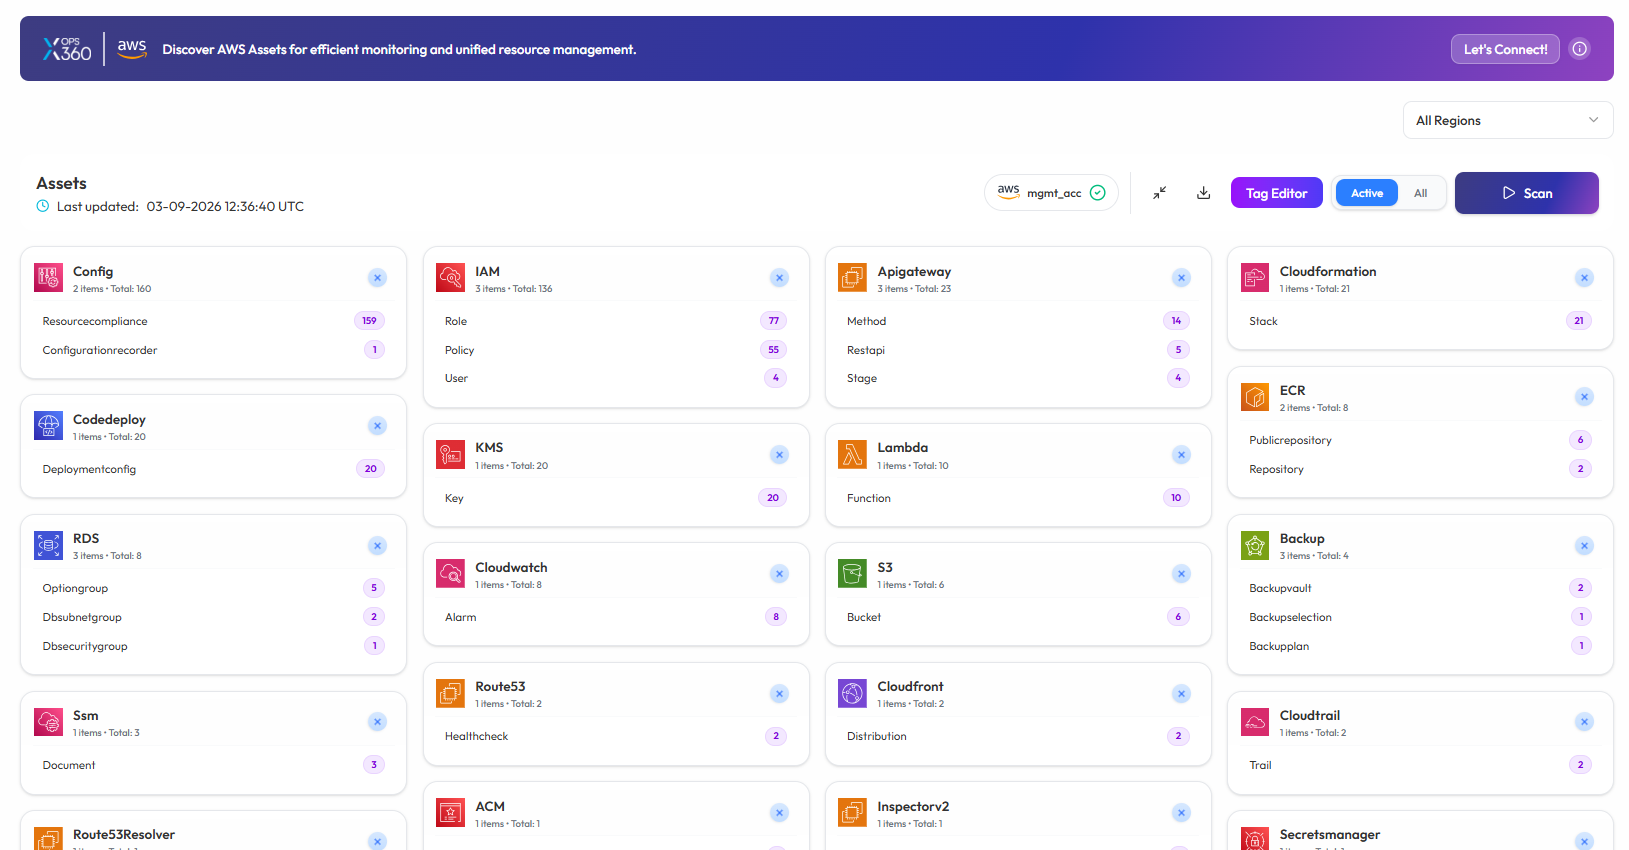
The system will fetch the cloud resources and update the Assets Dashboard.
Once completed : -
-
All discovered cloud resources will be displayed.
-
Resources will be categorized by service (EC2, ECS, IAM, S3, Lambda, etc.).
-
Users can review the inventory to better manage and monitor their cloud infrastructure.
-
Note:
- For accessing historic reports or addressing scan failures, refer to the Report History Page for further details and View error.
Conducting Cloud Security Assessments
Ensuring cloud security requires regular vulnerability assessments and compliance checks across various cloud environments. The SecOps module in XOps 360 enables organizations to evaluate their security posture and compliance status across AWS, Azure, and Microsoft environments including Microsoft 365 and Entra ID.
This guide outlines the steps required to initiate compliance scans and review security findings.
Cloud Security – AWS Security Assessment
-
Log in to the Platform
- Access the platform and sign in using your credentials.
- Access the platform and sign in using your credentials.
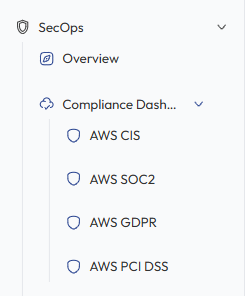
- Navigate to SecOps
-
Open the Side Navigation Bar located on the left side of the screen.
- Click SecOps to expand the available security modules.
- Select Compliance Dashboard .
-
- Select Compliance Standard
Under the Compliance Dashboard, choose one of the following AWS compliance frameworks:
-
AWS CIS v5.0 (Center for Internet Security)
-
AWS SOC2 (System and Organization Controls 2)
-
AWS GDPR (General Data Protection Regulation)
-
AWS PCI DSS (Payment Card Industry Data Security Standard)
-
- These frameworks evaluate AWS cloud configurations against industry security best practices.
- Verify AWS Account
-
Ensure that an AWS account has already been added to the platform.
-
If no account is available, integrate the AWS account before initiating the scan.
-
- Initiate the Scan
-
Locate the AWS account under the selected compliance framework.
-
Click Scan to initiate an automated security check.
- The system will analyze AWS configurations and security controls.
-

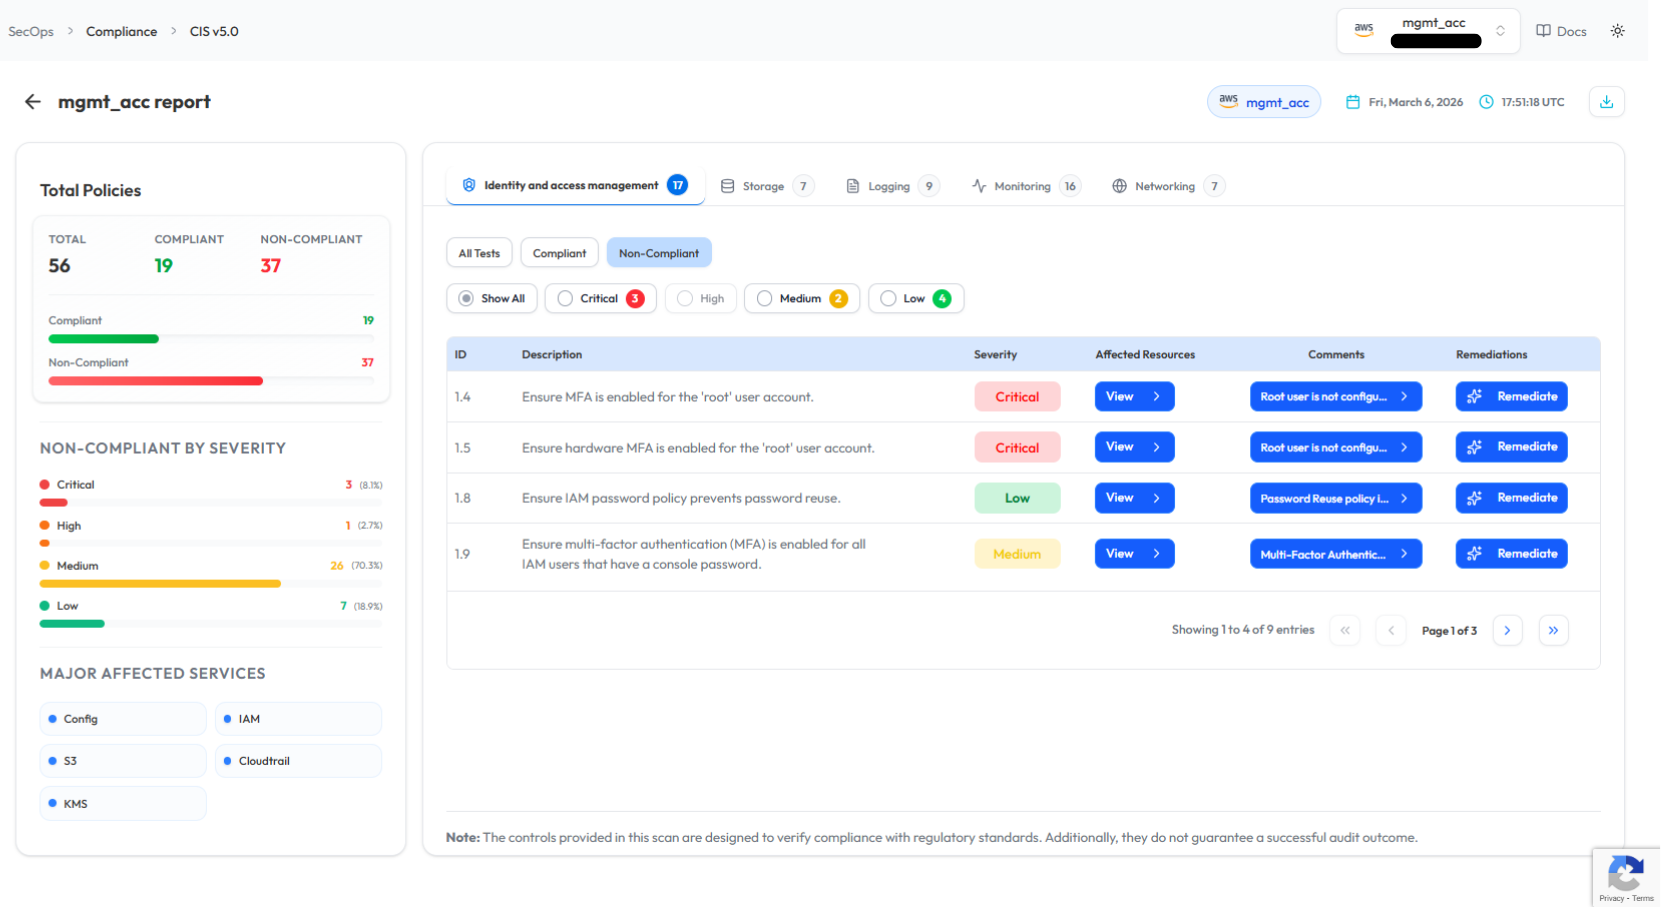
Monitor and Review Results
-
Monitor scan progress, and upon completion, a report will be generated then open it.

-
Review findings, including:
-
Compliance gaps
-
Security misconfigurations
-
Vulnerabilities
-
Cloud Security – Azure Security
-
Log in to the Platform
- Access the platform and sign in using your credentials.
- Access the platform and sign in using your credentials.
- Navigate to SecOps
-
Open the Side Navigation Bar
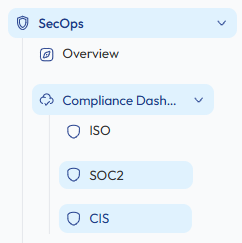
- Click SecOps → Compliance Dashboard.
-
- Select Azure Compliance Standard
Choose the compliance framework used to assess Azure security posture.
-
Available frameworks include:
-
ISO 27001 (International Organization for Standardization)
-
SOC2 (System and Organization Controls 2)
-
CIS (Center for Internet Security)
-
-
These frameworks analyze Azure configurations against established security standards.
- Verify Azure Account
-
Ensure that an Azure account has already been added to the platform.
-
If no account is available, connect the Azure account before running the scan.
-
- Initiate the Scan
-
Locate the Azure subscription listed under the selected compliance framework.
-
Click Scan to initiate the Azure security assessment.
-

Monitor and Review Results
- Monitor scan progress, and upon completion, a report will be generated then open it.

-
Analyze scan results to detect:
-
Compliance gaps
-
Security misconfigurations
-
Vulnerabilities
-

Cloud Security – Microsoft Security (M365 & Entra ID)
-
Log in to the Platform
- Access the platform and sign in using your credentials.
- Access the platform and sign in using your credentials.
- Navigate to SecOps
-
Open the Side Navigation Bar
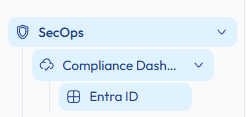
- Click SecOps → Compliance Dashboard.
-
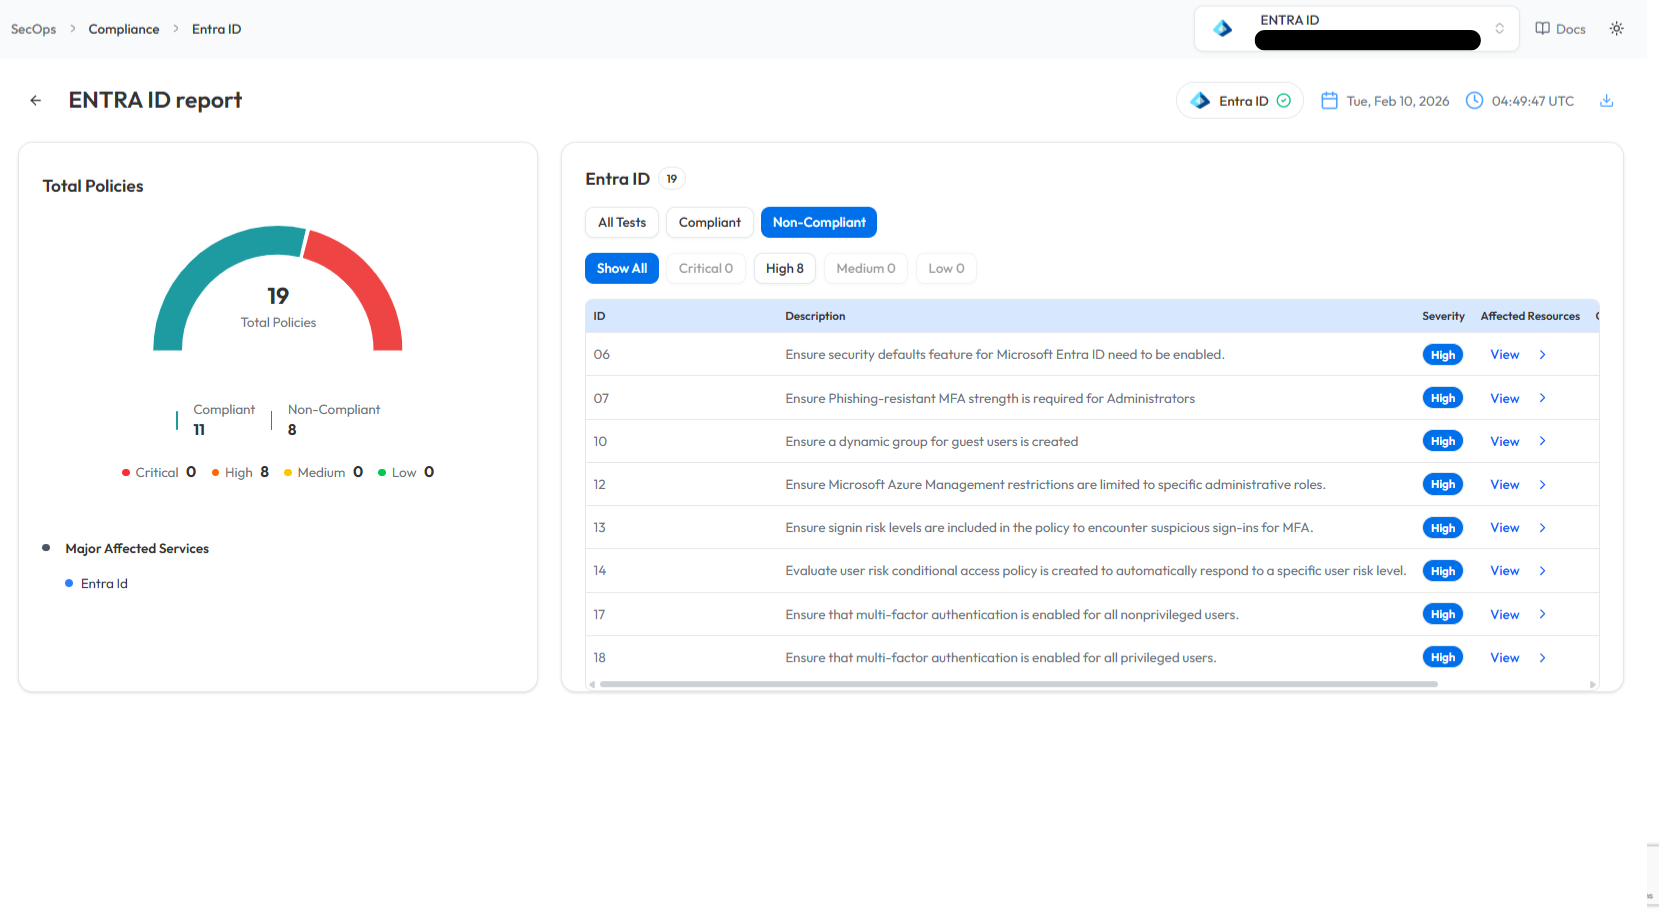
Microsoft Entra ID Security Assessment
- Select Entra ID
- Under the Compliance Dashboard, click Entra ID.
- This feature evaluates identity security configurations within Microsoft Entra ID.
- Verify Microsoft Tenant
-
Ensure that the Microsoft Entra ID tenant has already been connected to the platform.
-
If the tenant is not connected, integrate the Microsoft account before running the scan.
-
- Initiate the Scan
-
Locate the Entra ID tenant in the dashboard.
-
Click Scan to start the assessment.
-

Monitor and Review Results
-
Track scan progress in the Scan History section.

-
Review scan findings to identify:
- Identity security issues
- Authentication policy risks
- Misconfigured access controls
Microsoft 365 Security Assessment
- Select Microsoft 365
- Navigate to SecOps → Compliance Dashboard → M365.
- This feature evaluates the security posture of Microsoft 365 services.
- Verify Microsoft 365 Tenant
-
Ensure that the Microsoft 365 tenant has been connected to the platform.
-
If no tenant is available, integrate the Microsoft account before initiating the scan.
-
- Initiate the Scan
-
Locate the Microsoft 365 tenant in the dashboard.
-
Click Scan to start the assessment.
-

-
Monitor and Review Results
-
Monitor scan progress under Scan History.

- Once the scan is completed, review findings such as:
-
Security gaps
-
Compliance violations
-
Configuration risks
-

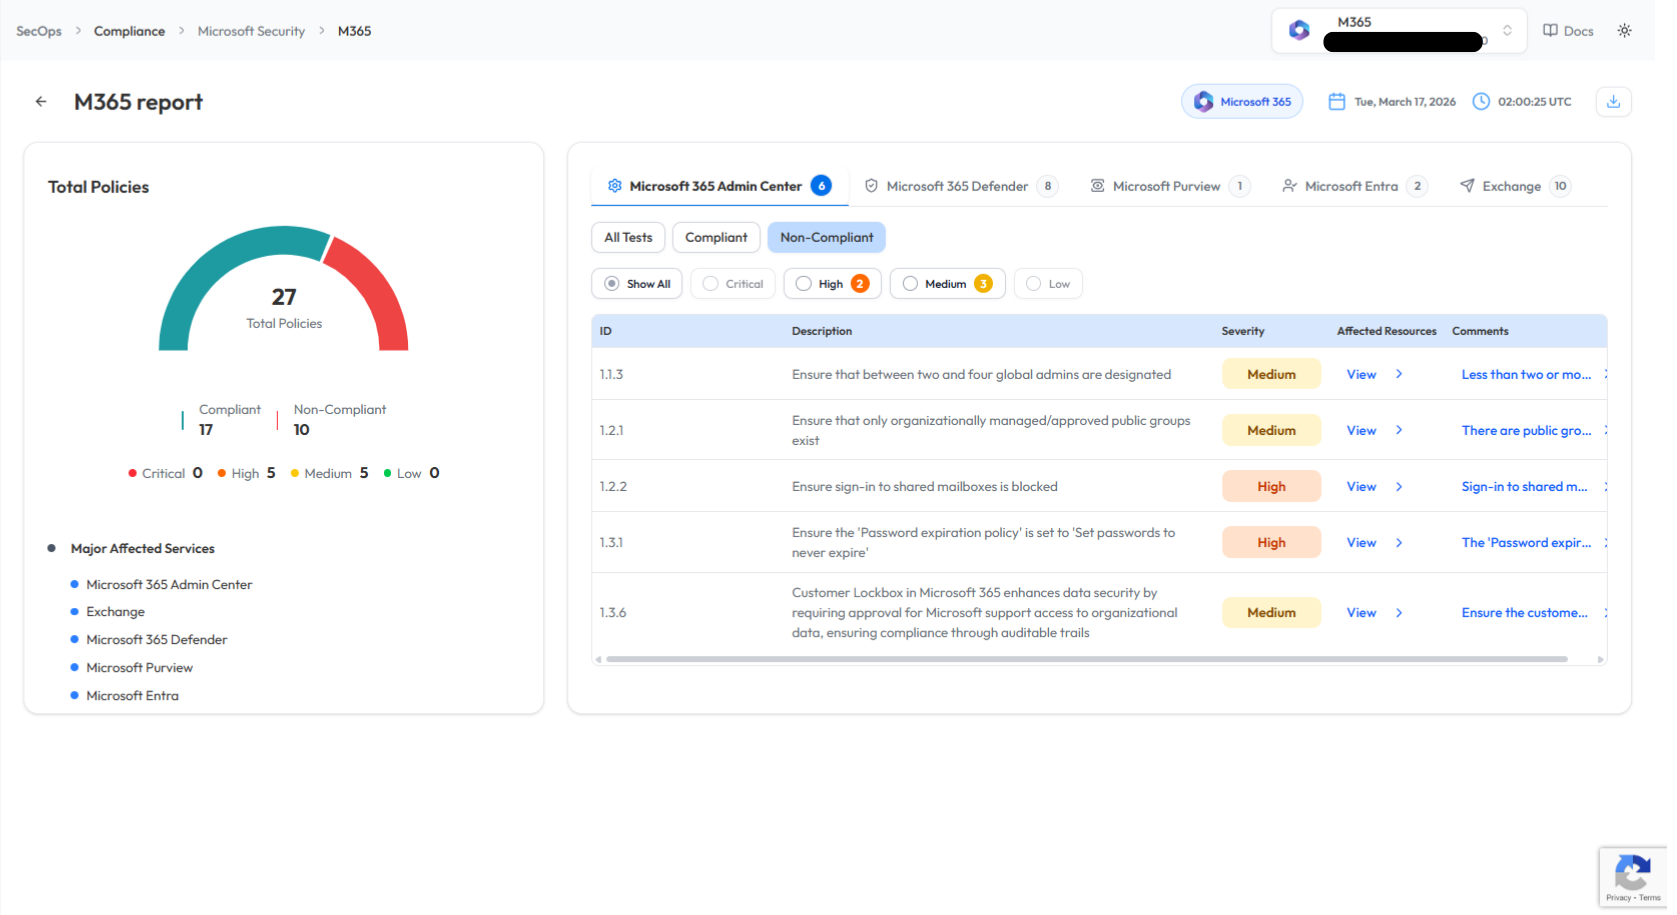
- These results help strengthen the Microsoft 365 security posture.
Note:
- For accessing historic reports or addressing scan failures, refer to the Report History Page for further details and View error.
Performing Cyber Security Evaluations
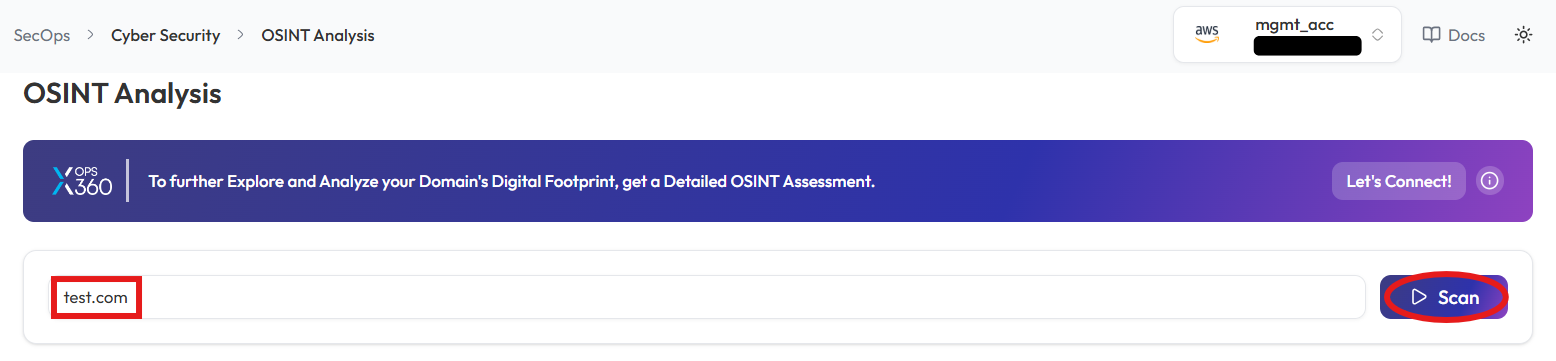
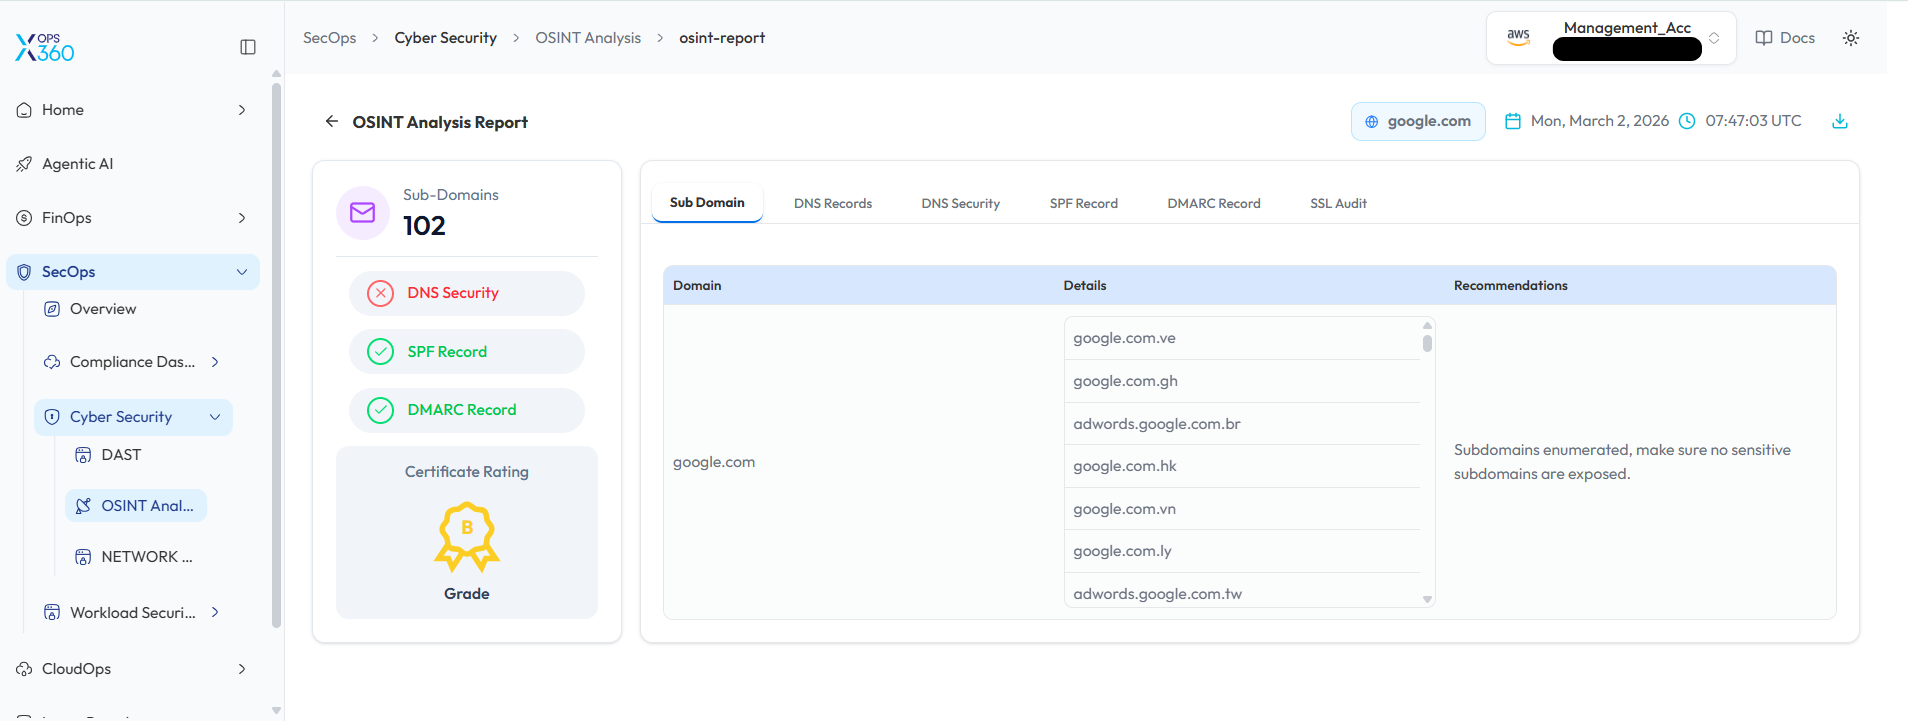
OSINT Analysis Scan in Cyber Security
Perform an OSINT Analysis scan to gather intelligence and identify potential vulnerabilities for a domain.
- Log In to the Platform
- Use your credentials to log in to the platform.
- Navigate to the Cyber Security Section
- Locate the Side Navigation Bar on the left side of the platform.
- Click on the SecOps section to expand its options.
-
Open Cyber Security Module
- Under SecOps, select Cyber Security to access the available security evaluation tools.
- Select OSINT Analysis Scan
- Within the Cyber Security section, click on OSINT Analysis to open the OSINT scanning interface where you can perform domain intelligence analysis.

- Enter the Domain
- In the OSINT Scan input field, type the domain you want to scan (e.g., example.com).
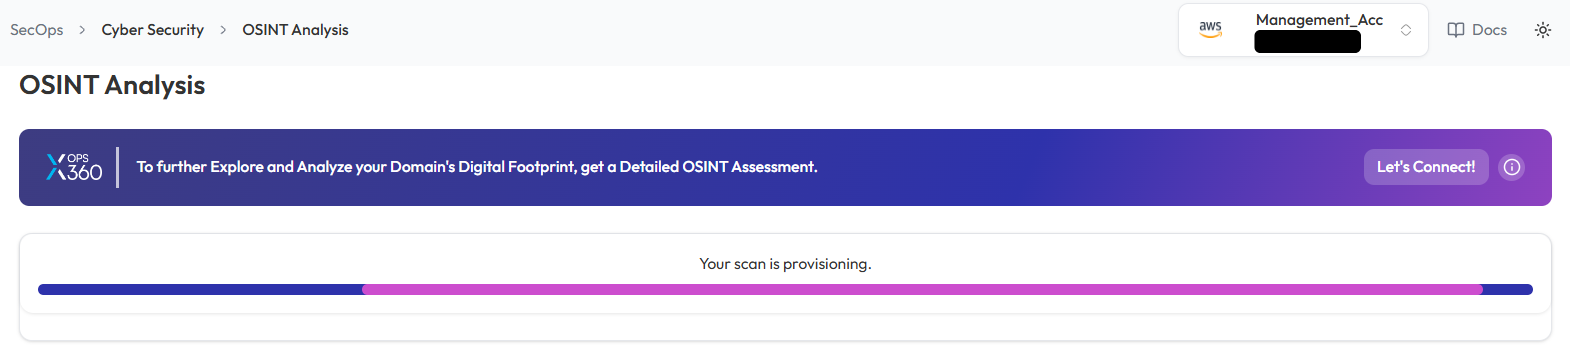
- Initiate the Scan
- Click the Scan button to start the OSINT scan for the entered domain.
- Monitor and Review Results
- Monitor scan progress, and upon completion, a report will be generated then open it.
- Monitor scan progress, and upon completion, a report will be generated then open it.
-
- Once the scan is complete, detailed results will be displayed for analysis.
- Use the results to identify potential vulnerabilities or gather intelligence on the domain.
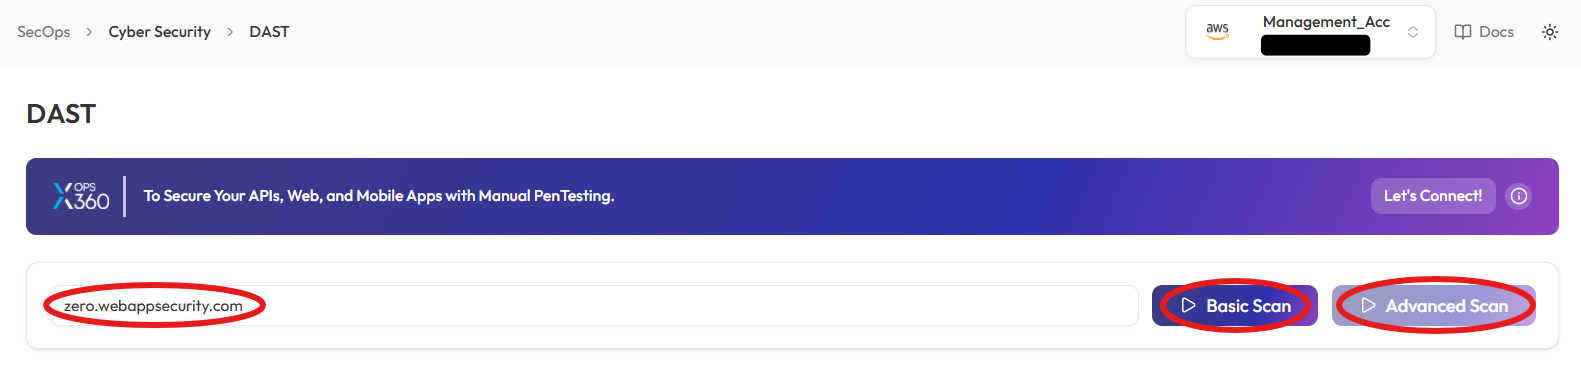
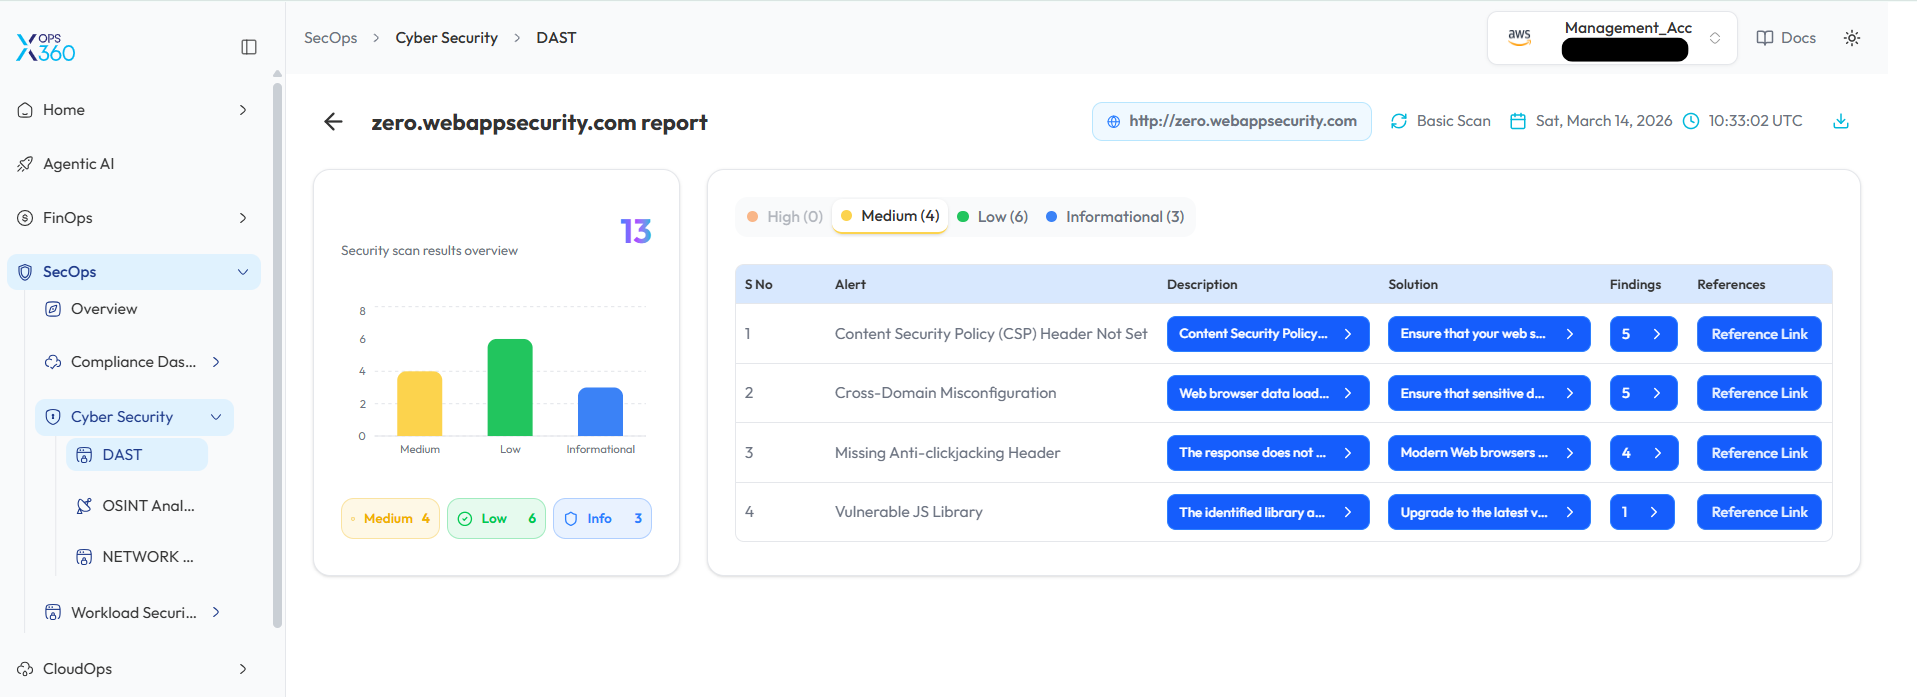
DAST Scan in Cyber Security
Conduct a Dynamic Application Security Test (DAST) to detect vulnerabilities in a web application.
- Log In to the Platform
- Use your credentials to log in to the platform.
- Navigate to the Cyber Security Section
- Locate the Side Navigation Bar on the left side of the platform.
- Click on the SecOps section to expand its options.
- Open Cyber Security Module
- Under SecOps, select Cyber Security to access the available security tools.
- Select the DAST Scan Option
- Within the Cyber Security section, select DAST to open the DAST scanning interface and begin testing the web application for vulnerabilities.

- Enter the Domain
- In the DAST Scan input field, type the domain you want to scan (e.g., example.com).
- Choose the Type of Scan
- Select the type of scan based on your needs:
- Basic Scan: Performs a general security assessment of the domain.
- Advanced Scan: Conducts a thorough and detailed security evaluation with advanced checks.
- Select the type of scan based on your needs:
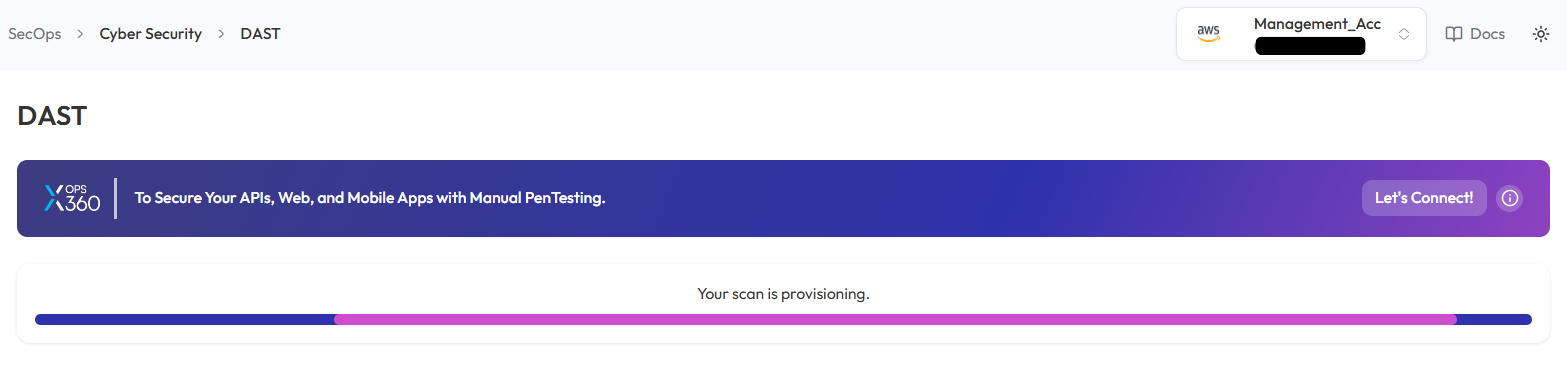
- Initiate the Scan
- Click respective button to start scanning process
- Monitor and Review Results
- Monitor scan progress, and upon completion, a report will be generated then open it.
-
- After the scan is complete, detailed results will be displayed for review.
- Analyze the findings to identify vulnerabilities and take necessary actions.
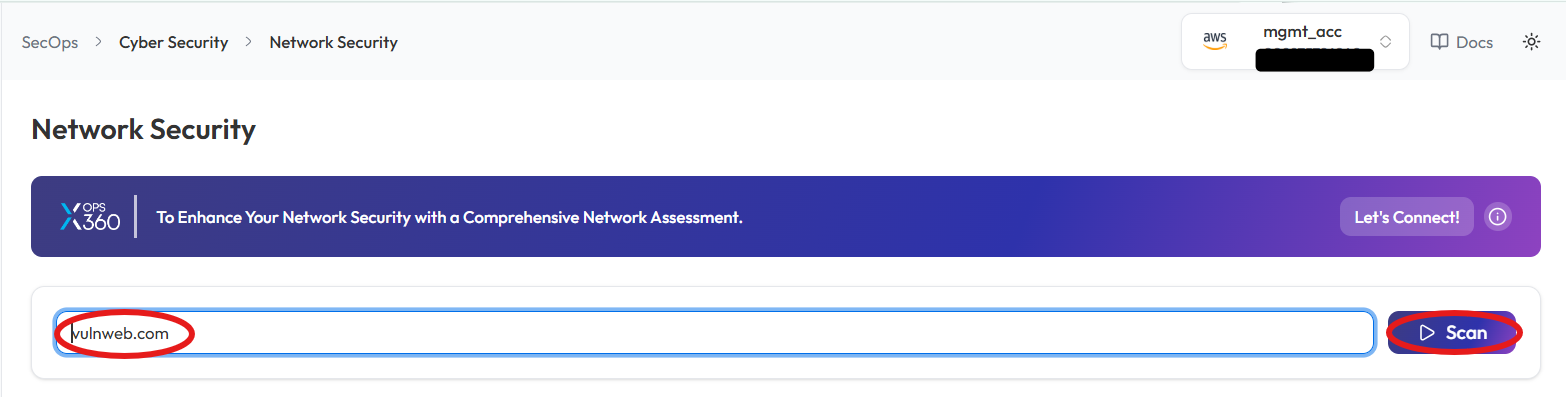
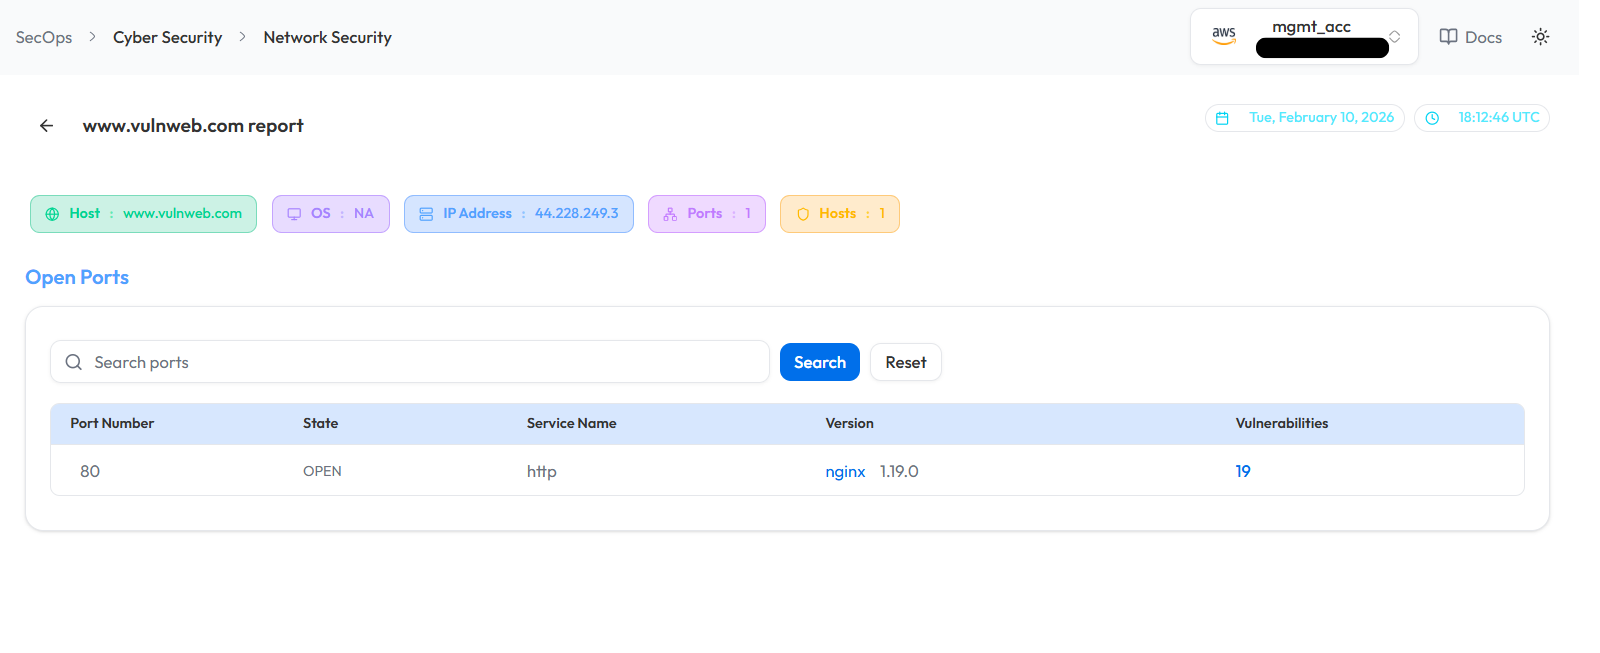
Network Security Scan in Cyber Security
Conduct a network security scan to identify vulnerabilities, misconfigurations, and potential threats.
- Log In to the Platform
- Enter your username and password to access the platform.
- Navigate to the Cyber Security Section
- Locate the Side Navigation Bar on the left side of the platform.
- Click on the SecOps section to expand its options.
- Open Cyber Security Module
- Under SecOps, select Cyber Security to access the available security tools.
- Select the Network Security Scan Option
- Within the Cyber Security section, select Network Security to initiate the network security scanning process and analyze potential risks.

- Enter the Domain
- In the Network Security Scan field, type the domain you want to scan (e.g., example.com or IP Address)
- Initiate the Scan
- Click the Scan button to begin the Network Security Scan.
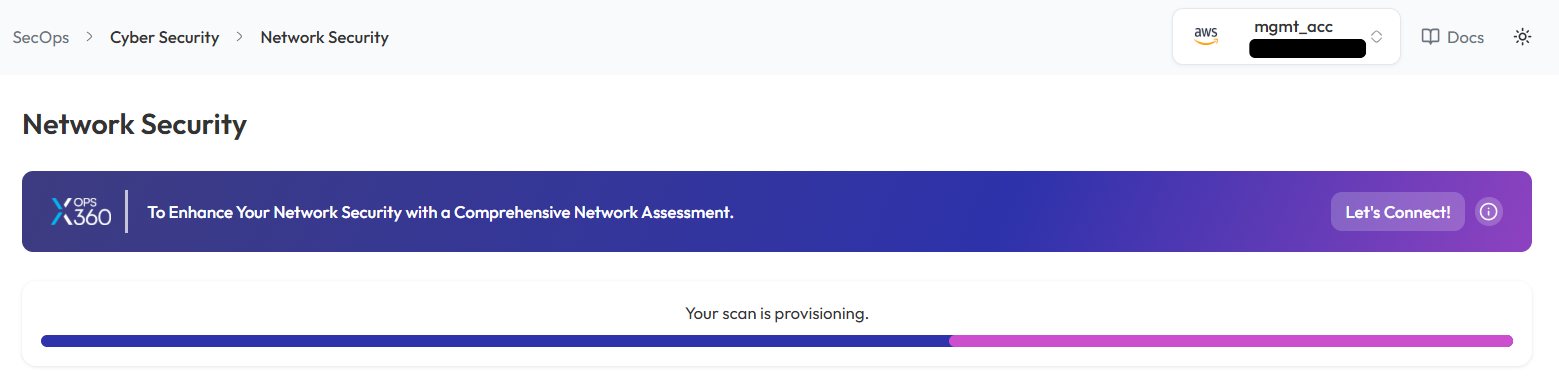
- Monitor and Review Results
- Monitor scan progress, and upon completion, a report will be generated then open it.
-
- Once the scan is complete, detailed results will be displayed for:
- Identified vulnerabilities
- Network misconfigurations
- Potential threats
- Once the scan is complete, detailed results will be displayed for:
Note:
- For accessing historic reports or addressing scan failures, refer to the Report History Page for further details and View error.
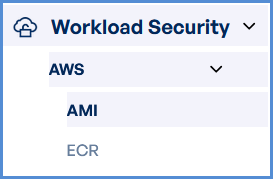
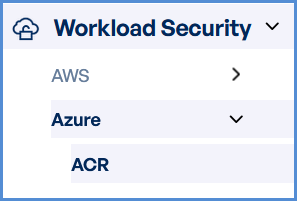
Workload Security
Techniques for protecting workloads deployed across multiple cloud platforms by leveraging security scans for container images and machine images in AWS and Azure.
Scan in Workload Security - AWS (AMI & ECR)
- Log in to the Platform
- Access the platform and sign in using your credentials.
- Navigate to Cloud Ops
-
Locate the Side Navigation Bar on the left-hand side of the screen.
-
Click on the Workload Security tab to access its features.
-
- Verify AWS Account
-
Ensure that an AWS account has already been added to the platform.
-
If no account is available, click on + Add New Account..
-
- Select a Scan Type
-
Choose from the following scan options:
- AMI (Amazon Machine Image) scan for VM security.
- ECR (Elastic Container Registry) scan for container images.
-
- Initiate the Scan
- Select the target AWS account.
- Click Scan to open a new input form.

-
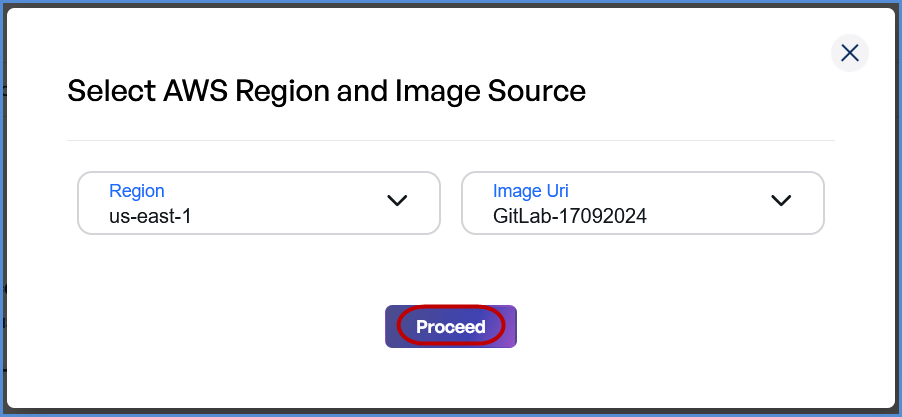
- Choose the Region from the drop down list.
- Provide the Image URI (enabled after Region selection).
- Click Proceed to start the scan.
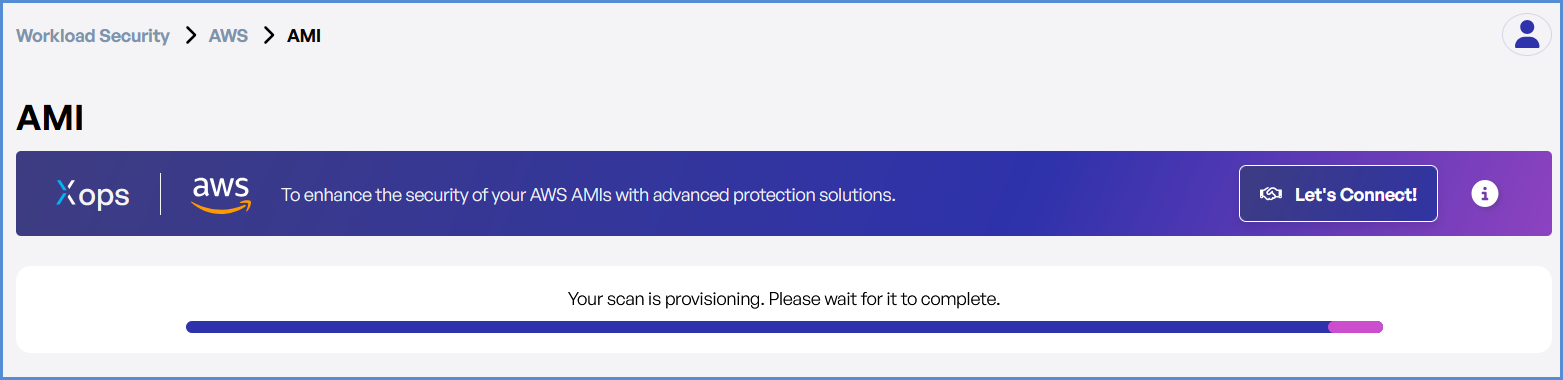
- Monitor and Review Results
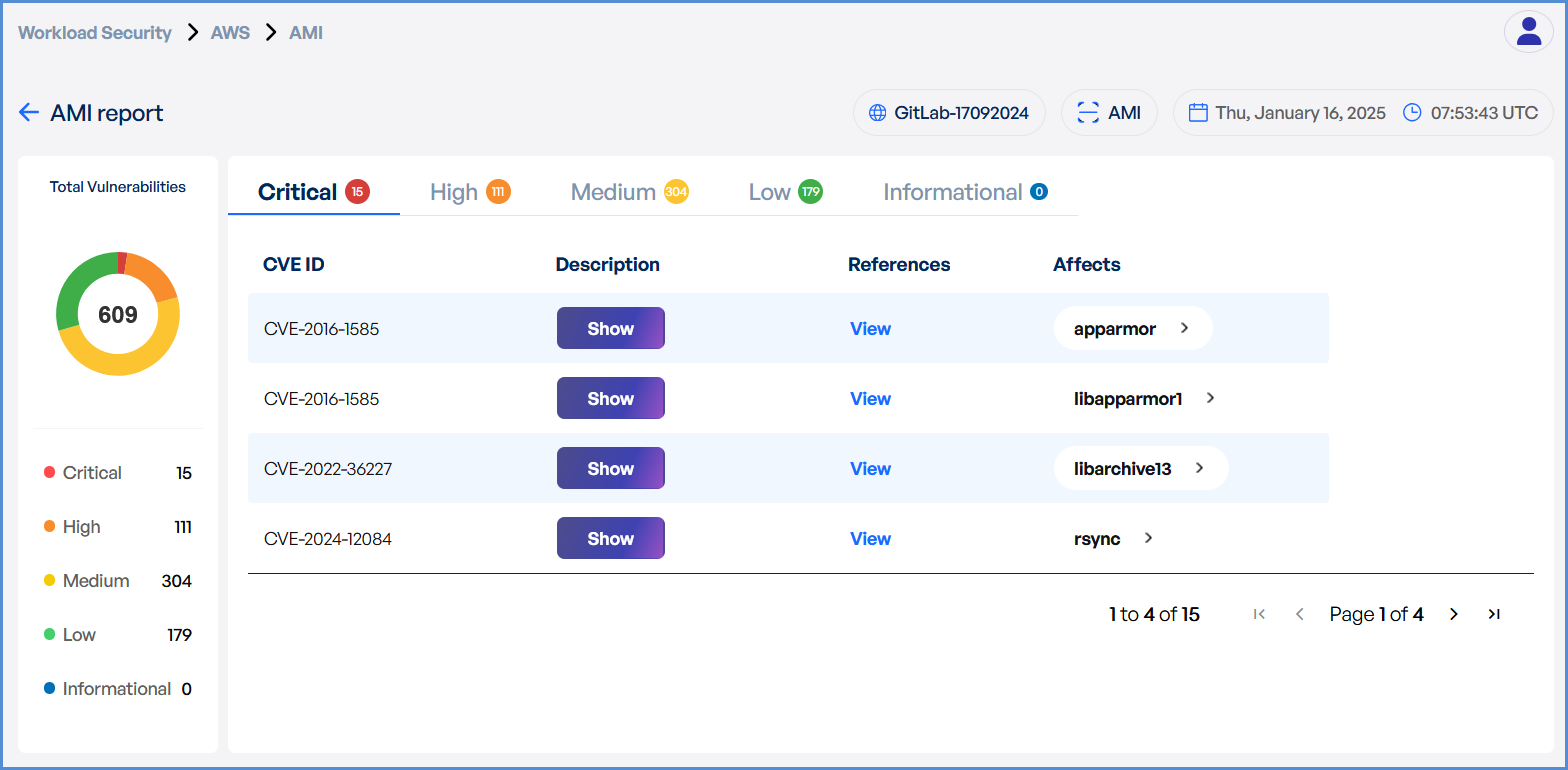
- Monitor scan progress, and upon completion, a report will be generated then open it.
-
- Upon completion, review results highlighting:
- Security risks
- Vulnerabilities
- Compliance issues
- Upon completion, review results highlighting:
Scan in Workload Security - Azure (ACR)
-
- Log in to the Platform
- Access the platform and sign in using your credentials.
- Navigate to Cloud Ops
-
Locate the Side Navigation Bar on the left-hand side of the screen.
-
Click on the Workload Security tab to access its features.
-
- Log in to the Platform
- Verify Azure Account
-
Ensure that an Azure account has already been added to the platform.
-
If no account is available, click on + Add New Account..
-
- Choose ACR Scan Option
- Select ACR (Azure Container Registry) Scan.
- Initiate the Scan
- Select the target Azure account.
- Click Scan to open a new input form.

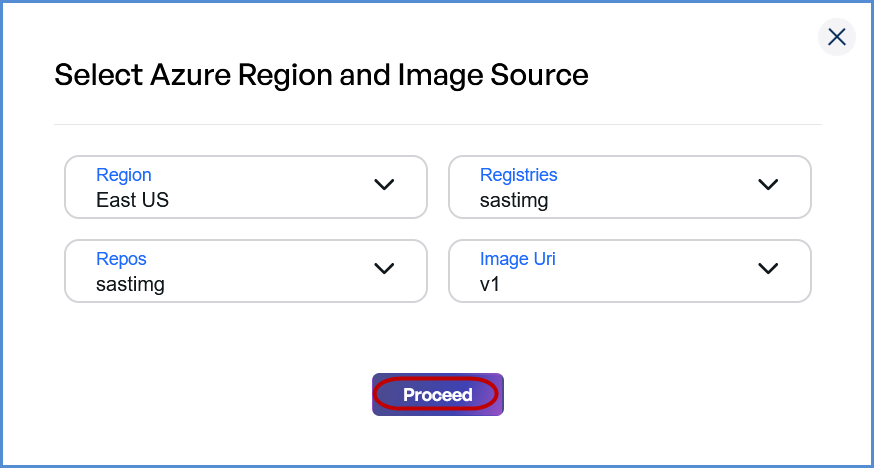
-
- Choose the Region from the drop down list.
- Select the Registry (enabled after Region selection).
- Choose the Repository (enabled after Registry selection).
- Provide the Image URI (enabled after Repository selection).
- Click Proceed to start the scan.
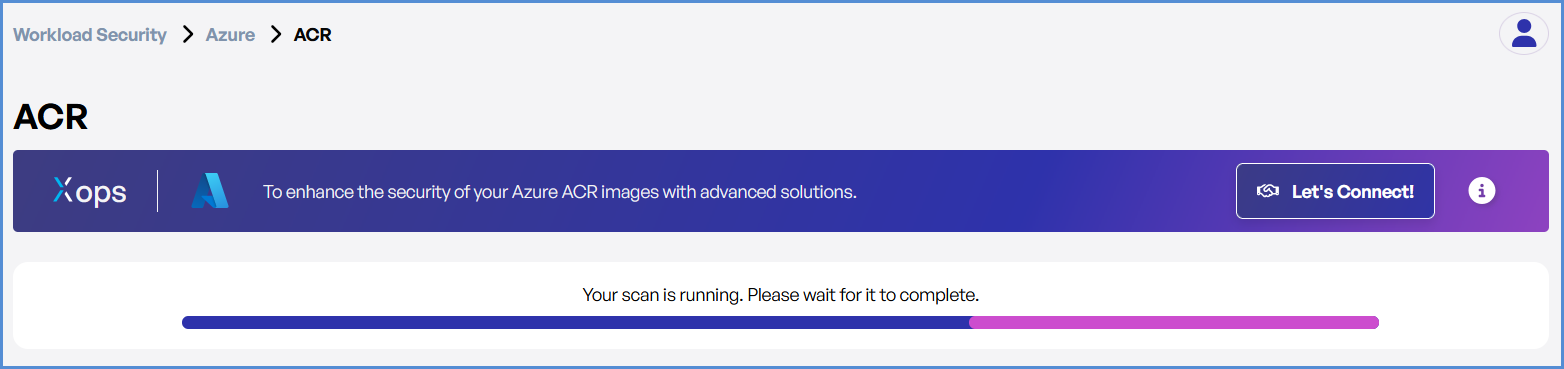
- Monitor and Review Results
- Monitor scan progress, and upon completion, a report will be generated then open it.
- Monitor scan progress, and upon completion, a report will be generated then open it.
-
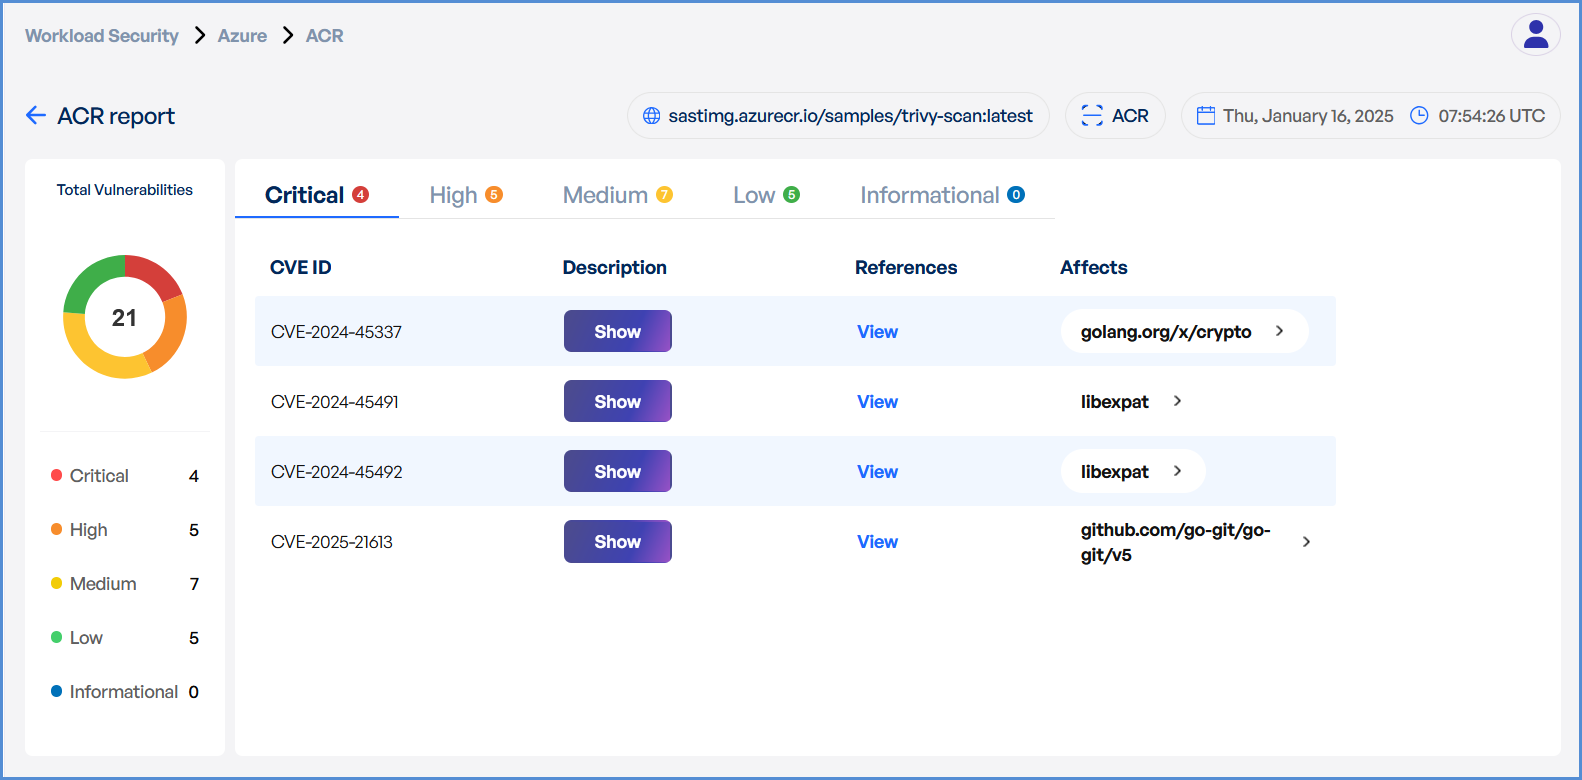
- Upon completion, review results highlighting:
- Security risks
- Vulnerabilities
- Compliance issues
- Upon completion, review results highlighting:
Note:
- For accessing historic reports or addressing scan failures, refer to the Report History Page for further details and View error.