# Xops 360 Documentation

# Introduction

#### **Overview**

**XOps 360 Platform** is an all-in-one cloud operations and security solution designed to optimize cloud environments, enhance security, and improve financial efficiency. It provides a unified platform for managing cloud infrastructure across **AWS, Azure, and Microsoft ecosystems**, enabling organizations to monitor resources, control costs, and strengthen security posture from a single interface.

The platform integrates multiple operational domains including **Cloud FinOps, CloudOps, SecOps, Cyber Security, Workload Security, Infrastructure Automation, and AI-driven insights**. By combining automation, compliance monitoring, real-time analytics, and intelligent recommendations, **XOps 360** helps teams maintain efficient, secure, and well-governed cloud environments.

The platform dashboard provides a **centralized view of cloud infrastructure, cost insights, security posture, and operational metrics**, allowing users to quickly assess system health and identify optimization opportunities.

#### **Key Features**

- **Cloud FinOps** : Advanced cloud cost management and financial optimization tools that help organizations monitor spending, analyze usage patterns, and identify cost-saving opportunities across cloud services.
- **CloudOps** : Provides intelligent infrastructure monitoring and resource management capabilities to maintain operational efficiency and optimize cloud resources.
- **Cyber Security** : Offers security scanning and vulnerability analysis tools including **DAST scanning, OSINT analysis, and network security assessments**.
- **Cloud Security**: Provides compliance monitoring and security benchmarking frameworks to ensure cloud environments align with industry security standards.
- **Workload Security**: Protects workloads by identifying vulnerabilities in images, containers, and cloud infrastructure components.
- **Infrastructure Automation:** Automates infrastructure provisioning using **Infrastructure as Code (IaC)** modules for services such as VPC, ECS, RDS, EC2, and more.
- **Agentic AI :** An AI-powered assistant that provides intelligent insights, generates reports, and helps users analyze cloud cost and security data through conversational queries.

**Current Version:** Flamingo

#### **What’s New?**

**New Features**

- **Agentic AI :** The Agentic AI Assistant enables users to interact with the platform using natural language to generate reports, analyze cloud spending, identify vulnerabilities, and receive intelligent recommendations.
- **Unified Compliance Dashboard :**The Compliance Dashboard provides centralized visibility into compliance assessments such as AWS CIS benchmarks and other security frameworks. Users can monitor compliance status, review scan results, and track security findings across their cloud environment.
- **Issues Board :** The Issues Board provides a centralized interface for tracking detected issues across the platform. It allows teams to monitor security alerts, compliance findings, and operational problems, organize them by status, and manage remediation workflows.
- **AWS Cost Map** : The AWS Cost Map provides an interactive visualization of AWS service spending, helping users understand cost distribution across services and identify areas for optimization.

# Feature Overview

Cloud cost management, Cloud Ops, Cybersecurity and security scans across AWS, Azure, and Microsoft 365.

# Features

#### **Cloud FinOps**

Managing financial operations within cloud environments, enabling cost optimization, budget monitoring, and efficient resource allocation.

- **AWS &amp; Azure Cost Analyzers** – Provides detailed insights into cloud spending patterns, cost trends, and optimization opportunities to improve financial visibility.
- **AWS Saving Opportunities** – Identifies potential cost-saving recommendations by analyzing current resource usage and highlighting opportunities such as Reserved Instances and resource optimization.
- **AWS Costmap** –Visualizes daily AWS service costs and usage distribution across services, helping teams understand spending behavior and identify high-cost services.

#### **CloudOps**

Efficient management and monitoring of cloud infrastructure to maintain operational efficiency and resource utilization.

- **Resource Manager**  – Provides a centralized inventory of cloud resources across multiple services, enabling users to track and manage infrastructure components from a single interface.
- **Unutilized AWS Resources** – Detects idle or underutilized AWS resources that can be optimized or removed to reduce unnecessary cloud spending.
- **AWS Resource Optimizer** – Identifies opportunities to right-size resources across services such as EC2, EBS, and other compute or storage components to improve performance and reduce costs.
- **CloudOps Automation (IaC Automation)** – Automates the provisioning and management of cloud infrastructure using Infrastructure-as-Code modules such as Terraform for services like VPC, ECS, EC2, RDS, CloudFront, and IAM.
- **Azure WAR** – Evaluates Azure cloud architecture against Microsoft’s Well-Architected Framework best practices. The review analyzes workloads across key pillars such as reliability, security, cost optimization, operational excellence, and performance efficiency, helping teams identify architectural risks and improvement opportunities.

#### **Cyber Security** 

Identify and mitigate risks associated with cyber threats across integrated systems and applications.

- **OSINT Analysis** – Monitors publicly available information to detect potential security risks, exposed assets, and vulnerabilities related to domains or applications.
- **DAST (Dynamic Application Security Testing)** – Performs security testing on web applications to identify vulnerabilities such as misconfigurations, injection flaws, and insecure endpoints.
- **Network Security Analysis** – Identifies exposed ports, security group risks, and network configuration weaknesses that could allow unauthorized access.

#### **Cloud Security** 

Identify security vulnerabilities and maintain compliance with industry security standards and regulatory frameworks.

- **AWS CIS v5.0** –Evaluates AWS account configurations against CIS security best practices.
- **AWS PCI DSS v3.2.1** – Maintains a secure environment for cardholder data.
- **AWS GDPR** – Strengthens compliance with data protection regulations.
- **AWS SOC2** – Provides assurance of security controls.
- **Azure ISO 27001** – Addresses information security management requirements.
- **Azure SOC2** – Enables security auditing and monitoring.
- **Azure CIS v2.1.0** – Implements best practices for secure configurations.
- **Microsoft 365 Security** – Ensures compliance and secure collaboration.
- **Entra ID Security** – Enhances identity security and compliance.

#### **Workload Security** 

<span data-teams="true"> Secure workloads deployed across various cloud platforms.</span>

- **AWS AMI** – Identifies vulnerabilities in AMIs to improve security.
- **AWS ECR** – Detects vulnerabilities in ECR container images.
- **Azure ACR** – Ensures secure containerized applications in Azure Container Registry.

#### **Agentic AI**  


Provides an intelligent AI-powered assistant that helps users analyze cloud data, generate reports, and receive recommendations through conversational interaction.

- **AI for Finops** – Produces detailed cybersecurity analysis reports by evaluating vulnerability scans, compliance data, and security insights.
- **AI for Cybersecurity** – The AI Assistant will begin generating the Cyber Security report based on the provided details.

#### **Issues Board**

The **Issues Board** provides a centralized interface for tracking and managing operational and security issues identified across the platform.Users can monitor issues based on **severity levels, status, and service categories**, enabling teams to prioritize remediation tasks and track progress across cloud environments.

# Initial Setup

Guide to account setup and subscription options for Xops 360 Platform.

# Account Registration

Customers interested in using the **Xops 360 Platform** can request for a new account by following these steps:

- **Visit our website**: [Xops 360 Platform Free Trial Registration](https://xops.axiomio.com/).
- **Click on** Sign Up to get an account request form.

[![image.png](https://xops-docs.axiomio.com/uploads/images/gallery/2026-03/scaled-1680-/1GfVTUwkcJik6dVf-image.png)](https://xops-docs.axiomio.com/uploads/images/gallery/2026-03/1GfVTUwkcJik6dVf-image.png)

- **Complete the account request form** with the required details.
- **Submit the form** and **Users will receive an email** containing information to set up their password and complete the account setup process..

[![image.png](https://xops-docs.axiomio.com/uploads/images/gallery/2026-03/scaled-1680-/0WE5svd4yzShODsg-image.png)](https://xops-docs.axiomio.com/uploads/images/gallery/2026-03/0WE5svd4yzShODsg-image.png)

Alternatively, you can request for an account by contacting us directly at **<sales@axiomio.com>**. Our team will assist with the setup and custom subscription plan to receive an email with information to set your password and finalize the account activation.

For any assistance during the registration process, please contact our support team at **<a data-end="106" data-is-only-node="" data-start="89" rel="noopener">sales@axiomio.com</a>** or call us at **+1 510-254-3342**.

# Subscription Plans

Xops 360 Platform offers flexible subscription plans tailored to meet various security and operational needs.

#### **Trial Subscription**

Complimentary plan with limited access to core features for evaluation, including **1** scan per category.

**1. Cloud FinOps:**

- AWS Cost Analyzer
- Azure Cost Analyzer
- AWS RI Saving
- AWS Costmap

**2. Cloud Security:**

- AWS CIS Scan
- Azure CIS Scan

**3. Cyber Security:**

- OSINT Analysis
- Network vulnerability Discovery

#### **Basic Subscription**

Foundational tier offering essential functionalities and baseline capabilities with **3** scans per category.

**1. Cloud Operations:**

- AWS Unutilized Resources
- AWS Assets
- Azure Assets

**2. Cyber Security:**

- DAST Basic
- Web Directory Enumeration

**3. Cloud Security:**

- AWS PCI DSS Compliance
- Azure ISO 27001 Compliance
- Microsoft 365 Security

#### **Advanced Subscription**

A premium tier offering enhanced capabilities and support for larger-scale operations with **5** scans per category.

**1. Cloud Operations:**

- AWS Resource Optimizer
- AWS Automation
- Azure Automation

**2. Cyber Security:**

- DAST Advanced

**3. Cloud Security:**

- AWS GDPR Compliance
- AWS SOC2
- Azure SOC2
- Microsoft Entra ID

**4. Workload Security:**

- AWS AMI Security
- AWS ECR Security
- Azure ACR Security

**5. Kubernetes Automation**

- EKS

**6. AI Assistant**

- AI FinOps
- AI Cyber Security

**Note:**

- **AWS Automation** and **Azure Automation** are **not** scanning services. Instead, we provide **Terraform modules** with defined **inputs and outputs** to facilitate infrastructure automation. Additionally, users have the option to **download the respective files** for deployment and customization.

#### **Custom Plan**

For organizations with unique security and operational requirements, we offer a **Custom Plan** tailored to specific needs.

To discuss a custom plan, please contact: **<sales@axiomio.com>**

# Account and Subscription Management

Guidance on managing user credentials and subscriptions within the Xops 360 Platform.

# Account Management

##### **Updating User Credentials**

Maintaining account security requires regularly updating user credentials. Follow these instructions to modify your password securely.

- **Log in to the Platform**
    
    
    - Access the platform and sign in using your credentials.
- **Access the Profile Page**
    - Locate the **user profile section** in the **bottom-left corner of the sidebar** where your email and avatar are displayed.
    - Click on it to open the **profile options menu**.
- **Select "Change Password"**
    - Within the Profile page, find the "Change Password" option.
- **Follow the Password Change Process**
    - Enter your current password for verification.
    - Provide a new password following the password policy guidelines (if applicable).
    - Confirm the new password by entering it again.
- **Save Changes**
    - Click on "Submit" to confirm the password change.
    - After successfully updating your password, you will be redirected to the login page.

[![image.png](https://xops-docs.axiomio.com/uploads/images/gallery/2026-03/scaled-1680-/daSyTatH57dDJiwI-image.png)](https://xops-docs.axiomio.com/uploads/images/gallery/2026-03/daSyTatH57dDJiwI-image.png)

#### **Forgot Password**

Resetting your password is straightforward if you have forgotten it. Follow these steps to securely regain access to your account.

- **Open the Forgot Password Page**  
     Navigate to the login page and click on the “Forgot password?” link below the login form.
- **Enter Registered Email Address**  
     Provide your registered Email Address in the input field.
- **Request Password Reset Link**  
    Click on the "Send" button. A password reset link will be sent to your registered email.
- **Check Email Inbox**  
    Go to your email inbox and look for the password reset email. If not found, check your spam or junk folder.
- **Follow the Password Reset Link**  
    Click the reset link in the email to open the password creation page.
- **Set a New Password**  
    Enter your new password following the password guidelines. Confirm the new password by entering it a second time.
- **Complete the Process**  
    Click "Submit" or "Reset Password" to finalize the change. You can now log in with your new password.

> **Password Guidelines:**
> 
> - Use at least **8 characters** (including alphanumeric and special symbols password required).
> - Avoid common words, sequential numbers, or personal details.

# Managing Subscriptions

##### **<span data-teams="true">Subscription Configuration</span>**

<span data-teams="true">Directions for managing subscription details, including upgrades, downgrades, and cancellations.</span>

- **Log in to the Platform**
    - Access the platform and sign in using your credentials.
- **Access the Profile Page**
    - Locate the Profile icon or menu option in the top-right corner of the interface.
    - Hover on it to open the profile settings, to open a drop down menu.
- **Access the Subscription Menu**  
    
    - From the list of options, select **Subscription**.
- **Redirect to the Subscription Page**
    - After selecting Subscription, the portal will automatically redirect you to the Subscription page where you can view and manage your subscription details.

![Screenshot 2025-08-19 112345.png](https://xops-docs.axiomio.com/uploads/images/gallery/2025-08/GDP7MWcpVCWZhXEr-screenshot-2025-08-19-112345.png)

##### **Upgrade subscription**

- Currently not supporting downgrading or cancelling subscription plans. Users can only upgrade their subscription.

![image (1).png](https://xops-docs.axiomio.com/uploads/images/gallery/2025-08/dUgLnOOreQwWSPLF-image-1.png)

- Subscription upgrades cannot be processed directly through the portal. To upgrade your plan, click on **Upgrade** as shown in the image above. You will be prompted to submit a request by clicking the designated request form. Upon selection, a pop-up form will appear, requiring you to provide the following details: 
    - **Subject**: Specify the request type (e.g., "Upgrade to Advanced Plan").
    - **Description**: Provide details about your upgrade request.
- Once submitted, our team will review your request and process the upgrade accordingly.

![image.png](https://xops-docs.axiomio.com/uploads/images/gallery/2025-01/scaled-1680-/1H6S4usMdpdTzx5v-1Qximage.png)

#####

# Account Integration Procedures

Guide to integrating cloud accounts with the platform.

# AWS Account Integration

### **Link AWS Account** 

#### **Navigating to the Account Integration Page**

- **Log in to the Platform**
    
    
    - Access the platform and sign in using your credentials.
- **Open the Account Selector**
    
    
    - Locate the **Select account** dropdown at the top-right corner of the dashboard.
    - Click on it to open the list of available cloud accounts.
- **Add Cloud Account**
    
    
    - From the dropdown menu, click on **Add Cloud Account**. This will redirect you to the **Select Your Preferred Cloud Service or Platform** page.
    - Click on the **AWS (Amazon Web Services) card**.

**Note:** Initially, only **AWS Management Account** can be linked in this section.

[![wHf6mDfxuPWl23ZH-arhimage.png](https://xops-docs.axiomio.com/uploads/images/gallery/2026-03/scaled-1680-/mYmB5VMHnHj638eS-whf6mdfxupwl23zh-arhimage.png)](https://xops-docs.axiomio.com/uploads/images/gallery/2026-03/mYmB5VMHnHj638eS-whf6mdfxupwl23zh-arhimage.png)

**No Management Account Initially**

If you do not have any management account linked initially to the Xops 360 Portal, follow the steps below to add a new AWS account. After clicking on the **AWS (Amazon Web Services)** card on the **Select Your Preferred Cloud Service or Platform** page, a new window will appear prompting you to select the **AWS Account Type**.

[![image.png](https://xops-docs.axiomio.com/uploads/images/gallery/2026-03/scaled-1680-/NHchOC9tnkzuUIcm-image.png)](https://xops-docs.axiomio.com/uploads/images/gallery/2026-03/NHchOC9tnkzuUIcm-image.png)

**Select AWS Account Type**

**On the **Select AWS Account Type** screen, you will see two options:**

<span style="background-color: rgb(194, 224, 244);"> </span>

- Management Account
- Linked Account

Click on **Management Account** to proceed with linking your AWS Management Account to the Xops 360 platform.

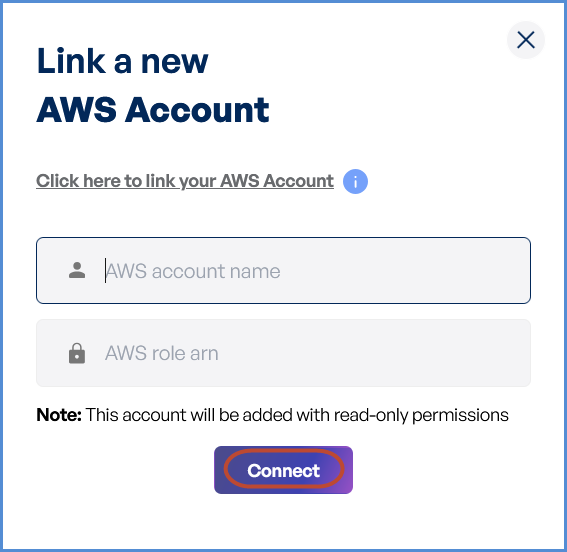
**Link a New AWS Account**

After selecting Management Account, you will be redirected to the Link a New AWS Account page.

[![image.png](https://xops-docs.axiomio.com/uploads/images/gallery/2026-03/scaled-1680-/TGmggo6qWz3Brp3u-image.png)](https://xops-docs.axiomio.com/uploads/images/gallery/2026-03/TGmggo6qWz3Brp3u-image.png)

#### **Initiating Account Integration**

- **Access Setup Instructions**
    
    
    - Click the **Information ("i") button** to view step-by-step setup guidance.

[![image.png](https://xops-docs.axiomio.com/uploads/images/gallery/2026-03/scaled-1680-/uYOp26T3l1uvthQO-image.png)](https://xops-docs.axiomio.com/uploads/images/gallery/2026-03/uYOp26T3l1uvthQO-image.png)

- **Retrieve AWS Role ARN**
    
    
    - Follow the setup guide to create a required **Cloud Formation stack** in the AWS **Management** Console.
    - Once the stack is created, navigate to the **Outputs tab** in the stack details page.
    - Copy the **AWS Role ARN** from the output.
- **Configure AWS Integration**
    
    
    - Return to the **Link a New AWS Account** page in the platform.
    - Provide a suitable name in the **AWS Account Name** field.
    - Paste the copied **AWS Role ARN** into the designated field.
    - Click **Connect** to finalize the integration.

##### **Adding a Linked AWS Account**

If you already have a management account linked to the Xops 360 Portal and want to add a **linked (child) AWS account**, follow these steps:

- **Log in to the Platform**
    
    
    - Sign in and open the platform dashboard.
- **Open the Account Selector**
    
    
    - Locate the **Select account** dropdown at the top-right corner of the dashboard.
    - Click on it to open the list of available cloud accounts.
- **Add Cloud Account**
    - From the dropdown menu, click on **Add Cloud Account**. This will redirect you to the **Select Your Preferred Cloud Service or Platform** page.
    - Click on the **AWS **(Amazon Web Services)** card** .
    - After clicking on the **AWS (Amazon Web Services)** card on the **Select Your Preferred Cloud Service or Platform** page, a new window will appear prompting you to select the **AWS Account Type**.

[![image.png](https://xops-docs.axiomio.com/uploads/images/gallery/2026-03/scaled-1680-/HmPI5Ay0MiZ2pFNp-image.png)](https://xops-docs.axiomio.com/uploads/images/gallery/2026-03/HmPI5Ay0MiZ2pFNp-image.png)

**Select AWS Account Type**

On the Select **AWS Account Type** screen, the **Linked Account** option will be displayed.

Click on Linked Account to proceed with linking your AWS Linked Account to the Xops 360 platform.

**Link a New AWS Account**

After selecting **Linked Account**, you will be redirected to the **Link a New AWS Account** page.

[![image.png](https://xops-docs.axiomio.com/uploads/images/gallery/2026-03/scaled-1680-/bWqq36TLOcCL2Sj0-image.png)](https://xops-docs.axiomio.com/uploads/images/gallery/2026-03/bWqq36TLOcCL2Sj0-image.png)

#### **Initiating Account Integration**

- **Access Setup Instructions**
    
    
    - Click the **Information ("i") button** to view step-by-step setup guidance.

[![image.png](https://xops-docs.axiomio.com/uploads/images/gallery/2026-03/scaled-1680-/uYOp26T3l1uvthQO-image.png)](https://xops-docs.axiomio.com/uploads/images/gallery/2026-03/uYOp26T3l1uvthQO-image.png)

- **Retrieve AWS Role ARN**
    
    
    - Follow the setup guide to create a required **Cloud Formation stack** in the AWS **Management** Console.
    - Once the stack is created, navigate to the **Outputs tab** in the stack details page.
    - Copy the **AWS Role ARN** from the output.
- **Configure AWS Integration**
    
    
    - Return to the **Link a New AWS Account** page in the platform.
    - Provide a suitable name in the **AWS Account Name** field.
    - Paste the copied **AWS Role ARN** into the designated field.
    - Click **Connect** to finalize the integration.

**Note:**

- For any challenges, please contact our support team at **<support@axiomio.com>**
- **First-Time Login Experience**
    - When you log in for the first time, you will be prompted to select your preferred **cloud service or platform** (AWS, EKS Azure, or Microsoft). This selection is required to establish the initial account connection.
    - Once your account is successfully connected to AWS, Azure, or Microsoft, this selection screen **will not appear** in subsequent logins. Instead, you will be directed **automatically to the Home page**.
    - To manage or modify integrations, navigate to the **"Integrations"** section from the left panel in the dashboard.

### **AWS Account Management** 

##### **Access AWS Integration Settings**

- **Log in to the Platform**
    
    
    - Sign in and open the platform dashboard.
- **Navigate to AWS Integration**
    
    
    - First, select the **respective account** from the **top-right corner** of the platform.  
        Choose the specific account for which you want to manage or update the AWS integration settings in the XOps portal.
    - Open the **profile menu** located in the **bottom-left corner** of the platform interface.
    - Click on your **profile/email section** to open the profile options.
    - Select **Accounts** from the menu.
    - You will be redirected to the **Integrations page**, where the **AWS Accounts integration settings** are available.

##### **Updating the Account Name**

- **Edit the AWS Account Name**
    
    
    - Locate the **Edit** option next to the existing AWS account name.
    - Click the **Edit** button to enable modifications.

[![Screenshot 2026-03-12 175729.png](https://xops-docs.axiomio.com/uploads/images/gallery/2026-03/scaled-1680-/YmAuMZHGhK7SU4rN-screenshot-2026-03-12-175729.png)](https://xops-docs.axiomio.com/uploads/images/gallery/2026-03/YmAuMZHGhK7SU4rN-screenshot-2026-03-12-175729.png)

1. **Save the New Name**
    
    
    - Enter the new AWS account name in the provided field.
    - Click **Proceed** to confirm the changes.
    - A success message will appear, indicating the account name update.

[![image.png](https://xops-docs.axiomio.com/uploads/images/gallery/2026-03/scaled-1680-/7wlMkdvOlk2nHkMh-image.png)](https://xops-docs.axiomio.com/uploads/images/gallery/2026-03/7wlMkdvOlk2nHkMh-image.png)

##### **Deleting Linked Account** 

- **Delete the AWS Account**
    
    
    - Locate the **Delete** option next to the existing AWS account name.
    - Click the **Delete**.

[![image.png](https://xops-docs.axiomio.com/uploads/images/gallery/2026-03/scaled-1680-/RGmMBqVLYnKJIiNK-image.png)](https://xops-docs.axiomio.com/uploads/images/gallery/2026-03/RGmMBqVLYnKJIiNK-image.png)

- **Enter the Account Name**
    
    
    - Enter the AWS account name in the provided field.
    - Click **Delete Account** to confirm the changes.
    - A success message will appear, indicating Account has been deleted.

[![image.png](https://xops-docs.axiomio.com/uploads/images/gallery/2026-03/scaled-1680-/MnqRZX06pgtgfZ3a-image.png)](https://xops-docs.axiomio.com/uploads/images/gallery/2026-03/MnqRZX06pgtgfZ3a-image.png)

Note: There is currently no provision to delete AWS Management accounts from the Xops portal. To delete the account, submit a support request via the following link:

Submit Support Request

**Request Submission Guidelines:**

- **Subject:** Clearly state that the request is for AWS Management account deletion.
- **Description:** Provide a detailed explanation of your request, including relevant account details and the reason for deletion.
- Once submitted, our support team will review your request and assist you accordingly.

# Azure Account Integration

### **Link Azure Account** 

#### **Navigating to the Integrations Page**

- **Log in to the Platform**
    
    
    - Access the platform and sign in using your credentials.
- **Open the Integrations Section**
    
    
    - Locate the side navigation panel on the left.
    - Click on the **Integrations** tab.
- **Select Azure Integration**
    
    
    - On the Integrations page, you will see available options for **AWS, Azure, and Microsoft accounts**.
    - Click on the **Azure card** to open the “Link a New Azure Account” page.

[![ARHimage.png](https://xops-docs.axiomio.com/uploads/images/gallery/2025-01/scaled-1680-/wHf6mDfxuPWl23ZH-arhimage.png)](https://xops-docs.axiomio.com/uploads/images/gallery/2025-01/wHf6mDfxuPWl23ZH-arhimage.png)

Note: Follow <span style="color: rgb(0, 0, 0);">**Initiating Azure Integration** s</span>teps to Connect Azure Account in Xops 360, ensure that the following permissions are assigned

### <span style="color: rgb(0, 0, 0);">**Initiating Azure Integration**</span>


##### **Registering an Application in Azure**

- Navigate to the **[Azure Portal](https://portal.azure.com/)**.
- In the search bar, enter **App Registrations** and select it from the results.

[![image.png](https://xops-docs.axiomio.com/uploads/images/gallery/2025-02/scaled-1680-/4Lc6QceMq5jy4kF9-image.png)](https://xops-docs.axiomio.com/uploads/images/gallery/2025-02/4Lc6QceMq5jy4kF9-image.png)

- Click on **New Registration**.
- Register the application:
    
    
    - Provide a name for the application.
    - Under **Supported account types**, select **Accounts in this organizational directory only** if not set by default.
    - Click **Register** to complete the process.

[![image.png](https://xops-docs.axiomio.com/uploads/images/gallery/2025-02/scaled-1680-/h8HsC98CUOcHJiO6-image.png)](https://xops-docs.axiomio.com/uploads/images/gallery/2025-02/h8HsC98CUOcHJiO6-image.png)

##### **Assigning Entra ID Permissions**

- In the **[Azure Portal](https://portal.azure.com/)**, search for **Entra ID** and select it.

[![image.png](https://xops-docs.axiomio.com/uploads/images/gallery/2025-02/scaled-1680-/L9iBvBc1x3Td09h5-image.png)](https://xops-docs.axiomio.com/uploads/images/gallery/2025-02/L9iBvBc1x3Td09h5-image.png)

- Navigate to **Properties**, then locate the setting **Access management for Azure resources** and toggle it to **Yes**.

[![image.png](https://xops-docs.axiomio.com/uploads/images/gallery/2025-02/scaled-1680-/Ouzk4HM4rqSK8Ix1-image.png)](https://xops-docs.axiomio.com/uploads/images/gallery/2025-02/Ouzk4HM4rqSK8Ix1-image.png)

- Go to **Overview**, and in the left navigation pane, click **Roles and Administrators**.
- Search for **Global Reader** and select it.

[![image.png](https://xops-docs.axiomio.com/uploads/images/gallery/2025-02/scaled-1680-/b4DzjZ5SRsJ7og4O-image.png)](https://xops-docs.axiomio.com/uploads/images/gallery/2025-02/b4DzjZ5SRsJ7og4O-image.png)

- Under **Assignments**, search for the application registered in the previous step, select it, and click **Add** to grant the **Global Reader** role to the application.

[![image.png](https://xops-docs.axiomio.com/uploads/images/gallery/2025-02/scaled-1680-/QH80y1LuvfNIoqxQ-image.png)](https://xops-docs.axiomio.com/uploads/images/gallery/2025-02/QH80y1LuvfNIoqxQ-image.png)

##### **Assigning Management Group Permissions**

- In the **Azure Portal**, search for **Management Groups** and select it.

[![image.png](https://xops-docs.axiomio.com/uploads/images/gallery/2025-02/scaled-1680-/teQywypvkCQI6Yx1-image.png)](https://xops-docs.axiomio.com/uploads/images/gallery/2025-02/teQywypvkCQI6Yx1-image.png)

- Navigate to **Tenant Group** and select the relevant **Subscription**.
- In the left navigation pane, go to **Access Control (IAM)** and click **Add**, then select **Add Role Assignment**.

[![image.png](https://xops-docs.axiomio.com/uploads/images/gallery/2025-02/scaled-1680-/bq7qG6x8ZvLAAFvh-image.png)](https://xops-docs.axiomio.com/uploads/images/gallery/2025-02/bq7qG6x8ZvLAAFvh-image.png)

- Under **Roles**, search for **Reader**, select it, and click **Next**.

[![image.png](https://xops-docs.axiomio.com/uploads/images/gallery/2025-02/scaled-1680-/XNV1cxiRWVfYhIE5-image.png)](https://xops-docs.axiomio.com/uploads/images/gallery/2025-02/XNV1cxiRWVfYhIE5-image.png)

- Under **Members**, click **Select members**, search for the application name created earlier, and select it.
- Click **Select**, then **Review + Assign** to complete the role assignment.

##### **Assigning Key Vault Reader Permissions (If Applicable)**

- Follow the same steps as assigning **Global Reader** permissions to grant **Key Vault Reader** permissions.

[![image.png](https://xops-docs.axiomio.com/uploads/images/gallery/2025-02/scaled-1680-/50pw8KsUdO4Gd3o1-image.png)](https://xops-docs.axiomio.com/uploads/images/gallery/2025-02/50pw8KsUdO4Gd3o1-image.png)

- If **Key Vaults** are configured with **Access Policies** (instead of **RBAC**), explicit permissions must be assigned to the application:
    
    
    - Grant **List/Get Keys** and **List Secrets** permissions for each Key Vault.

##### **Adding a Certificate for Authentication**

- Navigate to the previously created **Application Registration**.
- Copy the **Application (Client) ID** and **Directory (Tenant) ID**.
- Access the **[Xops 360 Portal](https://xops.axiomio.com/)** and navigate to **Integrations** , Select **Azure** icon then click on **Add Account**.
    
    
    - Enter a friendly name for the account.
    - Provide the **App ID** and **Tenant ID** copied earlier.
    - Click **Generate Public Key &amp; Download** the generated key.

[![image.png](https://xops-docs.axiomio.com/uploads/images/gallery/2025-02/scaled-1680-/zsgnqOnZOsXWxgNm-image.png)](https://xops-docs.axiomio.com/uploads/images/gallery/2025-02/zsgnqOnZOsXWxgNm-image.png)

- Return to the **Azure Portal**, open the application, and go to **Manage** &gt; **Certificates &amp; Secrets**.
- Click **Upload Certificate**, select the certificate file downloaded earlier, and click **Add** to complete the upload process.

[![image.png](https://xops-docs.axiomio.com/uploads/images/gallery/2025-02/scaled-1680-/gRf9XelYLknxttzY-image.png)](https://xops-docs.axiomio.com/uploads/images/gallery/2025-02/gRf9XelYLknxttzY-image.png)

**Note:**

- For any challenges, please contact our support team at **<support@axiomio.com>**
- **First-Time Login Experience**
- - When you log in for the first time, you will be prompted to select your preferred **cloud service or platform** (AWS, Azure, or Microsoft). This selection is required to establish the initial account connection.
    - Once your account is successfully connected to AWS, Azure, or Microsoft, this selection screen **will not appear** in subsequent logins. Instead, you will be directed **automatically to the Home page**.
    - To manage or modify integrations, navigate to the **"Integrations"** section from the left panel in the dashboard.

### **Managing Azure Subscriptions**

- **Access the Subscription Management Page**
    - Log in to the platform with your credentials.
    - Navigate to the **Integrations** section, Select Azure icon.
    - Select the connected **Azure account** to access the **Subscription Management** page.

#### **Connecting Azure Subscriptions**

- **Edit the Connected Azure Account**
    - Locate the Azure account under **Integrations**.
    - Click **Edit** to open the subscription management interface.
- **View and Select Subscriptions**
    - **List of Subscriptions**: Displays all available Azure subscriptions.
    - **Selected Subscriptions**: Highlights currently connected subscriptions.
- **Select Desired Subscriptions**
    - Review the list of available subscriptions.
    - Check the boxes next to the subscriptions you want to connect.
- **Apply Changes**
    - Click **Update** to save and apply changes.
    - Newly added subscriptions will be available in the platform.

[![image.png](https://xops-docs.axiomio.com/uploads/images/gallery/2025-01/scaled-1680-/A1znKwMBmEXg1KZR-UA7image.png)](https://xops-docs.axiomio.com/uploads/images/gallery/2025-01/A1znKwMBmEXg1KZR-UA7image.png)

#### **Disconnecting Azure Subscriptions**

- **Edit the Connected Azure Account**
    - Go to the **Integrations** section and locate the Azure account.
    - Click **Edit** to manage the account’s subscriptions.
- **Deselect Subscriptions**
    - Under **Selected Subscriptions**, uncheck the subscriptions you want to disconnect.
- **Apply Changes**
    - Click **Update** to finalize changes.
    - The deselected subscriptions will no longer be associated with your account.

[![image.png](https://xops-docs.axiomio.com/uploads/images/gallery/2025-01/scaled-1680-/JKcHV1iaWWJGvJ3s-0hHimage.png)](https://xops-docs.axiomio.com/uploads/images/gallery/2025-01/JKcHV1iaWWJGvJ3s-0hHimage.png)

# Microsoft 365 Account Integration

#### **Navigating to the Integrations Page**

- **Log in to the Platform**
    
    
    - Access the platform and sign in using your credentials.
- **Open the Integrations Section**
    
    
    - Locate the side navigation panel on the left.
    - Click on the **Integrations** tab.
- **Select Microsoft Integration**
    
    
    - On the Integrations page, you will see available options for **AWS, Azure, and Microsoft accounts**.
    - Click on the **Microsoft card** then click on **M365** to open the “Link a New Microsoft Account” page.

[![ARHimage.png](https://xops-docs.axiomio.com/uploads/images/gallery/2025-01/scaled-1680-/wHf6mDfxuPWl23ZH-arhimage.png)](https://xops-docs.axiomio.com/uploads/images/gallery/2025-01/wHf6mDfxuPWl23ZH-arhimage.png)

Note: Follow <span style="color: rgb(0, 0, 0);">**Initiating M365 Integration** s</span>teps to Connect Microsoft 365 Account in Xops 360, ensure that the following permissions are assigned

#### **Initiating M365 Integration**

##### **Registering an Application and configuration in Microsoft Entra Admin center**

- Navigate to the **[Microsoft Entra Admin Center](https://aka.ms/MSEntraPortal)** **Portal**.
- In the search bar, enter **App Registrations** and select it from the results.

[![image.png](https://xops-docs.axiomio.com/uploads/images/gallery/2025-02/scaled-1680-/1WBuI1zCB756M681-image.png)](https://xops-docs.axiomio.com/uploads/images/gallery/2025-02/1WBuI1zCB756M681-image.png)

- Click on **New Registration**.
- Register the application:
    
    
    - Provide a name for the application.
    - Under **Supported account types**, select **Accounts in this organizational directory only** if not set by default.
    - Click **Register** to complete the process.

![image.png](https://xops-docs.axiomio.com/uploads/images/gallery/2025-02/scaled-1680-/fn6K7V7WE547IcwG-image.png)

- Navigate to **Manage** and click on **API Permissions**.
- Click on **Add a permission**.

[![image.png](https://xops-docs.axiomio.com/uploads/images/gallery/2025-02/scaled-1680-/5xcQPcc2AbhsgERB-image.png)](https://xops-docs.axiomio.com/uploads/images/gallery/2025-02/5xcQPcc2AbhsgERB-image.png)

- Select **APIs my organization uses** and search for **Office 365 Exchange Online**, then click on it.

[![image.png](https://xops-docs.axiomio.com/uploads/images/gallery/2025-02/scaled-1680-/NoxidNsHYp6byF78-image.png)](https://xops-docs.axiomio.com/uploads/images/gallery/2025-02/NoxidNsHYp6byF78-image.png)

- Choose **Application permissions**, search for **Exchange.ManageAsApp**, select it, and click **Add permissions**.

[![image.png](https://xops-docs.axiomio.com/uploads/images/gallery/2025-02/scaled-1680-/Ubf7YTqJpnckSS3a-image.png)](https://xops-docs.axiomio.com/uploads/images/gallery/2025-02/Ubf7YTqJpnckSS3a-image.png)

- Click on **Grant admin consent** and confirm by selecting **Yes** in the confirmation popup.

[![image.png](https://xops-docs.axiomio.com/uploads/images/gallery/2025-02/scaled-1680-/57x0zIfk6LOIqPnO-image.png)](https://xops-docs.axiomio.com/uploads/images/gallery/2025-02/57x0zIfk6LOIqPnO-image.png)

[![image.png](https://xops-docs.axiomio.com/uploads/images/gallery/2025-02/scaled-1680-/AsOogaAC82YDW4D9-image.png)](https://xops-docs.axiomio.com/uploads/images/gallery/2025-02/AsOogaAC82YDW4D9-image.png)

##### **Assigning Entra ID Permissions**

- In the **Azure Portal**, search for **Entra ID** and select it.

![image.png](https://xops-docs.axiomio.com/uploads/images/gallery/2025-02/scaled-1680-/ynflBHk8nbkhYZwz-image.png)

- Go to **Overview**, and in the left navigation pane, click **Roles and Administrators**.
- Search for **Global Reader** and select it.

[![image.png](https://xops-docs.axiomio.com/uploads/images/gallery/2025-02/scaled-1680-/v5mR8RgLjni2zhpY-image.png)](https://xops-docs.axiomio.com/uploads/images/gallery/2025-02/v5mR8RgLjni2zhpY-image.png)

- Under **Assignments**, search for the application registered in the previous step, select it, and click **Add** to grant the **Global Reader** role to the application.

[![image.png](https://xops-docs.axiomio.com/uploads/images/gallery/2025-02/scaled-1680-/TGiIMtv54JGZCPOR-image.png)](https://xops-docs.axiomio.com/uploads/images/gallery/2025-02/TGiIMtv54JGZCPOR-image.png)

##### **Adding a Certificate for Authentication**

- Navigate to the previously created **Application Registration**.
- Copy the **Application (Client) ID** and **Directory (Tenant) ID**.
- Go to Domain names, copy the **Organization ID**

[![image.png](https://xops-docs.axiomio.com/uploads/images/gallery/2025-02/scaled-1680-/ctedUZhTWjm64flS-image.png)](https://xops-docs.axiomio.com/uploads/images/gallery/2025-02/ctedUZhTWjm64flS-image.png)

- Access the **[Xops 360 Portal](https://xops.axiomio.com/)** and navigate to **Integrations** , Select **Microsoft** icon then click on **Add Account for Microsoft**.
    
    
    - Enter a friendly name for the account.
    - Provide the **App ID, Tenant ID** copied earlier.
    - Provide the **Organization ID copied earlier.**
    - Click **Generate Public Key &amp; Download** the generated key.

[![image.png](https://xops-docs.axiomio.com/uploads/images/gallery/2025-02/scaled-1680-/kyUWtwzbKVLs5NTW-image.png)](https://xops-docs.axiomio.com/uploads/images/gallery/2025-02/kyUWtwzbKVLs5NTW-image.png)

- Return to the **Microsoft Entra Admin center Portal**, open the application, and go to **Manage** &gt; **Certificates &amp; Secrets**.
- Click **Upload Certificate**, select the certificate file downloaded earlier, and click **Add** to complete the upload process.

**Note:** The M365 scan requires all users/accounts to have the **O365\_BUSINESS\_PREMIUM** license; missing licenses may cause scan failure.

[![image.png](https://xops-docs.axiomio.com/uploads/images/gallery/2025-02/scaled-1680-/gRf9XelYLknxttzY-image.png)](https://xops-docs.axiomio.com/uploads/images/gallery/2025-02/gRf9XelYLknxttzY-image.png)

**Note:**

- For any challenges, please contact our support team at **<support@axiomio.com>**
- **First-Time Login Experience**
    - When you log in for the first time, you will be prompted to select your preferred **cloud service or platform** (AWS, Azure, or Microsoft). This selection is required to establish the initial account connection.
    - Once your account is successfully connected to AWS, Azure, or Microsoft, this selection screen **will not appear** in subsequent logins. Instead, you will be directed **automatically to the Home page**.
    - To manage or modify integrations, navigate to the **"Integrations"** section from the left panel in the dashboard.

# Microsoft Entra ID Account Integration

#### **Navigating to the Integrations Page**

- **Log in to the Platform**
    
    
    - Access the platform and sign in using your credentials.
- **Open the Integrations Section**
    
    
    - Locate the side navigation panel on the left.
    - Click on the **Integrations** tab.
- **Select Microsoft Integration**
    
    
    - On the Integrations page, you will see available options for **AWS, Azure, and Microsoft accounts**.
    - Click on the **Microsoft card** then click on **M365** to open the “Link a New Microsoft Account” page.

[![ARHimage.png](https://xops-docs.axiomio.com/uploads/images/gallery/2025-01/scaled-1680-/wHf6mDfxuPWl23ZH-arhimage.png)](https://xops-docs.axiomio.com/uploads/images/gallery/2025-01/wHf6mDfxuPWl23ZH-arhimage.png)

#### **Initiating Entra ID Integration**


##### **Registering an Application and configuration in Microsoft Entra Admin center**

- Navigate to the **[Microsoft Entra Admin Center](https://aka.ms/MSEntraPortal) Portal**.
- In the search bar, enter **App Registrations** and select it from the results.

[![image.png](https://xops-docs.axiomio.com/uploads/images/gallery/2025-02/scaled-1680-/1WBuI1zCB756M681-image.png)](https://xops-docs.axiomio.com/uploads/images/gallery/2025-02/1WBuI1zCB756M681-image.png)

- Click on **New Registration**.
- Register the application:
    
    
    - Provide a name for the application.
    - Under **Supported account types**, select **Accounts in this organizational directory only** if not set by default.
    - Click **Register** to complete the process.

![image.png](https://xops-docs.axiomio.com/uploads/images/gallery/2025-02/scaled-1680-/fn6K7V7WE547IcwG-image.png)

- Navigate to **Manage** and click on **API Permissions**.
- Click on **Add a permission**.

[![image.png](https://xops-docs.axiomio.com/uploads/images/gallery/2025-02/scaled-1680-/5xcQPcc2AbhsgERB-image.png)](https://xops-docs.axiomio.com/uploads/images/gallery/2025-02/5xcQPcc2AbhsgERB-image.png)

- Select **Microsoft APIs** and click on **Microsoft Graph**.

[![image.png](https://xops-docs.axiomio.com/uploads/images/gallery/2025-02/scaled-1680-/8xBH0WionaV1NA2N-image.png)](https://xops-docs.axiomio.com/uploads/images/gallery/2025-02/8xBH0WionaV1NA2N-image.png)

- Choose **Application permissions**, search for **AccessReview.Read.All**, select it, and click **Add permissions**.

[![image.png](https://xops-docs.axiomio.com/uploads/images/gallery/2025-02/scaled-1680-/X1jvDiTtIRuMkNSN-image.png)](https://xops-docs.axiomio.com/uploads/images/gallery/2025-02/X1jvDiTtIRuMkNSN-image.png)

- Click on **Grant admin consent** and confirm by selecting **Yes** in the confirmation popup.

[![image.png](https://xops-docs.axiomio.com/uploads/images/gallery/2025-02/scaled-1680-/4wYMWWWcvc51SzSk-image.png)](https://xops-docs.axiomio.com/uploads/images/gallery/2025-02/4wYMWWWcvc51SzSk-image.png)

[![image.png](https://xops-docs.axiomio.com/uploads/images/gallery/2025-02/scaled-1680-/AsOogaAC82YDW4D9-image.png)](https://xops-docs.axiomio.com/uploads/images/gallery/2025-02/AsOogaAC82YDW4D9-image.png)

##### **Assigning Entra ID Permissions**

- In the **Azure Portal**, search for **Entra ID** and select it.

![image.png](https://xops-docs.axiomio.com/uploads/images/gallery/2025-02/scaled-1680-/ynflBHk8nbkhYZwz-image.png)

- Go to **Overview**, and in the left navigation pane, click **Roles and Administrators**.
- Search for **Global Reader** and select it.

[![image.png](https://xops-docs.axiomio.com/uploads/images/gallery/2025-02/scaled-1680-/v5mR8RgLjni2zhpY-image.png)](https://xops-docs.axiomio.com/uploads/images/gallery/2025-02/v5mR8RgLjni2zhpY-image.png)

- Under **Assignments**, search for the application registered in the previous step, select it, and click **Add** to grant the **Global Reader** role to the application.

[![image.png](https://xops-docs.axiomio.com/uploads/images/gallery/2025-02/scaled-1680-/TGiIMtv54JGZCPOR-image.png)](https://xops-docs.axiomio.com/uploads/images/gallery/2025-02/TGiIMtv54JGZCPOR-image.png)

##### **Adding a Certificate for Authentication**

- Navigate to the previously created **Application Registration**.
- Copy the **Application (Client) ID** and **Directory (Tenant) ID**.
- Go to Domain names, copy the **Organization ID**
- Access the **[Xops 360 Portal](https://xops.axiomio.com/)** and navigate to **Integrations** , Select **Microsoft** icon then click on **Add Account for Microsoft**.
- Enter a friendly name for the account.
- Provide the **App ID, Tenant ID** copied earlier.
- Click **Generate Public Key &amp; Download** the generated key.

[![image.png](https://xops-docs.axiomio.com/uploads/images/gallery/2025-02/scaled-1680-/kyUWtwzbKVLs5NTW-image.png)](https://xops-docs.axiomio.com/uploads/images/gallery/2025-02/kyUWtwzbKVLs5NTW-image.png)

- Return to the **Microsoft Entra Admin center Portal**, open the application, and go to **Manage** &gt; **Certificates &amp; Secrets**.
- Click **Upload Certificate**, select the certificate file downloaded earlier, and click **Add** to complete the upload process.

[![image.png](https://xops-docs.axiomio.com/uploads/images/gallery/2025-02/scaled-1680-/gRf9XelYLknxttzY-image.png)](https://xops-docs.axiomio.com/uploads/images/gallery/2025-02/gRf9XelYLknxttzY-image.png)

**Note:**

- For any challenges, please contact our support team at **<support@axiomio.com>**
- **First-Time Login Experience**
- - When you log in for the first time, you will be prompted to select your preferred **cloud service or platform** (AWS, Azure, or Microsoft). This selection is required to establish the initial account connection.
    - Once your account is successfully connected to AWS, Azure, or Microsoft, this selection screen **will not appear** in subsequent logins. Instead, you will be directed **automatically to the Home page**.
    - To manage or modify integrations, navigate to the **"Integrations"** section from the left panel in the dashboard.

# EKS Integration

### **Link EKS Account** 

#### **Navigating to the Integrations Page**

- **Log in to the Platform**
    
    
    - Access the platform and sign in using your credentials.
- **Open the Integrations Section**
    
    
    - Locate the side navigation panel on the left.
    - Click on the **Integrations** tab.
- **Select EKS Integration**
    
    
    - On the Integrations page, you will see available options for **AWS, Azure, Microsoft accounts and EKS**.
    - Click on the EKS **card** to open the “Link a New AWS Account” page.

 [![eks int.png](https://xops-docs.axiomio.com/uploads/images/gallery/2025-09/scaled-1680-/Wld6OLfS2nLF7Z4L-eks-int.png)](https://xops-docs.axiomio.com/uploads/images/gallery/2025-09/Wld6OLfS2nLF7Z4L-eks-int.png)

#### **Initiating Account Integration**

- **Access Setup Instructions**
    
    
    - Click the **Information ("i") button** to view step-by-step setup guidance.
- **Retrieve AWS Role ARN**
    
    
    - Follow the setup guide to create a required **Cloud Formation stack** in the AWS **Management** Console.
    - Once the stack is created, navigate to the **Outputs tab** in the stack details page.
    - Copy the **AWS Role ARN** from the output.
- **Configure AWS Integration**
    
    
    - Return to the platform’s **AWS Integration** page.
    - Provide a suitable name in the **AWS Account Name** field.
    - Paste the copied **AWS Role ARN** into the designated field.
    - Click **Connect** to finalize the integration.

 [![image.png](https://xops-docs.axiomio.com/uploads/images/gallery/2025-09/scaled-1680-/FH3w1cOLKhiYzvub-image.png)](https://xops-docs.axiomio.com/uploads/images/gallery/2025-09/FH3w1cOLKhiYzvub-image.png)

**Note:**

- For any challenges, please contact our support team at **<support@axiomio.com>**
- **First-Time Login Experience**
    - When you log in for the first time, you will be prompted to select your preferred **cloud service or platform** (AWS, EKS Azure, or Microsoft). This selection is required to establish the initial account connection.
    - Once your account is successfully connected to AWS, Azure, or Microsoft, this selection screen **will not appear** in subsequent logins. Instead, you will be directed **automatically to the Home page**.
    - To manage or modify integrations, navigate to the **"Integrations"** section from the left panel in the dashboard.

# Performing Security and Operational Scans

# Executing Scans in CloudOps

### **Running Scans in Cloud Operations**

- **Log in to the Platform**
    - Access the platform and sign in using your credentials.
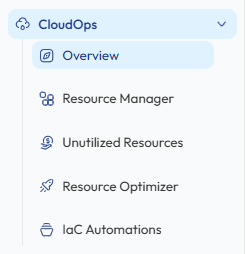
- **Navigate to CloudOps**
    - Locate the Side Navigation Bar on the left-hand side of the screen.
    - Click on the **CloudOps** module to expand the available options.

[![image.png](https://xops-docs.axiomio.com/uploads/images/gallery/2026-03/scaled-1680-/rCfAFyWDdyDsXZb3-image.png)](https://xops-docs.axiomio.com/uploads/images/gallery/2026-03/rCfAFyWDdyDsXZb3-image.png)
- **Verify Cloud Account**
    - Ensure that an **AWS or Azure account** has already been connected to the platform.
    - If no account is available, add a cloud account through the **Cloud Account Integration process** before initiating a scan.
- **Select a Scan Type**
    - From the **CloudOps module**, select the scan you want to perform.
        
        
        - **Resource Manager -** Provides a centralized inventory of cloud assets across AWS and Azure services. It allows users to fetch and view infrastructure resources such as compute, networking, storage, and identity services to monitor and manage cloud infrastructure efficiently.
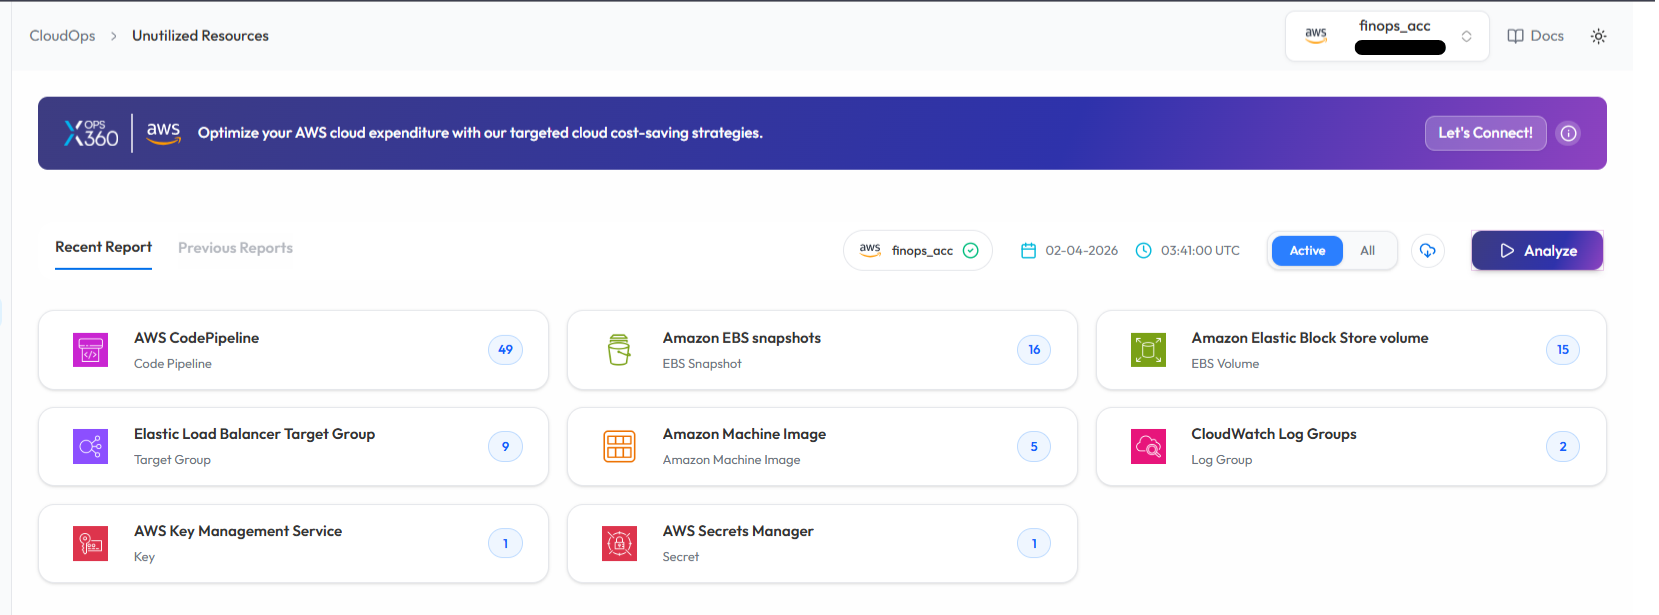
        - **Unutilized Resources -** Detect unused AWS resources.
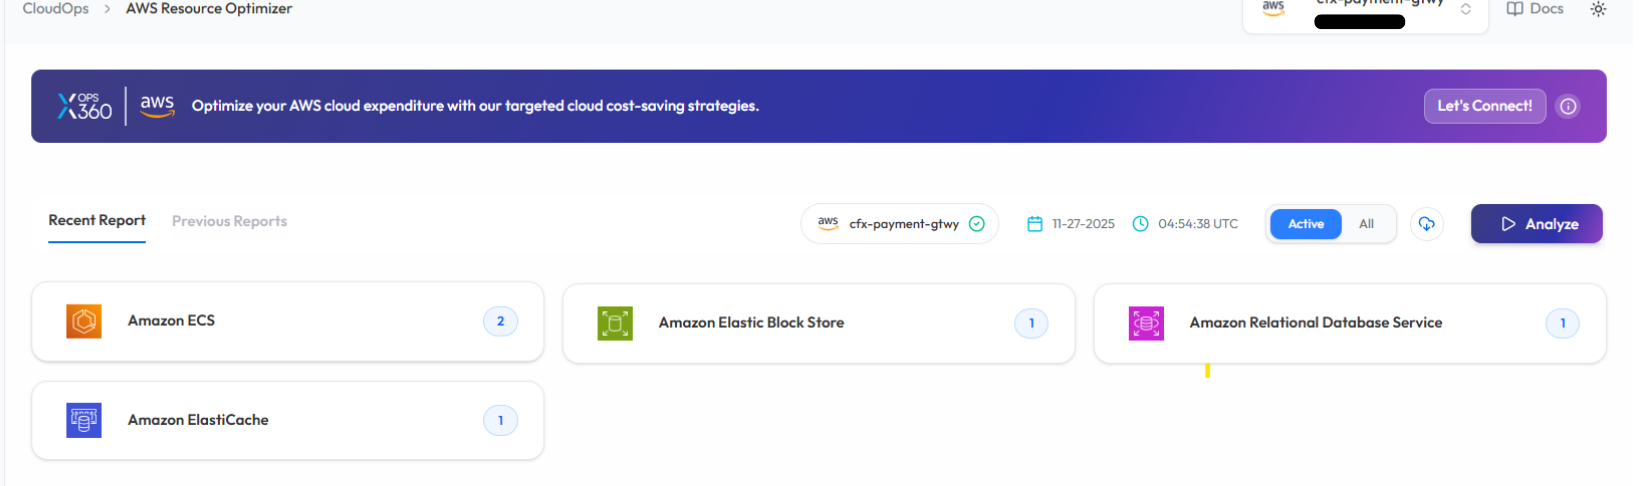
        - **Resource Optimizer -** Identify optimization opportunities across AWS resources.
        - **Azure WAR (Well-Architected Review)** – Evaluate Azure cloud architecture against Microsoft best practices.
- **Initiate the Scan**  
    
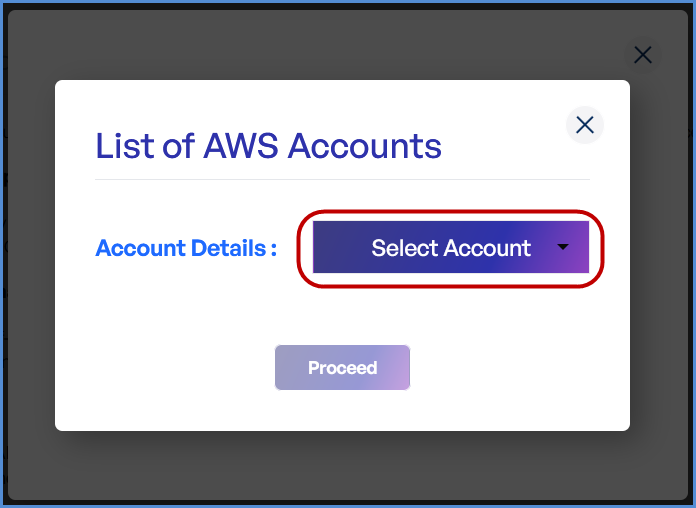
    - Select the **cloud account** from the available account list.
    - Click **Analyze** or **Scan** to initiate the scan for the selected account.
    - The platform will begin analyzing the selected cloud resources.

[![Untitled design (13).png](https://xops-docs.axiomio.com/uploads/images/gallery/2026-03/scaled-1680-/aIjQ1gsWjhUk7xFM-untitled-design-13.png)](https://xops-docs.axiomio.com/uploads/images/gallery/2026-03/aIjQ1gsWjhUk7xFM-untitled-design-13.png)

- **Monitor and Review Results** The scan will start processing the selected cloud account.

[![hhhhh.png](https://xops-docs.axiomio.com/uploads/images/gallery/2026-03/scaled-1680-/MwK8BAKViSdnrr80-hhhhh.png)](https://xops-docs.axiomio.com/uploads/images/gallery/2026-03/MwK8BAKViSdnrr80-hhhhh.png)

Once the scan is complete:

- - A report will be generated automatically.
    - Results will display identified **optimization opportunities or unused resources**.
    - Users can review detailed findings directly within the dashboard.

These results help identify opportunities to **reduce cloud costs and improve infrastructure efficiency**.

[![Untitled design (14).png](https://xops-docs.axiomio.com/uploads/images/gallery/2026-03/scaled-1680-/wKkaCFpf5DWSdByz-untitled-design-14.png)](https://xops-docs.axiomio.com/uploads/images/gallery/2026-03/wKkaCFpf5DWSdByz-untitled-design-14.png)
[![Untitled design (15).png](https://xops-docs.axiomio.com/uploads/images/gallery/2026-03/scaled-1680-/QJCijkDpMSPY7B9M-untitled-design-15.png)](https://xops-docs.axiomio.com/uploads/images/gallery/2026-03/QJCijkDpMSPY7B9M-untitled-design-15.png)
**Note:**

- > To receive recommendations for optimizing your resources in Resource Optimizer, kindly ensure that the **AWS Compute Optimizer** service is enabled in the AWS account linked with the Xops 360 portal.

### **Running a Scan in Resource Manager (Assets)**

- **Log in to the Platform**
    - - Access the platform and sign in using your credentials.
- **Navigate to Resource Manager**  
    
    - From the **Side Navigation Bar**, click :  
         CloudOps → Resource Manager  
        This page provides a **comprehensive inventory of cloud assets** across multiple services.
- **Verify AWS or Azure Account**
    - Ensure that an AWS account or Azure account has already been added to the platform.
    - If no account is available, add the account before initiating the scan.
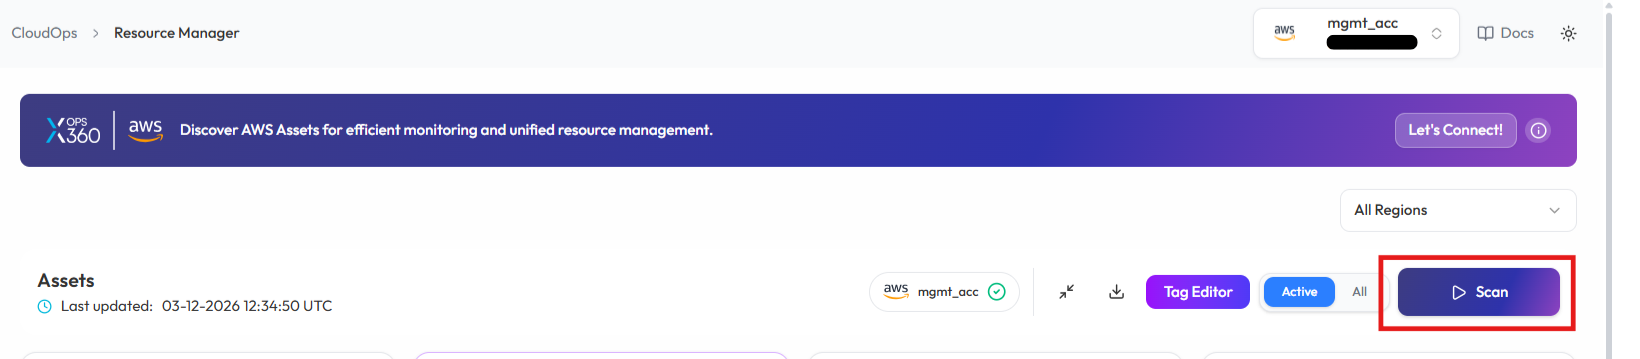
- **Run the Scan** On the Resource Manager (Assets) page  
    
    - Select the desired **cloud account**.
    - Click **Scan** to fetch the latest cloud asset information.
    - The platform will begin retrieving resources from the selected cloud account.
        
        [![Untitled design (17).png](https://xops-docs.axiomio.com/uploads/images/gallery/2026-03/scaled-1680-/HnpqCvE30CwWxgfz-untitled-design-17.png)](https://xops-docs.axiomio.com/uploads/images/gallery/2026-03/HnpqCvE30CwWxgfz-untitled-design-17.png)
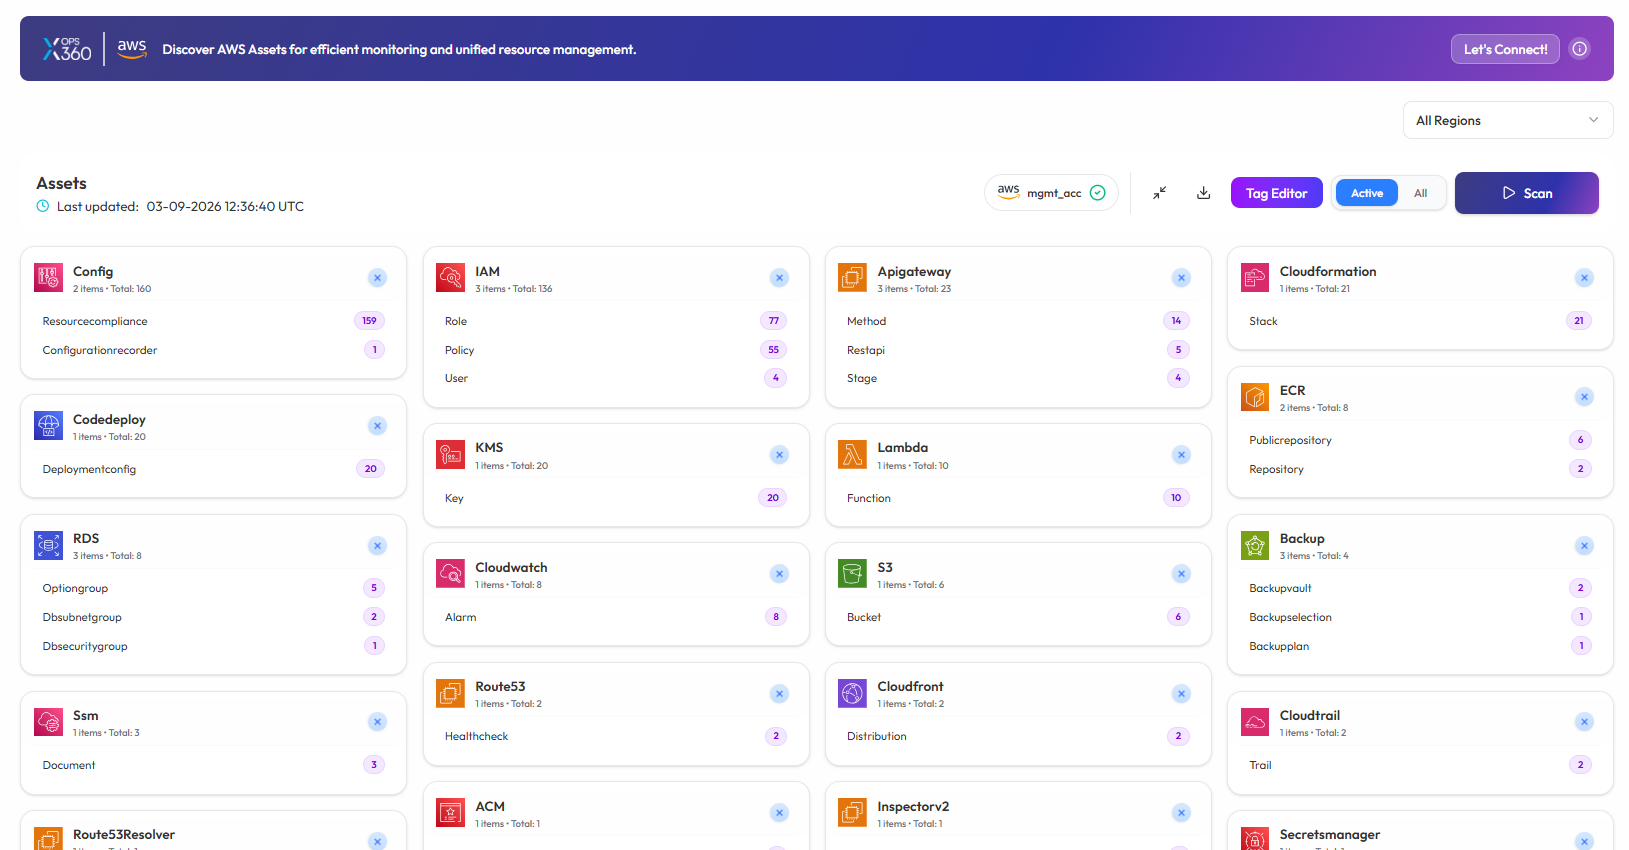
- **Monitor and Review Results** The system will fetch the cloud resources and update the **Assets Dashboard**.  
    Once completed :
- - All discovered cloud resources will be displayed.
    - Resources will be categorized by service (EC2, ECS, IAM, S3, Lambda, etc.).
    - Users can review the inventory to better manage and monitor their cloud infrastructure.

[![11.png](https://xops-docs.axiomio.com/uploads/images/gallery/2026-03/scaled-1680-/rwmOpAtq5BFqPcgk-11.png)](https://xops-docs.axiomio.com/uploads/images/gallery/2026-03/rwmOpAtq5BFqPcgk-11.png)
**Note:**

- For accessing historic reports or addressing scan failures, refer to the [Report History Page](https://xops-docs.axiomio.com/books/xops-360-documentation/page/accessing-and-managing-report-history) for further details and View error.

# Conducting Cloud Security Assessments

Ensuring cloud security requires regular vulnerability assessments and compliance checks across various cloud environments. The **SecOps module** in XOps 360 enables organizations to evaluate their **security posture and compliance status** across **AWS, Azure, and Microsoft environments** including **Microsoft 365 and Entra ID**.

This guide outlines the steps required to initiate compliance scans and review security findings.

### **Cloud Security – AWS Security Assessment**

- **Log in to the Platform**
    
    
    - Access the platform and sign in using your credentials.
- **Navigate to SecOps**
    - Open the **Side Navigation Bar** located on the left side of the screen.
    - Click **SecOps** to expand the available security modules.
    - Select **Compliance Dashboard** .
- **Select Compliance Standard**Under the Compliance Dashboard, choose one of the following AWS compliance frameworks:
    
    
    - **AWS CIS v5.0 (Center for Internet Security)**
    - **AWS SOC2 (System and Organization Controls 2)**
    - **AWS GDPR (General Data Protection Regulation)**
    - **AWS PCI DSS (Payment Card Industry Data Security Standard)**
- These frameworks evaluate AWS cloud configurations against industry security best practices.

[![image.png](https://xops-docs.axiomio.com/uploads/images/gallery/2026-03/scaled-1680-/vr3lxa2DsXCWHl7q-image.png)](https://xops-docs.axiomio.com/uploads/images/gallery/2026-03/vr3lxa2DsXCWHl7q-image.png)
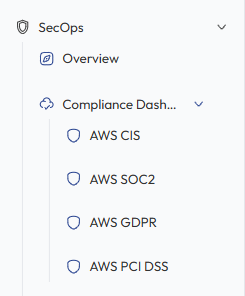
- **Verify AWS Account**
    - Ensure that an AWS account has already been added to the platform.
    - If no account is available, integrate the AWS account before initiating the scan.
- **Initiate the Scan**
    - Locate the AWS account under the selected compliance framework.
    - Click **Scan** to initiate an automated security check.
    - The system will analyze AWS configurations and security controls.

[![Untitled design (18).png](https://xops-docs.axiomio.com/uploads/images/gallery/2026-03/scaled-1680-/SMxeORBe4wwI3RDi-untitled-design-18.png)](https://xops-docs.axiomio.com/uploads/images/gallery/2026-03/SMxeORBe4wwI3RDi-untitled-design-18.png)

**Monitor and Review Results**

- Monitor scan progress, and upon completion, a report will be generated then open it.

[![Untitled design (19).png](https://xops-docs.axiomio.com/uploads/images/gallery/2026-03/scaled-1680-/34XATvDC69Pi8yEf-untitled-design-19.png)](https://xops-docs.axiomio.com/uploads/images/gallery/2026-03/34XATvDC69Pi8yEf-untitled-design-19.png)

- Review findings, including:
    
    
    - Compliance gaps
    - Security misconfigurations
    - Vulnerabilities

[![Untitled design (20).png](https://xops-docs.axiomio.com/uploads/images/gallery/2026-03/scaled-1680-/eI6CHhIHu8YUyg7z-untitled-design-20.png)](https://xops-docs.axiomio.com/uploads/images/gallery/2026-03/eI6CHhIHu8YUyg7z-untitled-design-20.png)
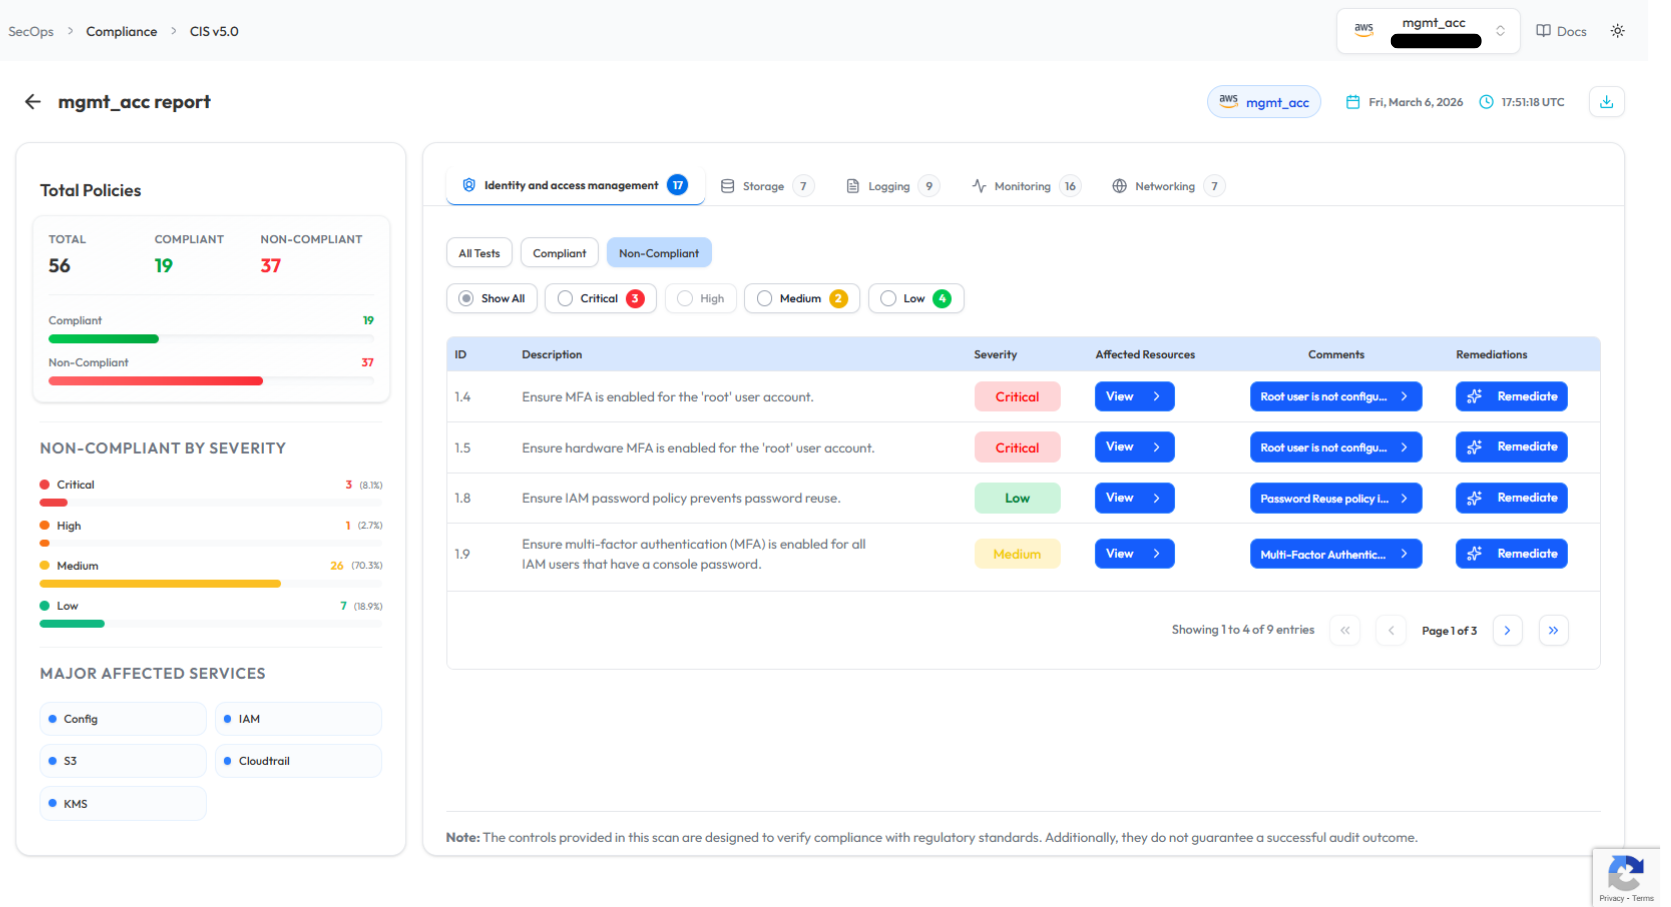
### **Cloud Security – Azure Security**

- **Log in to the Platform**
    
    
    - Access the platform and sign in using your credentials.
- **Navigate to SecOps**
    - Open the Side Navigation Bar
    - Click **SecOps → Compliance Dashboard**.
- **Select Azure Compliance Standard** Choose the compliance framework used to assess Azure security posture.  
    
    - Available frameworks include:
    - **ISO 27001 (International Organization for Standardization)**
    - **SOC2 (System and Organization Controls 2)**
    - **CIS (Center for Internet Security)**
- These frameworks analyze Azure configurations against established security standards.

[![image.png](https://xops-docs.axiomio.com/uploads/images/gallery/2026-03/scaled-1680-/9U392YjGcCegYdWx-image.png)](https://xops-docs.axiomio.com/uploads/images/gallery/2026-03/9U392YjGcCegYdWx-image.png)
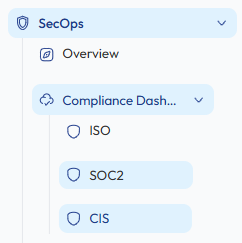
- **Verify Azure Account**
    - Ensure that an Azure account has already been added to the platform.
    - If no account is available, connect the Azure account before running the scan.
- **Initiate the Scan**
    - Locate the **Azure subscription** listed under the selected compliance framework.
    - Click **Scan** to initiate the Azure security assessment.

[![Untitled design (24).png](https://xops-docs.axiomio.com/uploads/images/gallery/2026-03/scaled-1680-/Junzf4DDvzpvr857-untitled-design-24.png)](https://xops-docs.axiomio.com/uploads/images/gallery/2026-03/Junzf4DDvzpvr857-untitled-design-24.png)

**Monitor and Review Results**

- Monitor scan progress, and upon completion, a report will be generated then open it.

[![Untitled design (22).png](https://xops-docs.axiomio.com/uploads/images/gallery/2026-03/scaled-1680-/CWn6YMI0S7vtuJq8-untitled-design-22.png)](https://xops-docs.axiomio.com/uploads/images/gallery/2026-03/CWn6YMI0S7vtuJq8-untitled-design-22.png)

- Analyze scan results to detect:
    
    
    - Compliance gaps
    - Security misconfigurations
    - Vulnerabilities

[![Untitled design (25).png](https://xops-docs.axiomio.com/uploads/images/gallery/2026-03/scaled-1680-/Pi2z5DwyaYfJFRly-untitled-design-25.png)](https://xops-docs.axiomio.com/uploads/images/gallery/2026-03/Pi2z5DwyaYfJFRly-untitled-design-25.png)
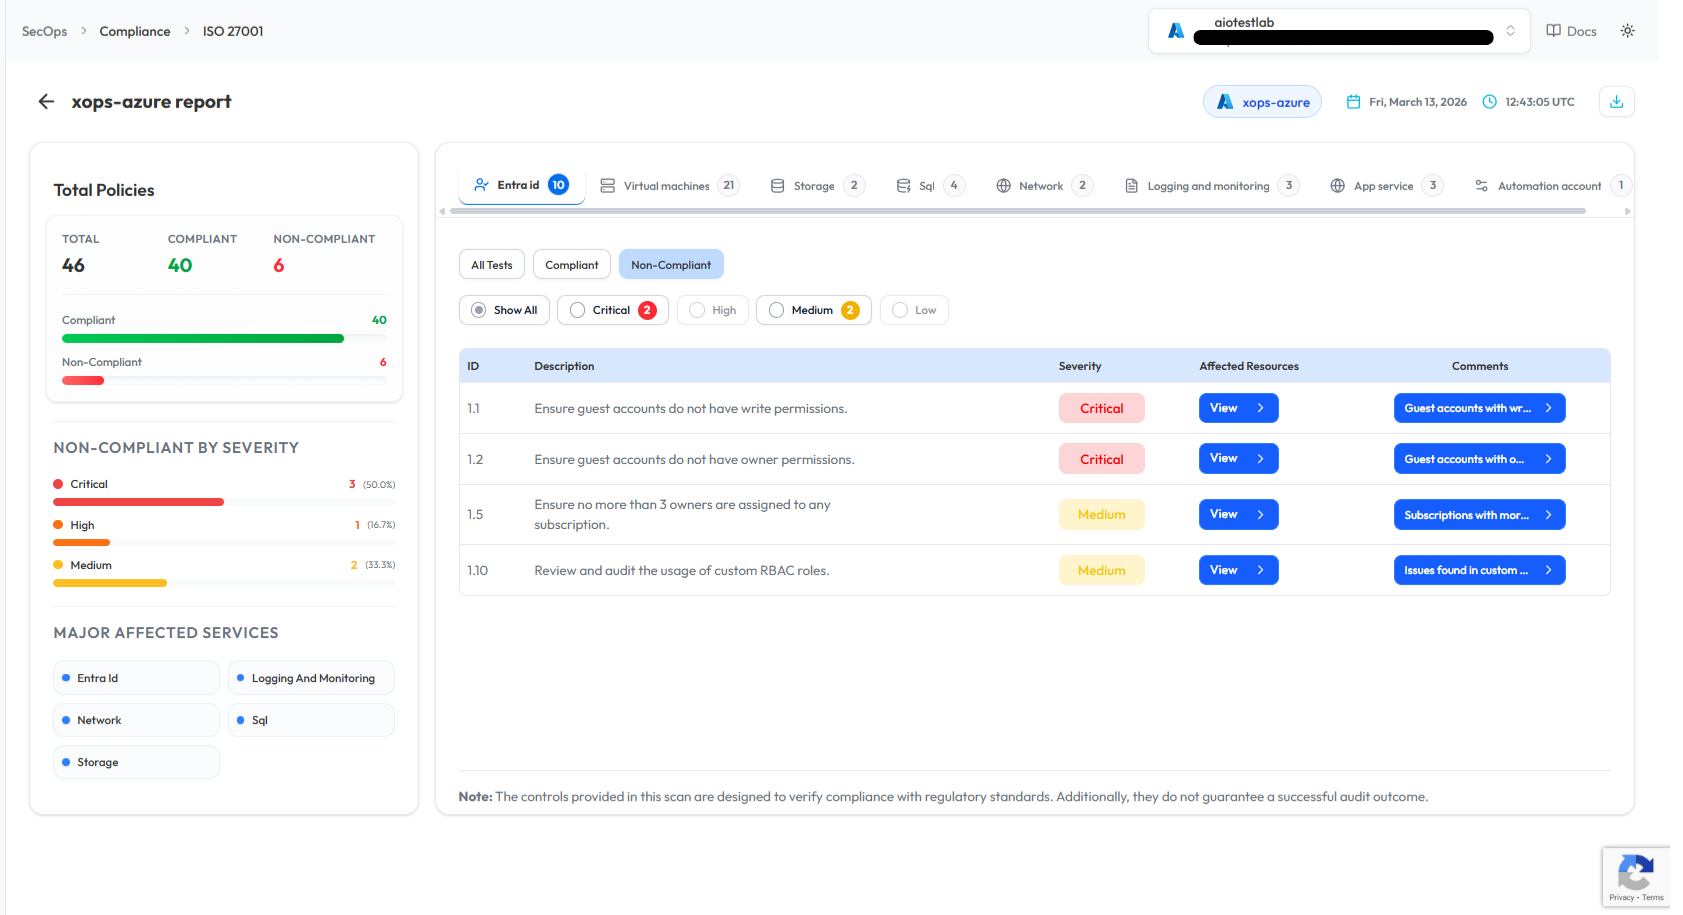
### **Cloud Security – Microsoft Security (M365 &amp; Entra ID)**

- **Log in to the Platform**
    
    
    - Access the platform and sign in using your credentials.
- **Navigate to SecOps**  
    
    - Open the Side Navigation Bar
    - Click **SecOps → Compliance Dashboard**.

**Microsoft Entra ID Security Assessment**

- **Select Entra ID**
- Under the Compliance Dashboard, click Entra ID.
- This feature evaluates identity security configurations within Microsoft Entra ID.

[![image.png](https://xops-docs.axiomio.com/uploads/images/gallery/2026-03/scaled-1680-/VLasQiBxU8UMj2GF-image.png)](https://xops-docs.axiomio.com/uploads/images/gallery/2026-03/VLasQiBxU8UMj2GF-image.png)
- **Verify Microsoft Tenant**  
    
    - Ensure that the **Microsoft Entra ID tenant** has already been connected to the platform.
    - If the tenant is not connected, integrate the Microsoft account before running the scan.
- **Initiate the Scan**
    - Locate the **Entra ID tenant** in the dashboard.
    - Click **Scan** to start the assessment.

[![Untitled design (27).png](https://xops-docs.axiomio.com/uploads/images/gallery/2026-03/scaled-1680-/zLIrkn3wfw6lmM1W-untitled-design-27.png)](https://xops-docs.axiomio.com/uploads/images/gallery/2026-03/zLIrkn3wfw6lmM1W-untitled-design-27.png)

**Monitor and Review Results**

- Track scan progress in the **Scan History** section.

[![Untitled design (28).png](https://xops-docs.axiomio.com/uploads/images/gallery/2026-03/scaled-1680-/iOv20wVb65p6vkRN-untitled-design-28.png)](https://xops-docs.axiomio.com/uploads/images/gallery/2026-03/iOv20wVb65p6vkRN-untitled-design-28.png)

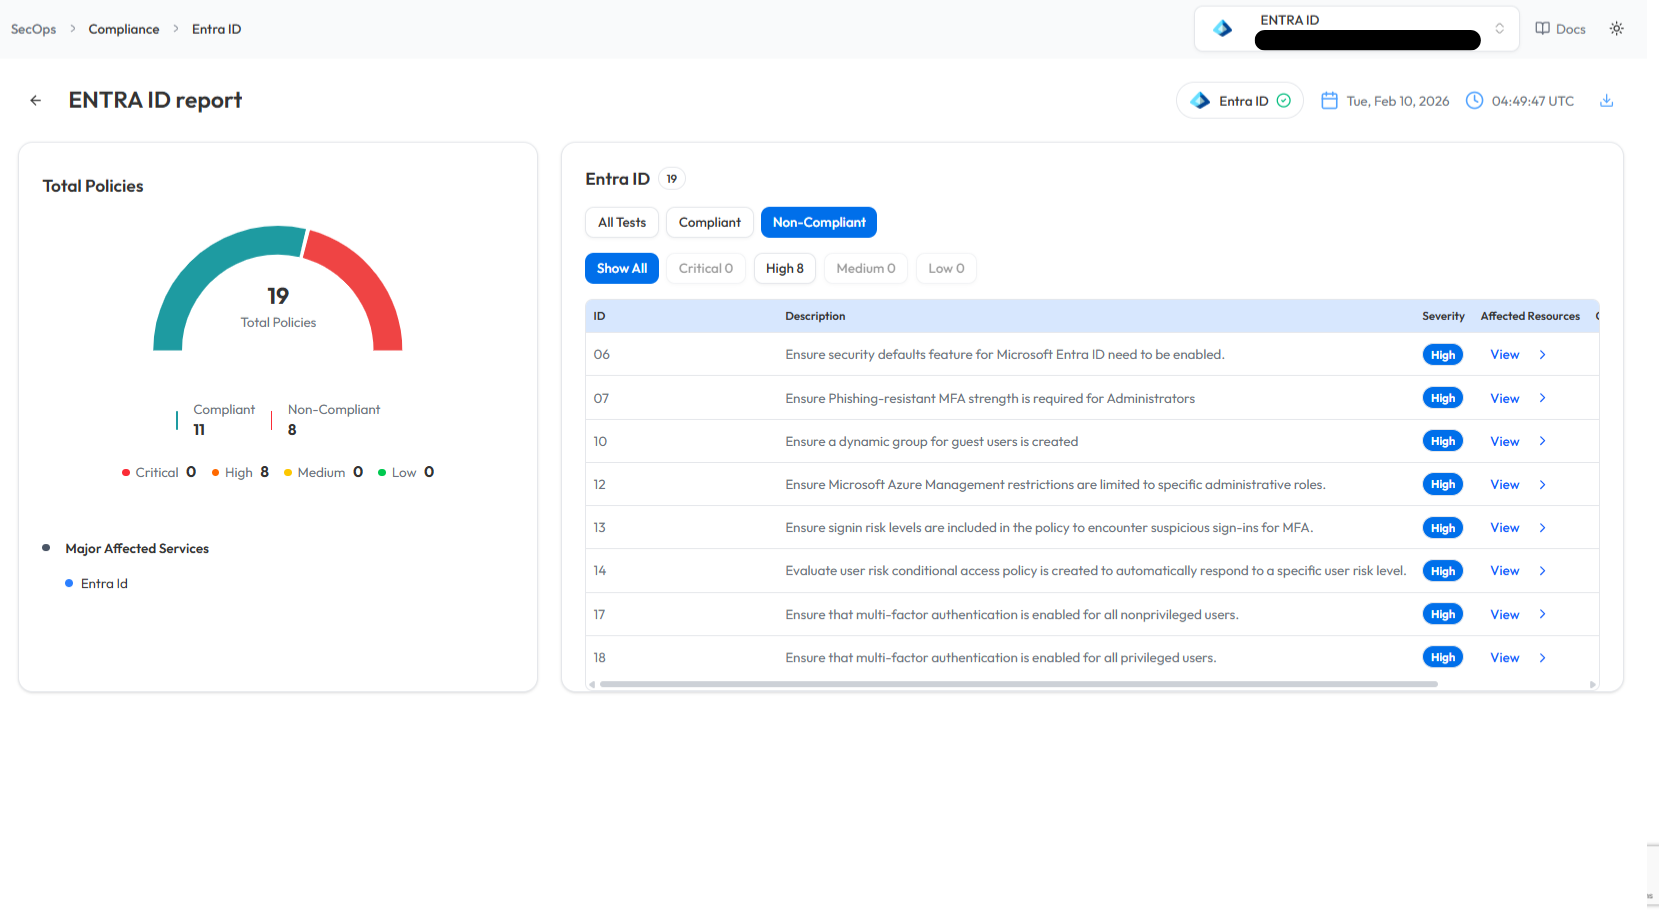
- Review scan findings to identify:
    
    
    - Identity security issues
    - Authentication policy risks
    - Misconfigured access controls

[![Untitled design (29).png](https://xops-docs.axiomio.com/uploads/images/gallery/2026-03/scaled-1680-/z7p7oVLwGtwbv3qZ-untitled-design-29.png)](https://xops-docs.axiomio.com/uploads/images/gallery/2026-03/z7p7oVLwGtwbv3qZ-untitled-design-29.png)
**Microsoft 365 Security Assessment**

- Select Microsoft 365
- Navigate to **SecOps → Compliance Dashboard → M365**.
- This feature evaluates the security posture of Microsoft 365 services.

[![image.png](https://xops-docs.axiomio.com/uploads/images/gallery/2026-03/scaled-1680-/OXhmYU5wgYPVhEe0-image.png)](https://xops-docs.axiomio.com/uploads/images/gallery/2026-03/OXhmYU5wgYPVhEe0-image.png)
- **Verify Microsoft 365 Tenant**  
    
    - Ensure that the **Microsoft 365 tenant** has been connected to the platform.
    - If no tenant is available, integrate the Microsoft account before initiating the scan.
- **Initiate the Scan**
    - Locate the **Microsoft 365 tenant** in the dashboard.
    - Click **Scan** to start the assessment.

[![Untitled design (30).png](https://xops-docs.axiomio.com/uploads/images/gallery/2026-03/scaled-1680-/ip7ap97Bptbb9ivS-untitled-design-30.png)](https://xops-docs.axiomio.com/uploads/images/gallery/2026-03/ip7ap97Bptbb9ivS-untitled-design-30.png)

- **Monitor and Review Results**
    
    
    - Monitor scan progress under **Scan History**.
        
        [![Untitled design (32).png](https://xops-docs.axiomio.com/uploads/images/gallery/2026-03/scaled-1680-/cpKYHsiIGrfGBE4S-untitled-design-32.png)](https://xops-docs.axiomio.com/uploads/images/gallery/2026-03/cpKYHsiIGrfGBE4S-untitled-design-32.png)

        
        
        - Once the scan is completed, review findings such as:
        - Security gaps
        - Compliance violations
        - Configuration risks

[![Untitled design (33).png](https://xops-docs.axiomio.com/uploads/images/gallery/2026-03/scaled-1680-/AXU40AWXbMCiQHXW-untitled-design-33.png)](https://xops-docs.axiomio.com/uploads/images/gallery/2026-03/AXU40AWXbMCiQHXW-untitled-design-33.png)
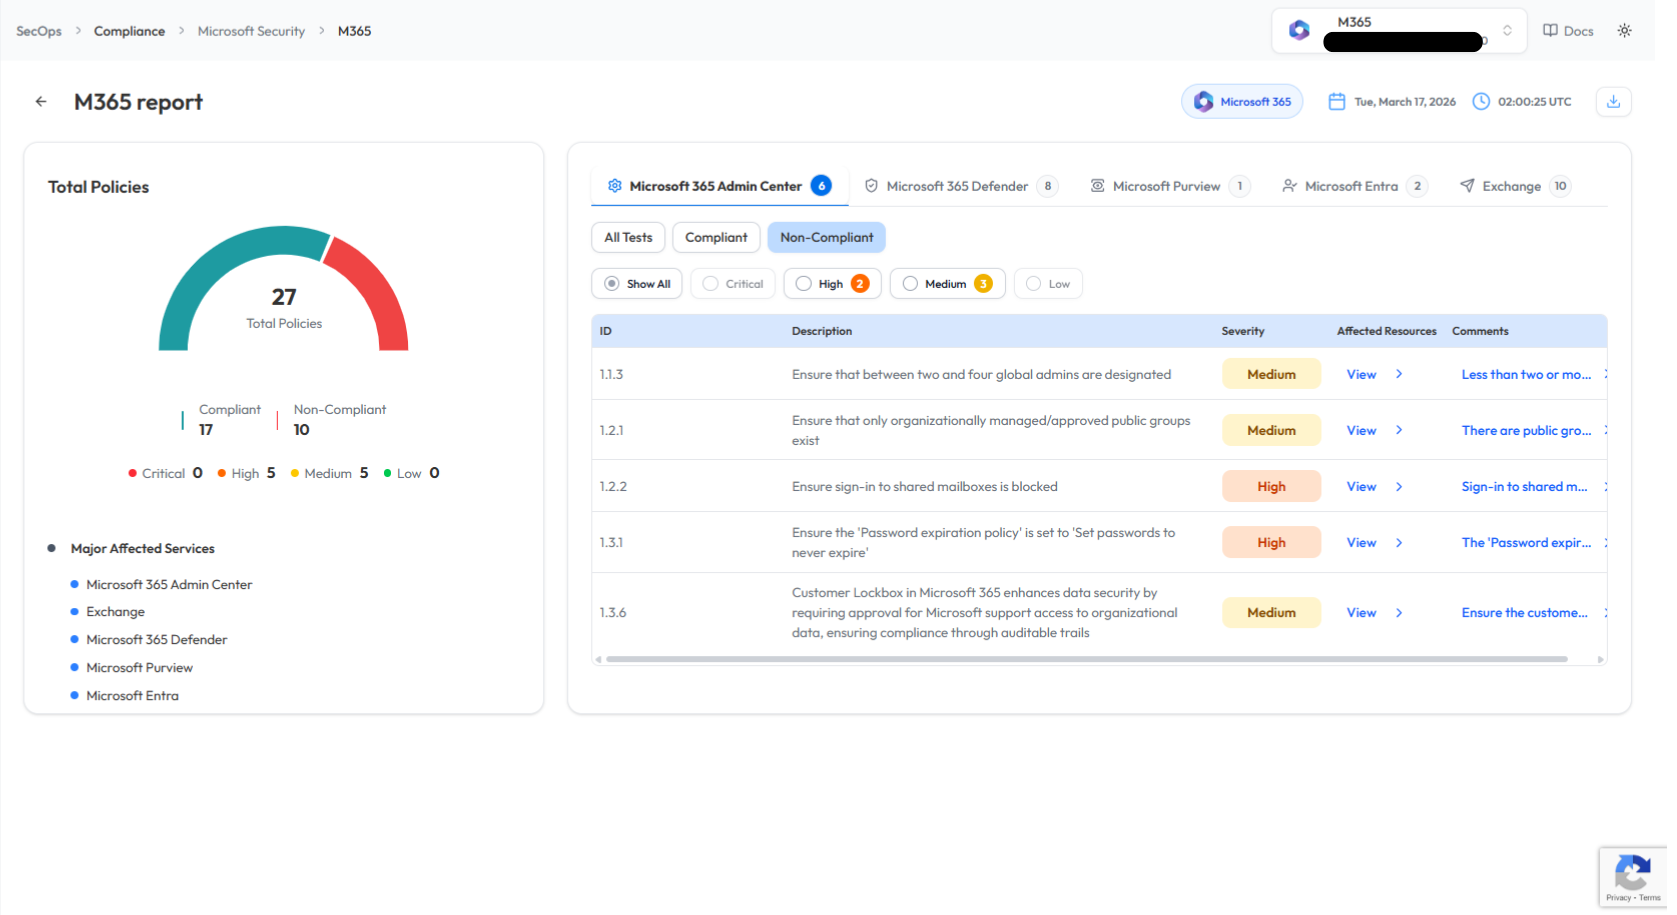
- These results help strengthen the **Microsoft 365 security posture**.

 **Note:**

- For accessing historic reports or addressing scan failures, refer to the [Report History Page](https://xops-docs.axiomio.com/books/xops-360-documentation/page/accessing-and-managing-report-history) for further details and View error.

# Performing Cyber Security Evaluations

#### **OSINT Analysis Scan in Cyber Security**

Perform an OSINT Analysis scan to gather intelligence and identify potential vulnerabilities for a domain.

- **Log In to the Platform**
    - Use your credentials to log in to the platform.
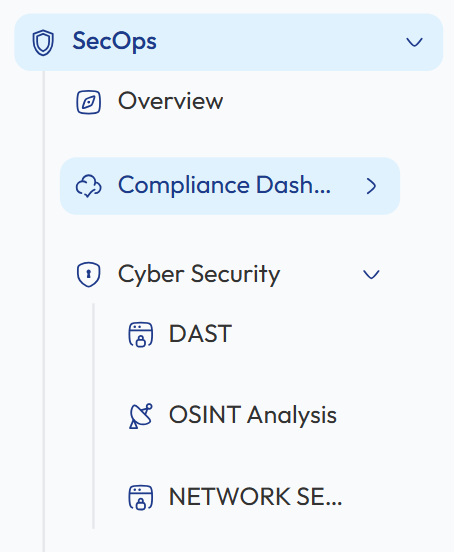
- **Navigate to the Cyber Security Section**
    - Locate the **Side Navigation Bar** on the left side of the platform.
    - Click on the **SecOps** section to expand its options.
- **Open Cyber Security Module**
    
    
    - Under **SecOps**, select **Cyber Security** to access the available security evaluation tools.
- **Select OSINT Analysis Scan**
    - Within the **Cyber Security** section, click on **OSINT Analysis** to open the OSINT scanning interface where you can perform domain intelligence analysis.

[![image.png](https://xops-docs.axiomio.com/uploads/images/gallery/2026-03/scaled-1680-/Z70jdJhTrIz7khFB-image.png)](https://xops-docs.axiomio.com/uploads/images/gallery/2026-03/Z70jdJhTrIz7khFB-image.png)
- **Enter the Domain**
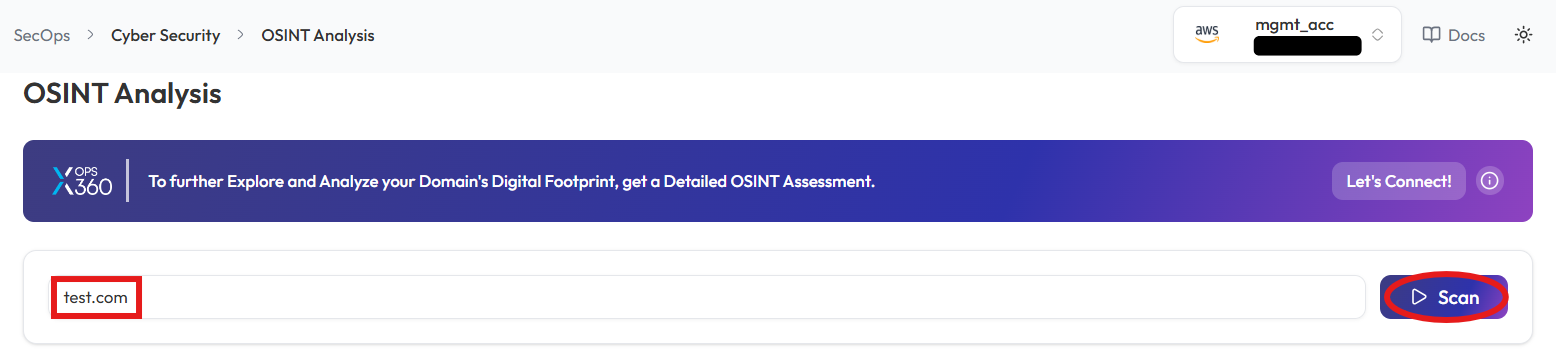
    - In the **OSINT Scan** input field, type the domain you want to scan (e.g., example.com).
- **Initiate the Scan**
    - Click the **Scan** button to start the OSINT scan for the entered domain.

[![Untitled design.png](https://xops-docs.axiomio.com/uploads/images/gallery/2026-03/scaled-1680-/BtF6oUrFwFVa0wQO-untitled-design.png)](https://xops-docs.axiomio.com/uploads/images/gallery/2026-03/BtF6oUrFwFVa0wQO-untitled-design.png)
- **Monitor and Review Results**
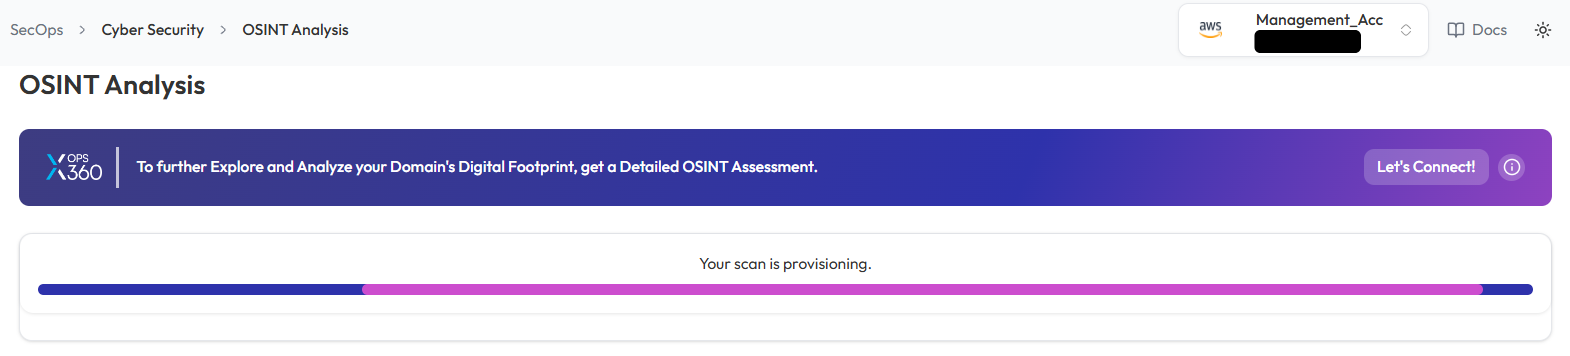
    - Monitor scan progress, and upon completion, a report will be generated then open it.

[![Untitled design (1).png](https://xops-docs.axiomio.com/uploads/images/gallery/2026-03/scaled-1680-/WuZLiPr4r5bXJ9XZ-untitled-design-1.png)](https://xops-docs.axiomio.com/uploads/images/gallery/2026-03/WuZLiPr4r5bXJ9XZ-untitled-design-1.png)
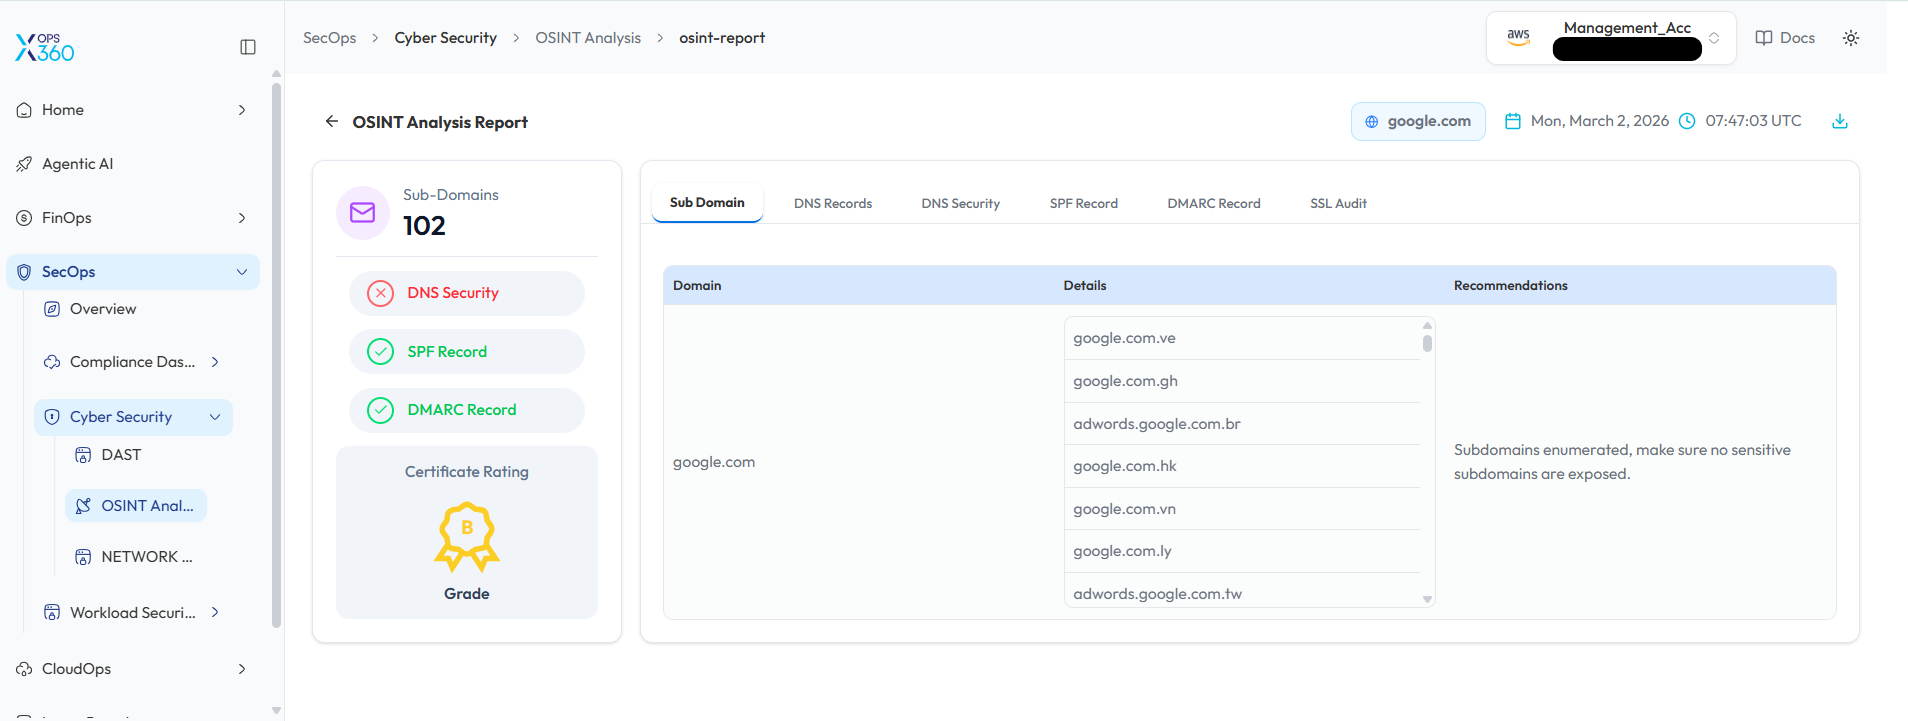
- - Once the scan is complete, detailed results will be displayed for analysis.
    - Use the results to identify potential vulnerabilities or gather intelligence on the domain.

[![Untitled design (2).png](https://xops-docs.axiomio.com/uploads/images/gallery/2026-03/scaled-1680-/32abrMXMuJQzWEs5-untitled-design-2.png)](https://xops-docs.axiomio.com/uploads/images/gallery/2026-03/32abrMXMuJQzWEs5-untitled-design-2.png)
#### **DAST Scan in Cyber Security**

Conduct a Dynamic Application Security Test (DAST) to detect vulnerabilities in a web application.

- **Log In to the Platform**
    - Use your credentials to log in to the platform.
- **Navigate to the Cyber Security Section**
    - Locate the **Side Navigation Bar** on the left side of the platform.
    - Click on the **SecOps** section to expand its options.
- **Open Cyber Security Module**
    - Under **SecOps**, select Cyber Security to access the available security tools.
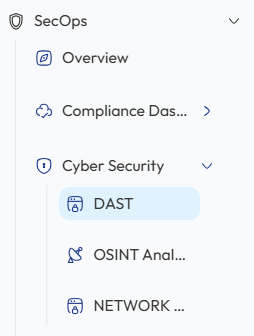
- **Select the DAST Scan Option**
    - Within the **Cyber Security** section, select **DAST** to open the DAST scanning interface and begin testing the web application for vulnerabilities.

[![image.png](https://xops-docs.axiomio.com/uploads/images/gallery/2026-03/scaled-1680-/9o2a98uPloaE5YK5-image.png)](https://xops-docs.axiomio.com/uploads/images/gallery/2026-03/9o2a98uPloaE5YK5-image.png)
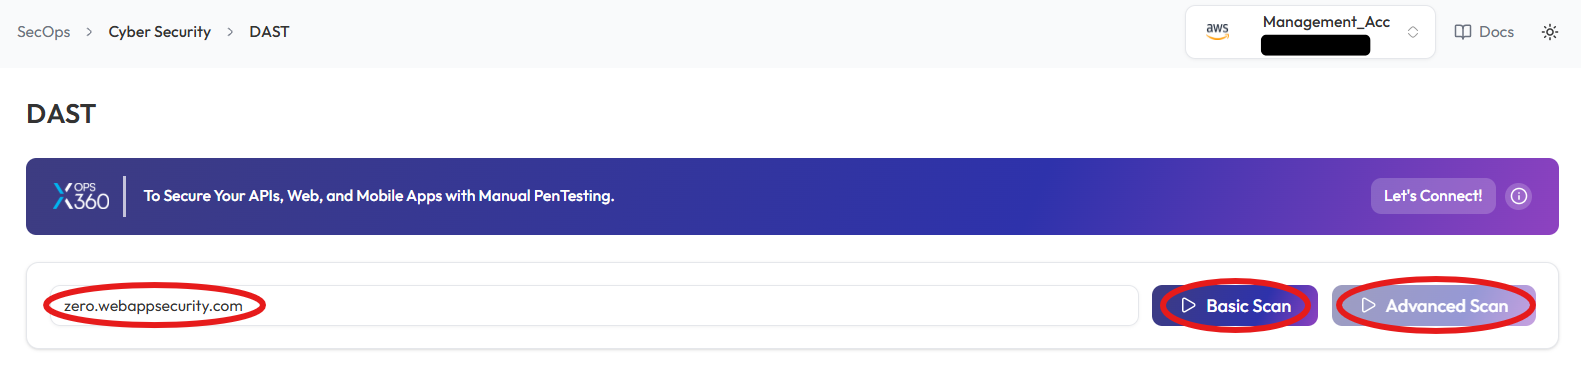
- **Enter the Domain**
    - In the **DAST Scan** input field, type the domain you want to scan (e.g., example.com).
- **Choose the Type of Scan**
    - Select the type of scan based on your needs: 
        - **Basic Scan**: Performs a general security assessment of the domain.
        - **Advanced Scan**: Conducts a thorough and detailed security evaluation with advanced checks.
- **Initiate the Scan**  
    
    - Click respective button to start scanning process

[![Untitled design (3).png](https://xops-docs.axiomio.com/uploads/images/gallery/2026-03/scaled-1680-/0ifi5jic2sH8Z2dg-untitled-design-3.png)](https://xops-docs.axiomio.com/uploads/images/gallery/2026-03/0ifi5jic2sH8Z2dg-untitled-design-3.png)
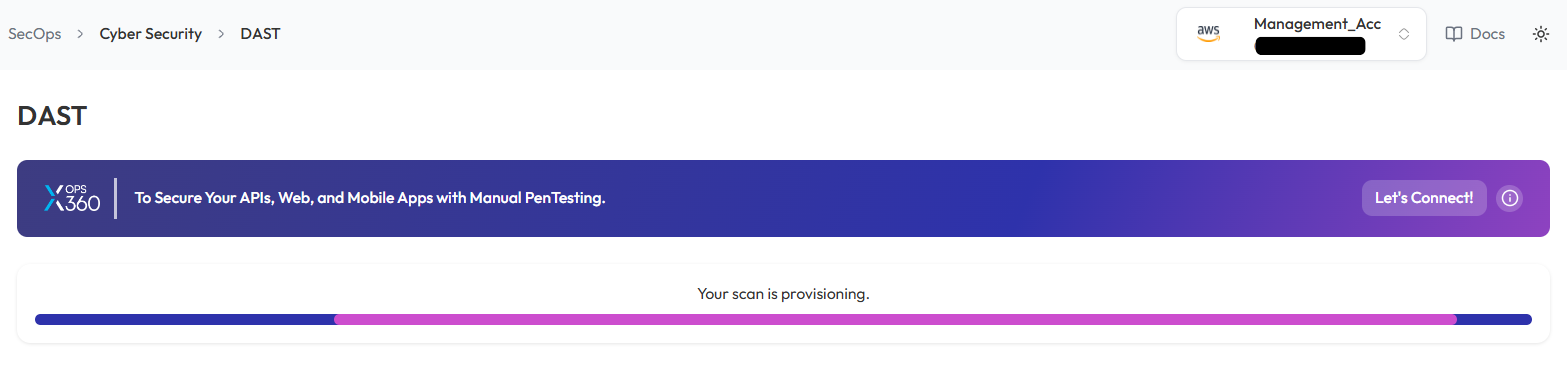
- **Monitor and Review Results**
    - Monitor scan progress, and upon completion, a report will be generated then open it.

[![Untitled design (4).png](https://xops-docs.axiomio.com/uploads/images/gallery/2026-03/scaled-1680-/2jyrBj2r27elXJbM-untitled-design-4.png)](https://xops-docs.axiomio.com/uploads/images/gallery/2026-03/2jyrBj2r27elXJbM-untitled-design-4.png)
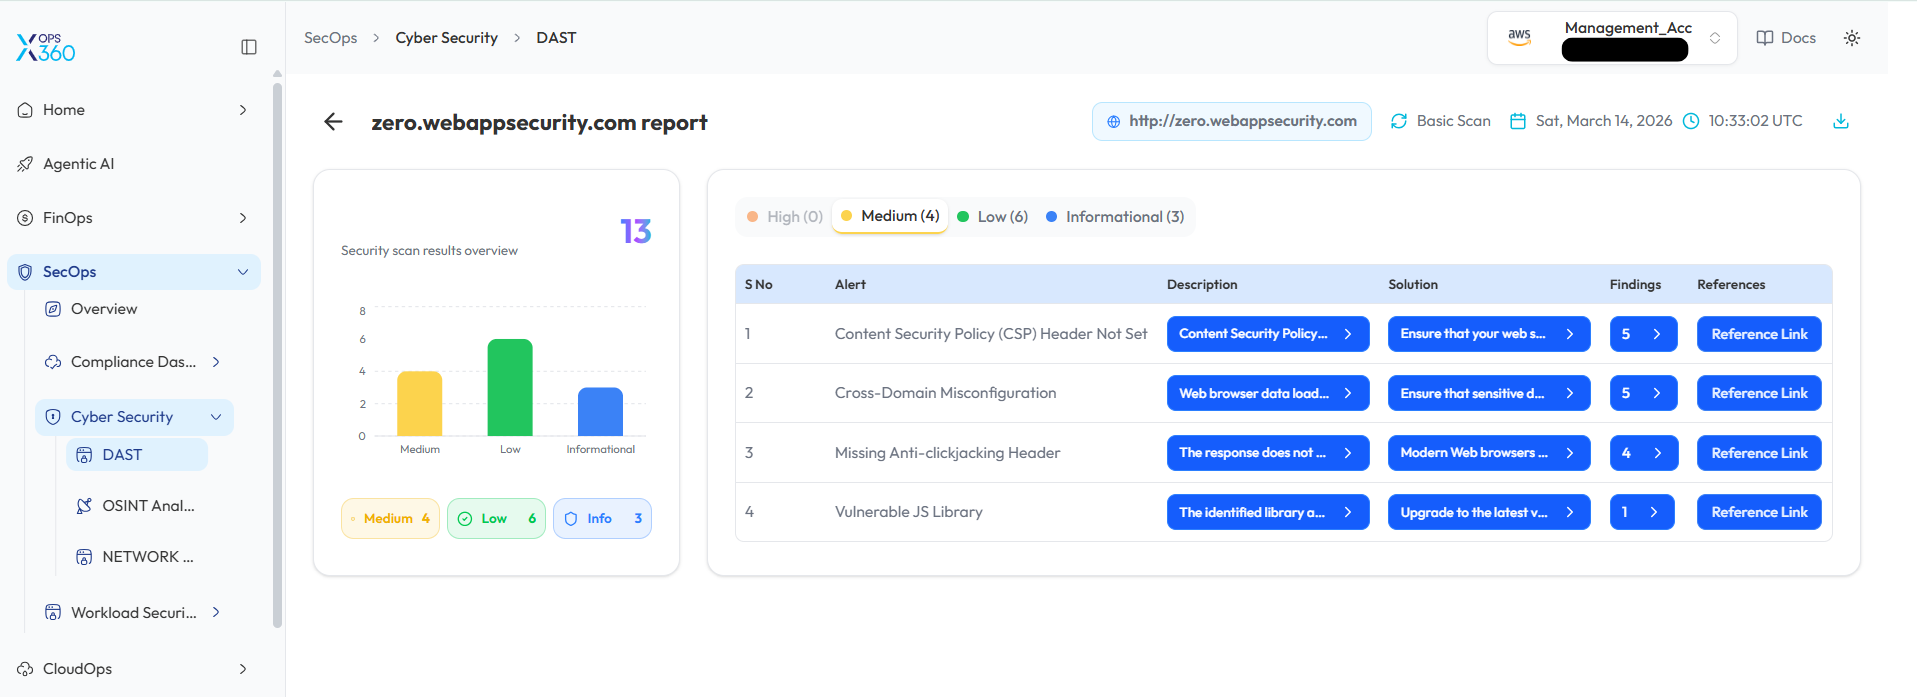
- - After the scan is complete, detailed results will be displayed for review.
    - Analyze the findings to identify vulnerabilities and take necessary actions.

[![Untitled design (5).png](https://xops-docs.axiomio.com/uploads/images/gallery/2026-03/scaled-1680-/GeU5PGTO6wWrmiy1-untitled-design-5.png)](https://xops-docs.axiomio.com/uploads/images/gallery/2026-03/GeU5PGTO6wWrmiy1-untitled-design-5.png)


#### **Network Security Scan in Cyber Security**

Conduct a network security scan to identify vulnerabilities, misconfigurations, and potential threats.

- **Log In to the Platform**
    - Enter your **username** and **password** to access the platform.
- **Navigate to the Cyber Security Section**
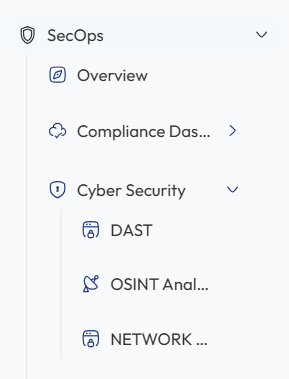
    - Locate the **Side Navigation Bar** on the left side of the platform.
    - Click on the **SecOps** section to expand its options.
- **Open Cyber Security Module**  
    
    - Under ****SecOps**,** select ****Cyber Security**** to access the available security tools.
- **Select the Network Security Scan Option**
    - Within the **Cyber Security** section, select **Network Security** to initiate the network security scanning process and analyze potential risks.

[![image.png](https://xops-docs.axiomio.com/uploads/images/gallery/2026-03/scaled-1680-/rD47n8RSyW8wHoLh-image.png)](https://xops-docs.axiomio.com/uploads/images/gallery/2026-03/rD47n8RSyW8wHoLh-image.png)
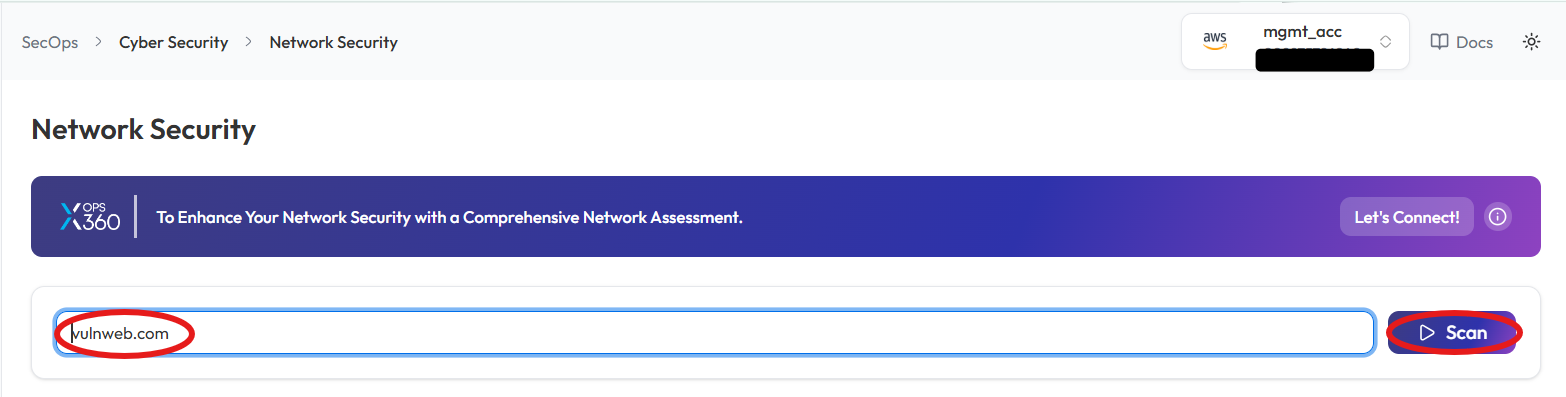
- **Enter the Domain**
    - In the **Network Security Scan** field, type the domain you want to scan (e.g., **example.com** or **IP Address**)
- **Initiate the Scan**
    - Click the **Scan** button to begin the Network Security Scan.

[![Untitled design (6).png](https://xops-docs.axiomio.com/uploads/images/gallery/2026-03/scaled-1680-/Yacy7ZdgkNuN4SXw-untitled-design-6.png)](https://xops-docs.axiomio.com/uploads/images/gallery/2026-03/Yacy7ZdgkNuN4SXw-untitled-design-6.png)
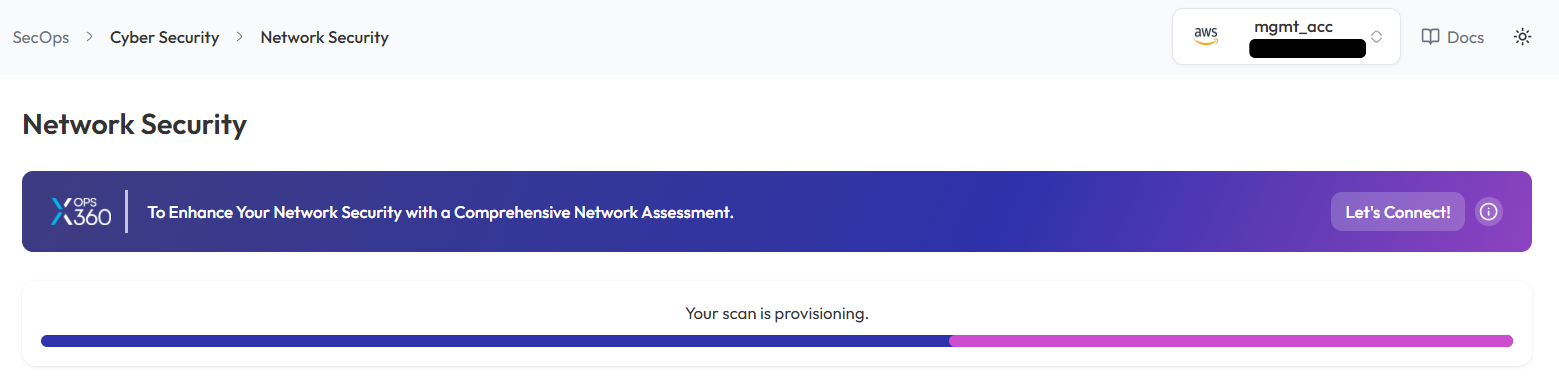
- **Monitor and Review Results**
    - Monitor scan progress, and upon completion, a report will be generated then open it.

[![Untitled design (7).png](https://xops-docs.axiomio.com/uploads/images/gallery/2026-03/scaled-1680-/gLb7LrWnyBYNvtk6-untitled-design-7.png)](https://xops-docs.axiomio.com/uploads/images/gallery/2026-03/gLb7LrWnyBYNvtk6-untitled-design-7.png)
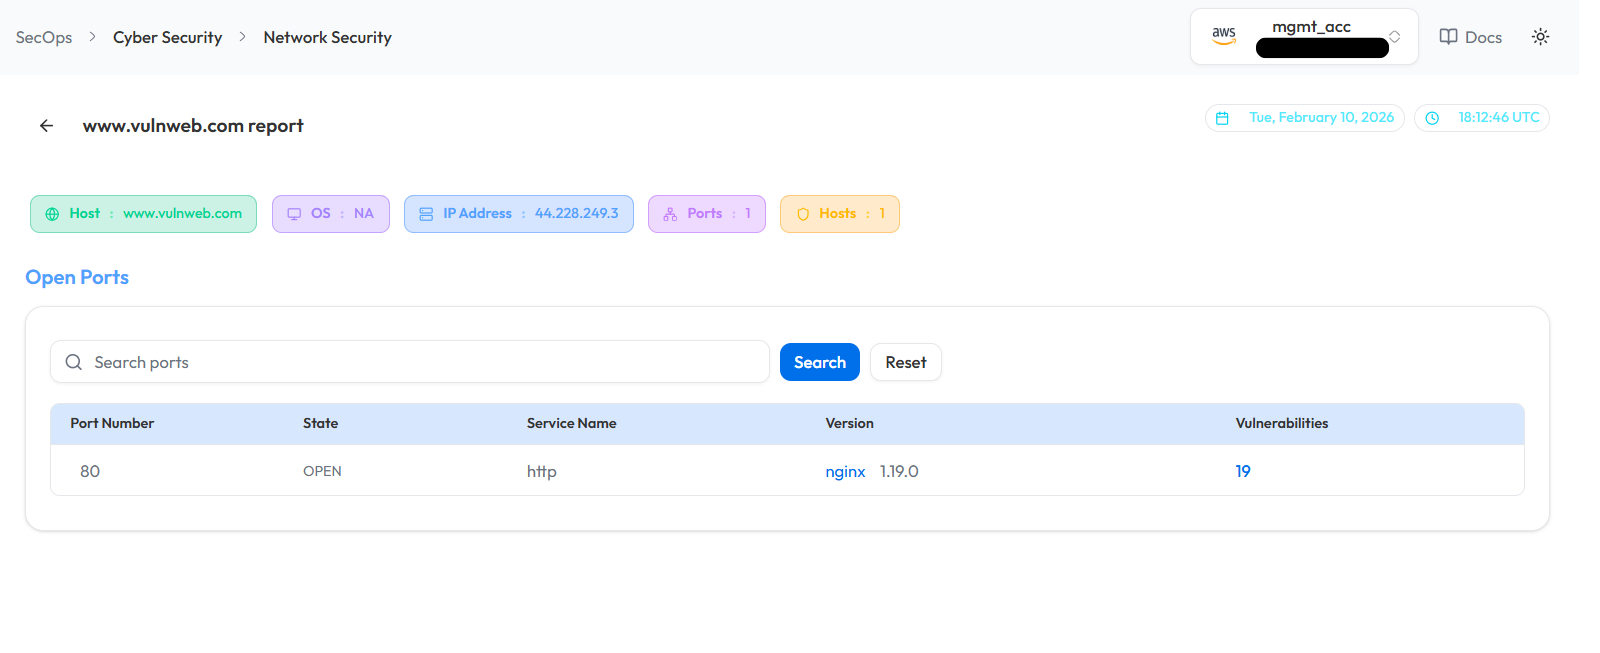
- - Once the scan is complete, detailed results will be displayed for: 
        - Identified vulnerabilities
        - Network misconfigurations
        - Potential threats

[![Untitled design (8).png](https://xops-docs.axiomio.com/uploads/images/gallery/2026-03/scaled-1680-/TGwF2uGmMJEjmbkH-untitled-design-8.png)](https://xops-docs.axiomio.com/uploads/images/gallery/2026-03/TGwF2uGmMJEjmbkH-untitled-design-8.png)
**Note:**

- For accessing historic reports or addressing scan failures, refer to the [Report History Page](https://xops-docs.axiomio.com/books/xops-360-documentation/page/accessing-and-managing-report-history) for further details and View error.

# Workload Security

Techniques for protecting workloads deployed across multiple cloud platforms by leveraging security scans for container images and machine images in AWS and Azure.

#### **Scan in Workload Security - AWS (AMI &amp; ECR)**

- **Log in to the Platform**
    - Access the platform and sign in using your credentials.
- **Navigate to Cloud Ops**
    - Locate the Side Navigation Bar on the left-hand side of the screen.
    - Click on the **Workload Security** tab to access its features.

[![image.png](https://xops-docs.axiomio.com/uploads/images/gallery/2025-02/scaled-1680-/fwTMfoQY2VKcs91t-image.png)](https://xops-docs.axiomio.com/uploads/images/gallery/2025-02/fwTMfoQY2VKcs91t-image.png)
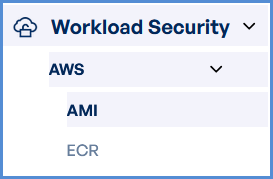
- **Verify AWS Account**
    - Ensure that an AWS account has already been added to the platform.
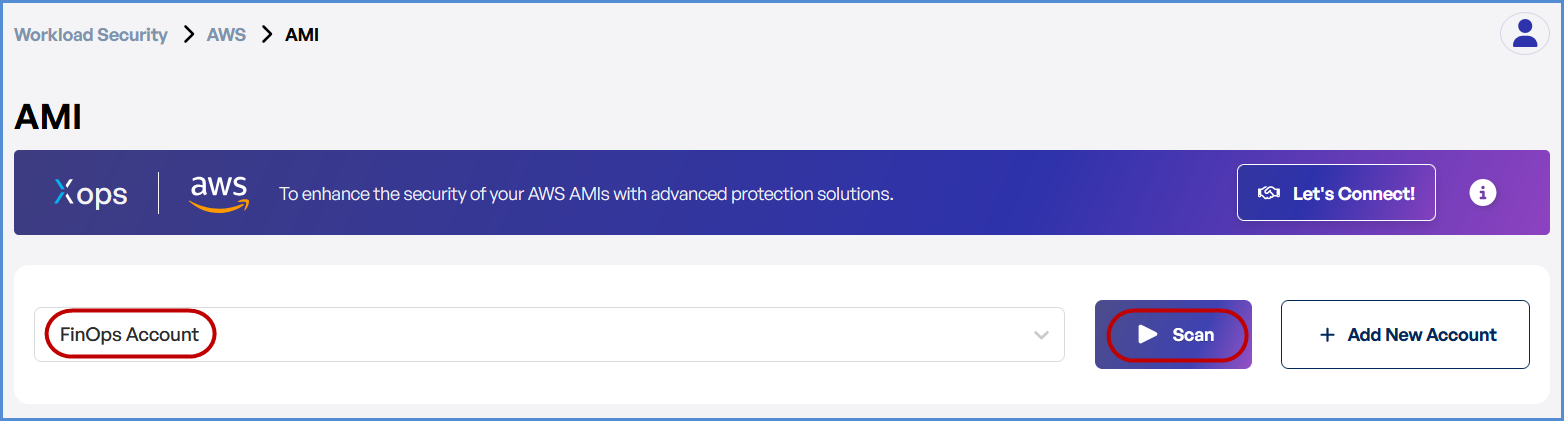
    - If no account is available, click on **+ Add New Account**..
- **Select a Scan Type**
    - Choose from the following scan options:
    - **AMI (Amazon Machine Image)** scan for VM security.
    - **ECR (Elastic Container Registry)** scan for container images.
- **Initiate the Scan**
    - Select the target AWS account.
    - Click **Scan** to open a new input form.
![image.png](https://xops-docs.axiomio.com/uploads/images/gallery/2025-02/scaled-1680-/Box4MGCIm8Rt3DgE-image.png)

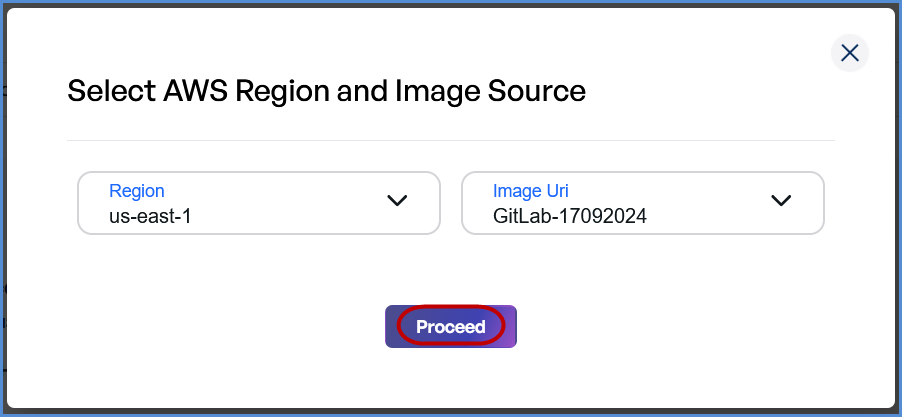
- - Choose the **Region** from the drop down list.
    - Provide the **Image URI** (enabled after Region selection).
    - Click **Proceed** to start the scan.

[![image.png](https://xops-docs.axiomio.com/uploads/images/gallery/2025-02/scaled-1680-/MAmyAp6tPClaJPka-image.png)](https://xops-docs.axiomio.com/uploads/images/gallery/2025-02/MAmyAp6tPClaJPka-image.png)
- **Monitor and Review Results**
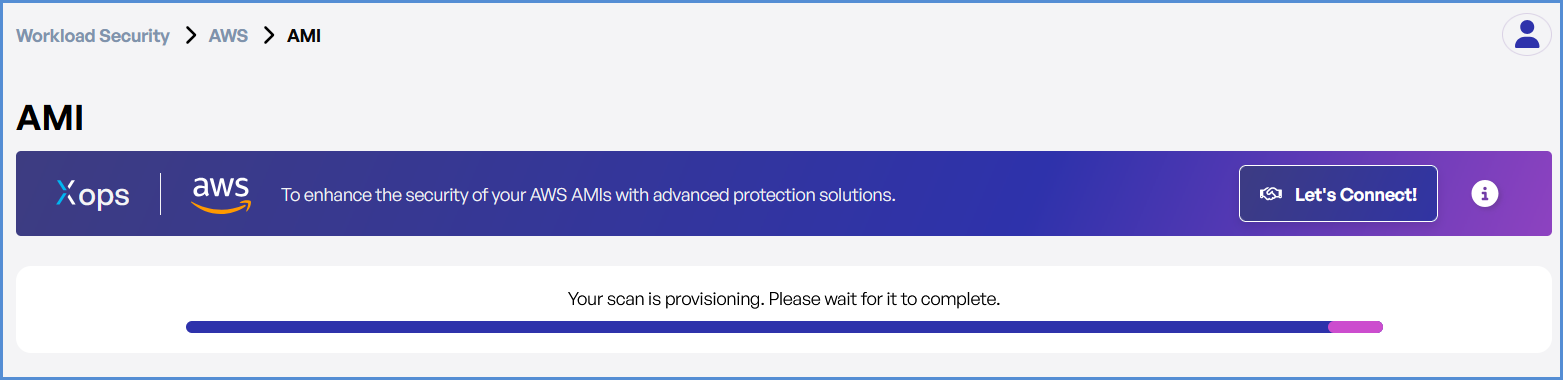
    - Monitor scan progress, and upon completion, a report will be generated then open it.

[![image.png](https://xops-docs.axiomio.com/uploads/images/gallery/2025-02/scaled-1680-/ugfG6DGHexb0ZyGO-image.png)](https://xops-docs.axiomio.com/uploads/images/gallery/2025-02/ugfG6DGHexb0ZyGO-image.png)
- - Upon completion, review results highlighting: 
        - Security risks
        - Vulnerabilities
        - Compliance issues

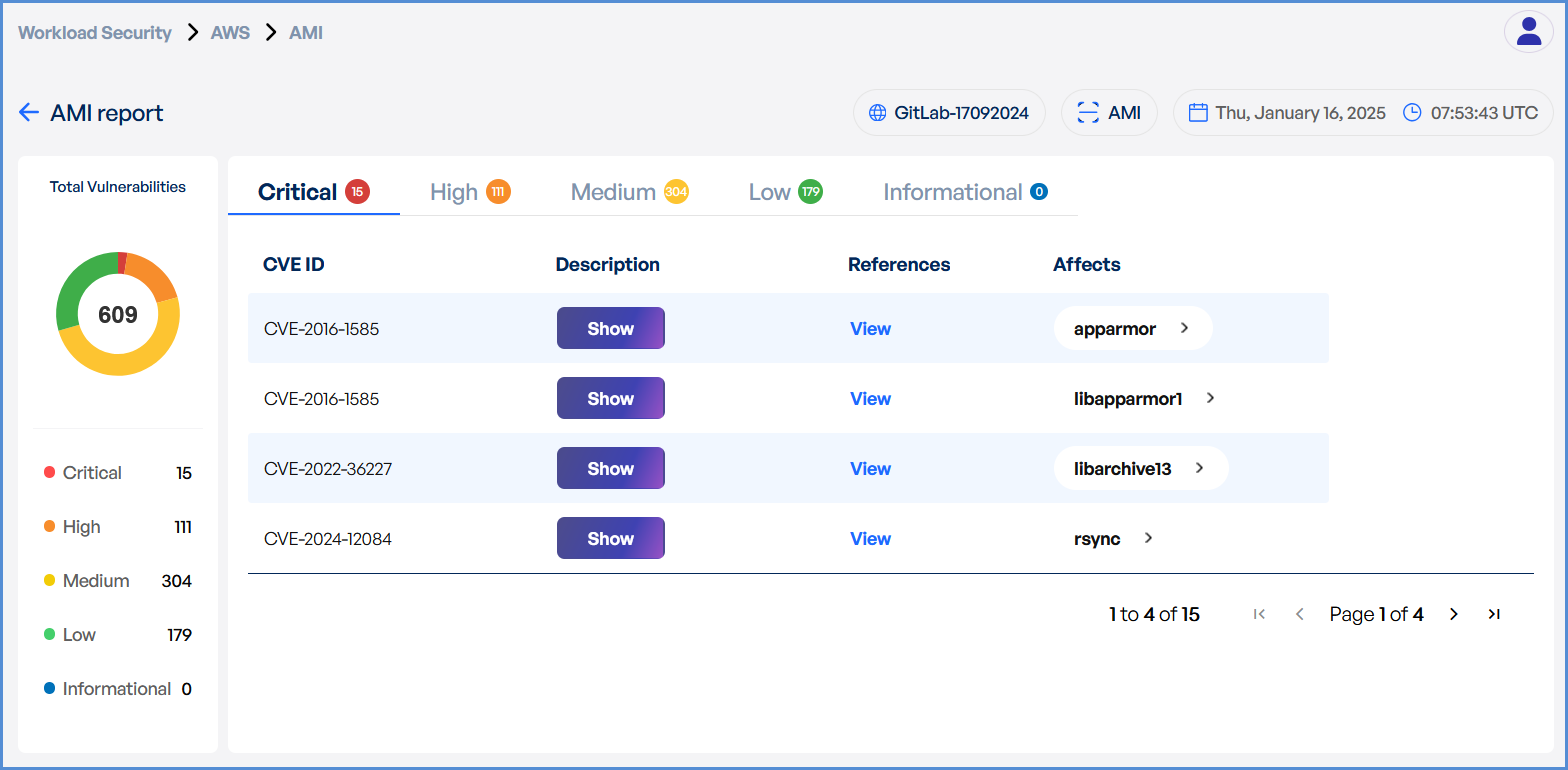
[![image.png](https://xops-docs.axiomio.com/uploads/images/gallery/2025-02/scaled-1680-/Q2xmNtMaW2MHzryW-image.png)](https://xops-docs.axiomio.com/uploads/images/gallery/2025-02/Q2xmNtMaW2MHzryW-image.png)

#### **Scan in Workload Security - Azure (ACR)**

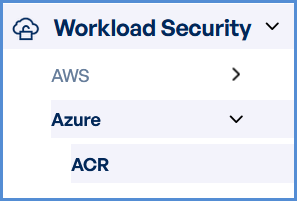
- - **Log in to the Platform**
        - Access the platform and sign in using your credentials.
    - **Navigate to Cloud Ops**
        - Locate the Side Navigation Bar on the left-hand side of the screen.
        - Click on the **Workload Security** tab to access its features.

[![image.png](https://xops-docs.axiomio.com/uploads/images/gallery/2025-02/scaled-1680-/5wbuSpm0c5ZSXu16-image.png)](https://xops-docs.axiomio.com/uploads/images/gallery/2025-02/5wbuSpm0c5ZSXu16-image.png)
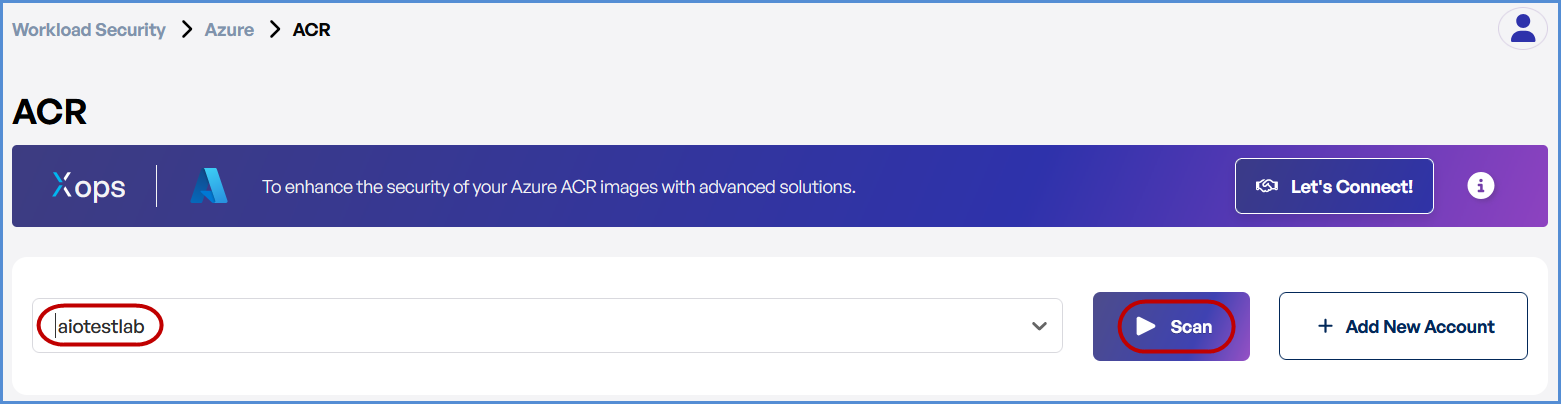
- **Verify Azure Account**
    - Ensure that an Azure account has already been added to the platform.
    - If no account is available, click on **+ Add New Account**..
- **Choose ACR Scan Option**
    - Select **ACR (Azure Container Registry)** Scan.
- **Initiate the Scan**
    - Select the target Azure account.
    - Click **Scan** to open a new input form.

[![image.png](https://xops-docs.axiomio.com/uploads/images/gallery/2025-02/scaled-1680-/OQ7jZTmqtYuy4Bxc-image.png)](https://xops-docs.axiomio.com/uploads/images/gallery/2025-02/OQ7jZTmqtYuy4Bxc-image.png)
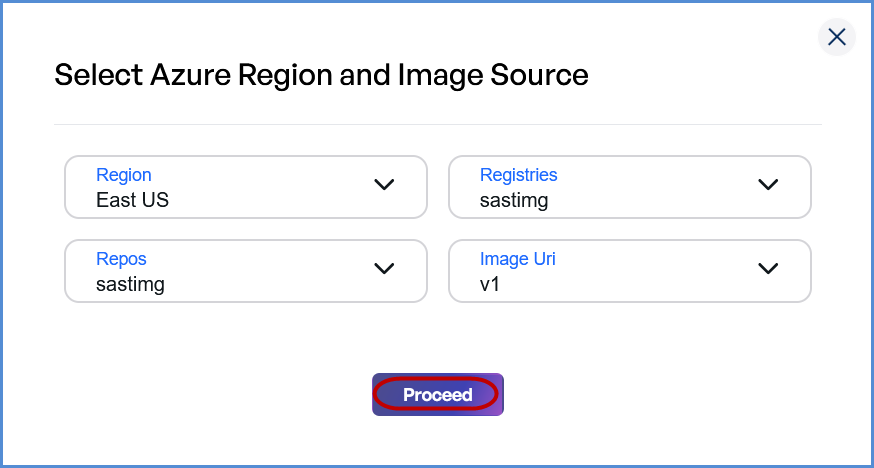
- - Choose the **Region** from the drop down list.
    - Select the **Registry** (enabled after Region selection).
    - Choose the **Repository** (enabled after Registry selection).
    - Provide the **Image URI** (enabled after Repository selection).
    - Click **Proceed** to start the scan.

[![image.png](https://xops-docs.axiomio.com/uploads/images/gallery/2025-02/scaled-1680-/xGrv7FP2BaJlsprl-image.png)](https://xops-docs.axiomio.com/uploads/images/gallery/2025-02/xGrv7FP2BaJlsprl-image.png)
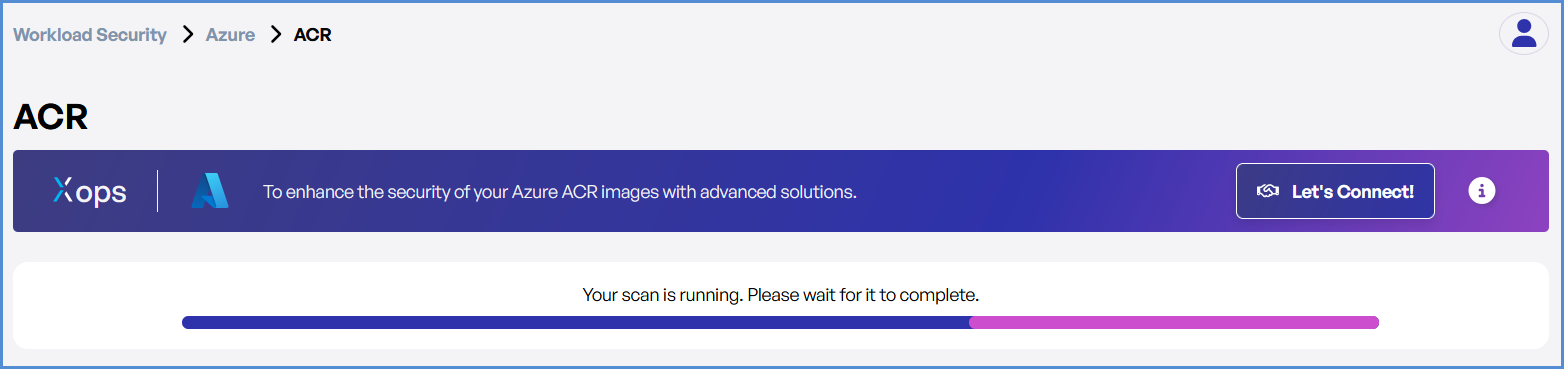
- **Monitor and Review Results**
    - Monitor scan progress, and upon completion, a report will be generated then open it.

[![image.png](https://xops-docs.axiomio.com/uploads/images/gallery/2025-02/scaled-1680-/7oYt3q62tDyIYk57-image.png)](https://xops-docs.axiomio.com/uploads/images/gallery/2025-02/7oYt3q62tDyIYk57-image.png)
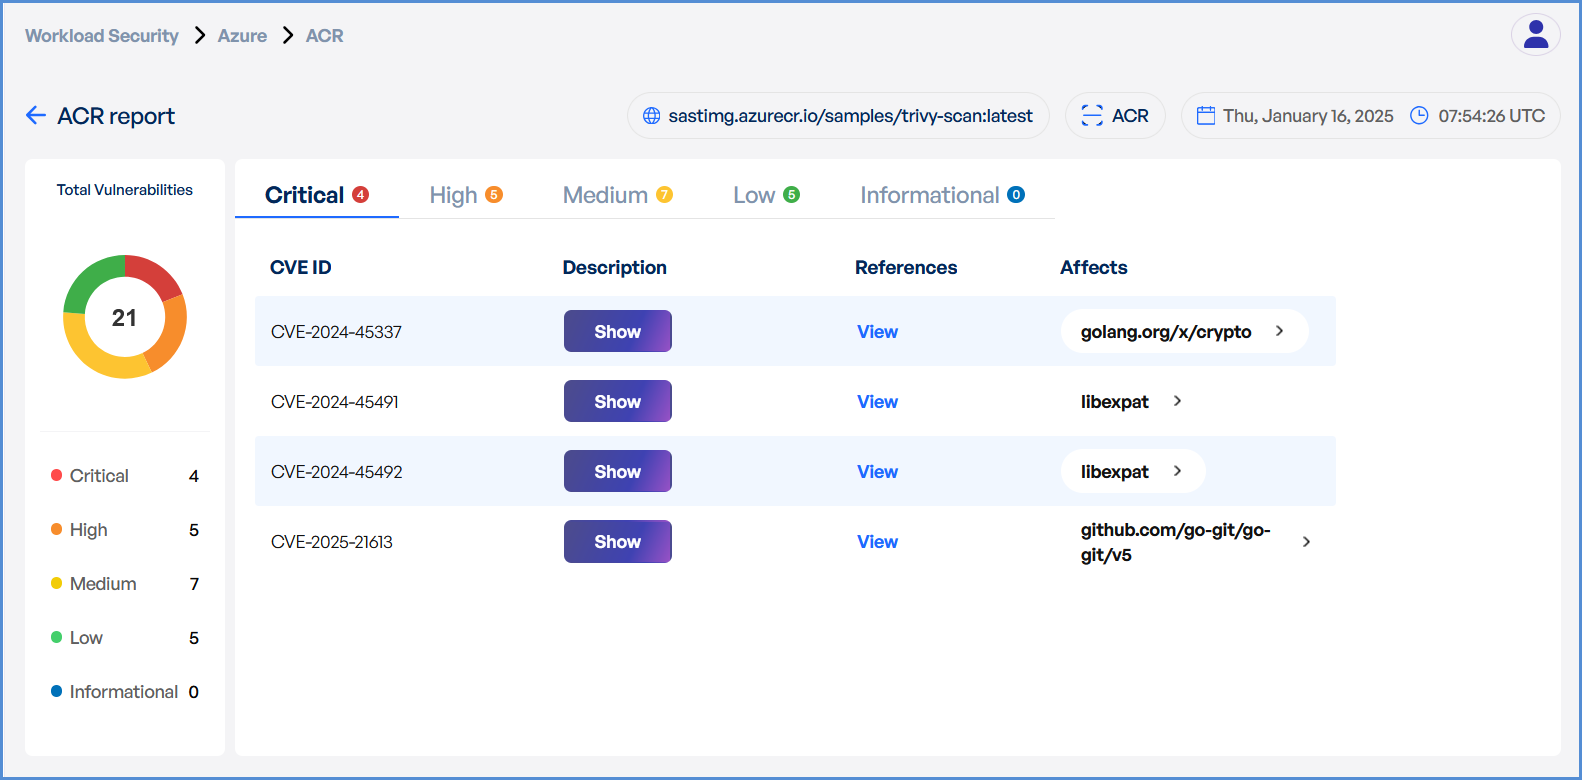
- - Upon completion, review results highlighting: 
        - Security risks
        - Vulnerabilities
        - Compliance issues

[![image.png](https://xops-docs.axiomio.com/uploads/images/gallery/2025-02/scaled-1680-/KLExHYVLY5X0l1Iz-image.png)](https://xops-docs.axiomio.com/uploads/images/gallery/2025-02/KLExHYVLY5X0l1Iz-image.png)
**Note:**

- For accessing historic reports or addressing scan failures, refer to the [Report History Page](https://xops-docs.axiomio.com/books/xops-360-documentation/page/accessing-and-managing-report-history) for further details and View error.

# Cloud Finops

# Cloud Finops - Cost Management

**Cloud FinOps** centralizes financial operations for cloud environments, enabling teams to monitor spending, analyze usage patterns, and optimize cloud costs efficiently. The platform provides unified visibility into AWS cloud spending, helping organizations track financial performance, detect anomalies, and identify potential cost-saving opportunities.

The **FinOps module** includes the following sections:

- **Overview**
- **AWS Cost Analyzer**
- **Saving Opportunities**
- **AWS Cost Map**

These features help finance and engineering teams gain deeper insights into cloud spending and improve cost optimization strategies.

### FinOps Overview

The **FinOps Overview** dashboard provides a summary of cloud financial operations and cost monitoring.

- **Current Month Spend** – Displays the total AWS spending for the current billing period.
- **Spend vs Last Month** – Shows cost changes compared to the previous month.
- **Potential Yearly Savings** – Estimates cost reductions achievable through savings plans.
- **Budget Status** – Displays configured budget monitoring alerts.

The dashboard also includes a **Savings Plan Overview** section that tracks:

- Active savings plans
- Savings plan coverage
- Total commitment
- Estimated yearly savings

Additionally, the **Daily Cost Trend** chart helps visualize spending patterns and identify cost fluctuations over time.

🔹 **Why it’s useful:**  
This overview provides a centralized snapshot of financial operations, allowing teams to quickly evaluate cloud cost performance and potential optimization opportunities.

[![Untitled design (6).png](https://xops-docs.axiomio.com/uploads/images/gallery/2026-03/scaled-1680-/3TYZiUXf7Gd9HfZH-untitled-design-6.png)](https://xops-docs.axiomio.com/uploads/images/gallery/2026-03/3TYZiUXf7Gd9HfZH-untitled-design-6.png)
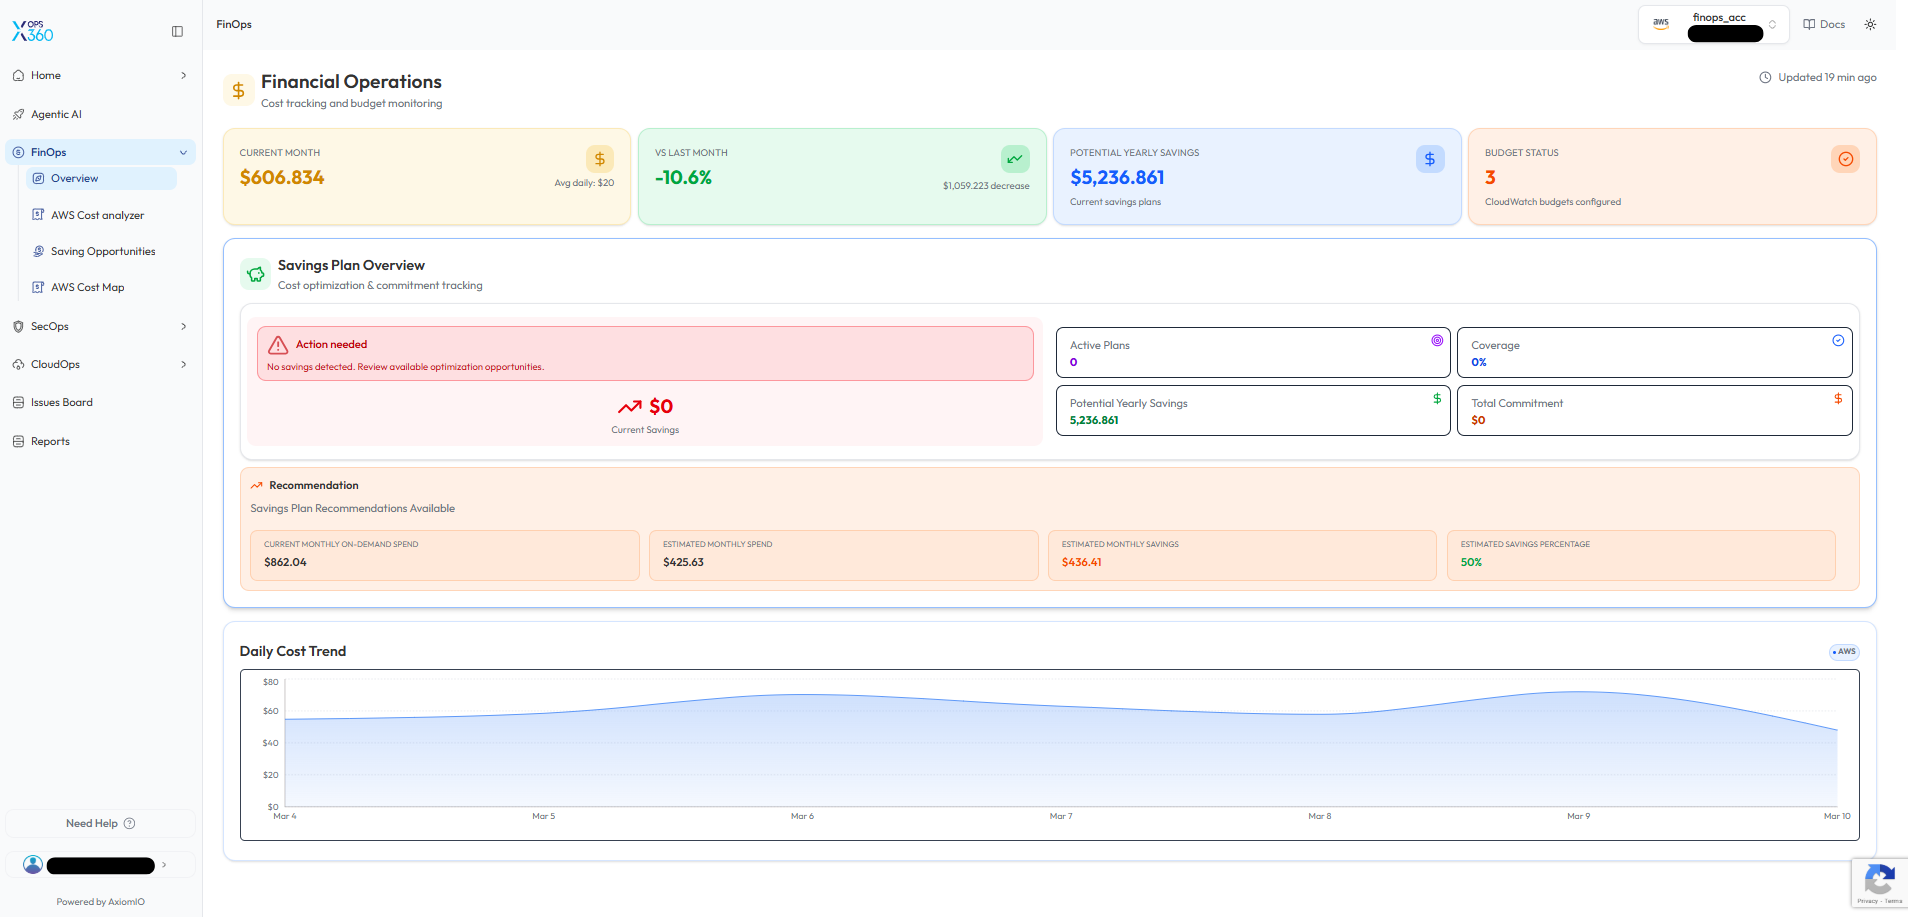
---

### **AWS Cost Analyzer**

The **AWS Cost Analyzer** provides detailed visibility into AWS spending and cost distribution.

Key capabilities include:

- **Cost Summary** – Displays total spend to date, forecasted costs, and comparisons with previous months.
- **Cost Monitor** – Detects anomalies or unusual spending patterns.
- **Monthly AWS Spend History** – Shows historical cost trends across multiple months.
- **AWS Spend by Region** – Visualizes spending distribution across AWS regions.
- **AWS Spend by Service** – Highlights the services contributing the most to overall costs.

🔹 **Why it’s better:**  
Unlike basic billing dashboards, this analyzer provides **multi-dimensional insights** into spending patterns, making it easier to identify cost drivers and detect anomalies early.

[![Untitled design (7).png](https://xops-docs.axiomio.com/uploads/images/gallery/2026-03/scaled-1680-/hhpjWicR880cGvvV-untitled-design-7.png)](https://xops-docs.axiomio.com/uploads/images/gallery/2026-03/hhpjWicR880cGvvV-untitled-design-7.png)
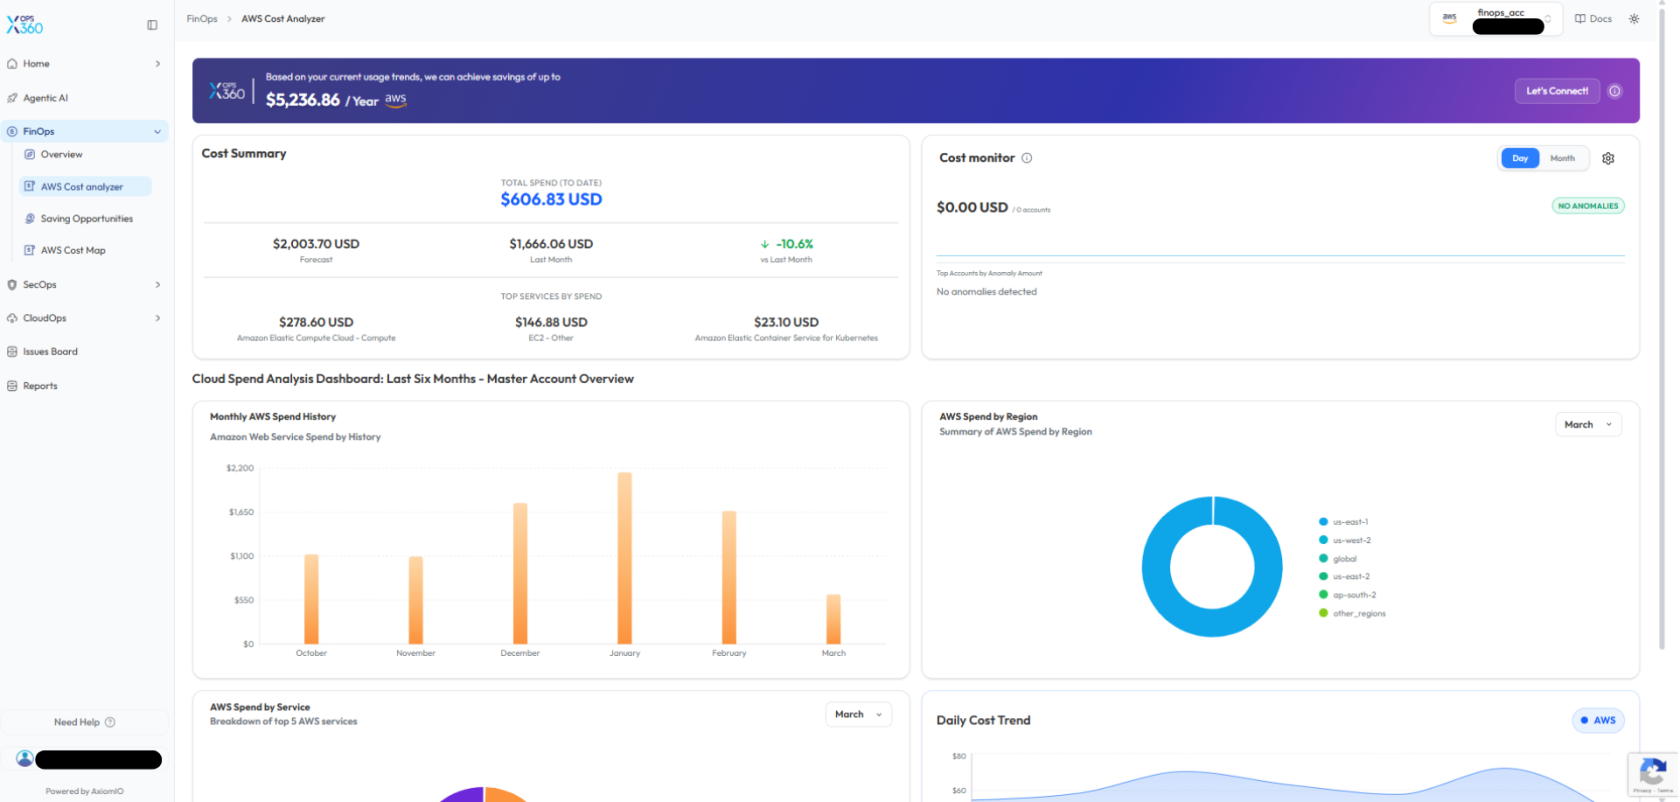
---

### Saving Opportunities

The **Saving Opportunities** section identifies AWS services that could benefit from cost optimization strategies.

The platform evaluates usage patterns and suggests opportunities for services such as:

- **Amazon Relational Database Service (RDS)**
- **Amazon Redshift**
- **Amazon ElastiCache**
- **Amazon MemoryDB**
- **Amazon OpenSearch Service**

These insights help teams determine where **Reserved Instances or savings plans** can reduce costs.

🔹 **Why it’s better:**  
Instead of manually analyzing cloud usage, this feature automatically identifies workloads that could benefit from optimized pricing models, helping organizations reduce cloud expenses efficiently.

[![Untitled design (8).png](https://xops-docs.axiomio.com/uploads/images/gallery/2026-03/scaled-1680-/BsU664iAh06Rw39c-untitled-design-8.png)](https://xops-docs.axiomio.com/uploads/images/gallery/2026-03/BsU664iAh06Rw39c-untitled-design-8.png)
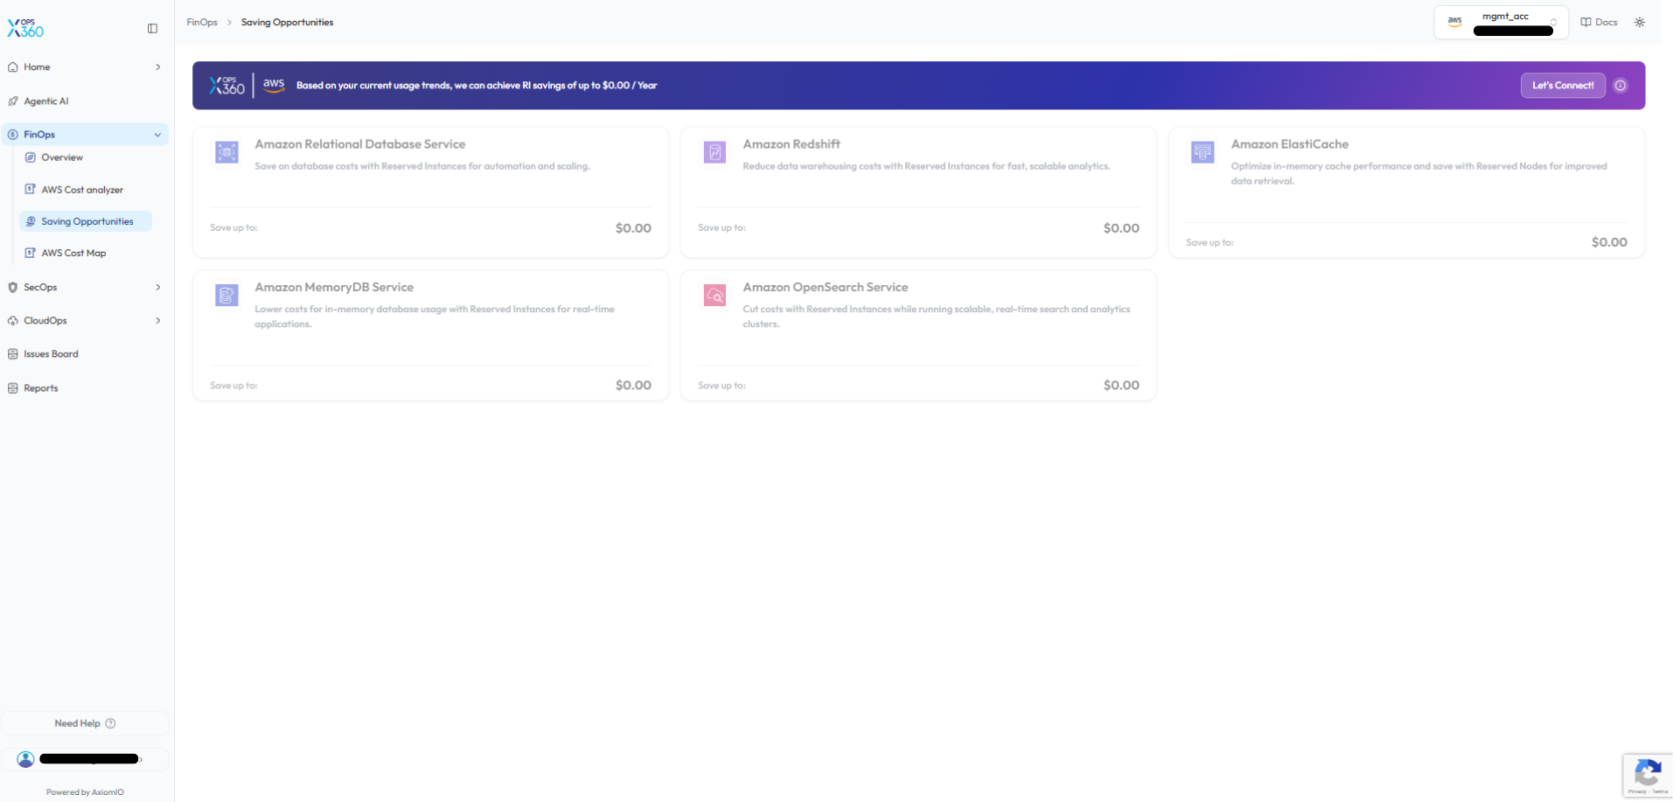
---

### AWS Cost Map

The **AWS Cost Map** provides a detailed visualization of AWS cost and usage trends.

Key features include:

- **Total Cost** – Displays the overall cloud spending within the selected time range.
- **Average Daily Cost** – Shows average daily spending trends.
- **Service Count** – Displays the number of AWS services contributing to costs.

Additional capabilities include:

- **Cost and Usage Graph** – Visualizes daily cost distribution by AWS service.
- **Cost and Usage Breakdown Table** – Displays detailed cost data per service.
- **Filtering Options** – Allows filtering by date range, granularity, and resource tags.
- **CSV Export** – Enables downloading cost data for external analysis and reporting.

🔹 **Why it’s better:**  
Unlike traditional billing dashboards that show only aggregated monthly costs, the Cost Map provides **granular daily insights**, helping teams detect cost spikes early and maintain better cost control.

[![Untitled design (9).png](https://xops-docs.axiomio.com/uploads/images/gallery/2026-03/scaled-1680-/fMZM8hVYpZjUWhmZ-untitled-design-9.png)](https://xops-docs.axiomio.com/uploads/images/gallery/2026-03/fMZM8hVYpZjUWhmZ-untitled-design-9.png)
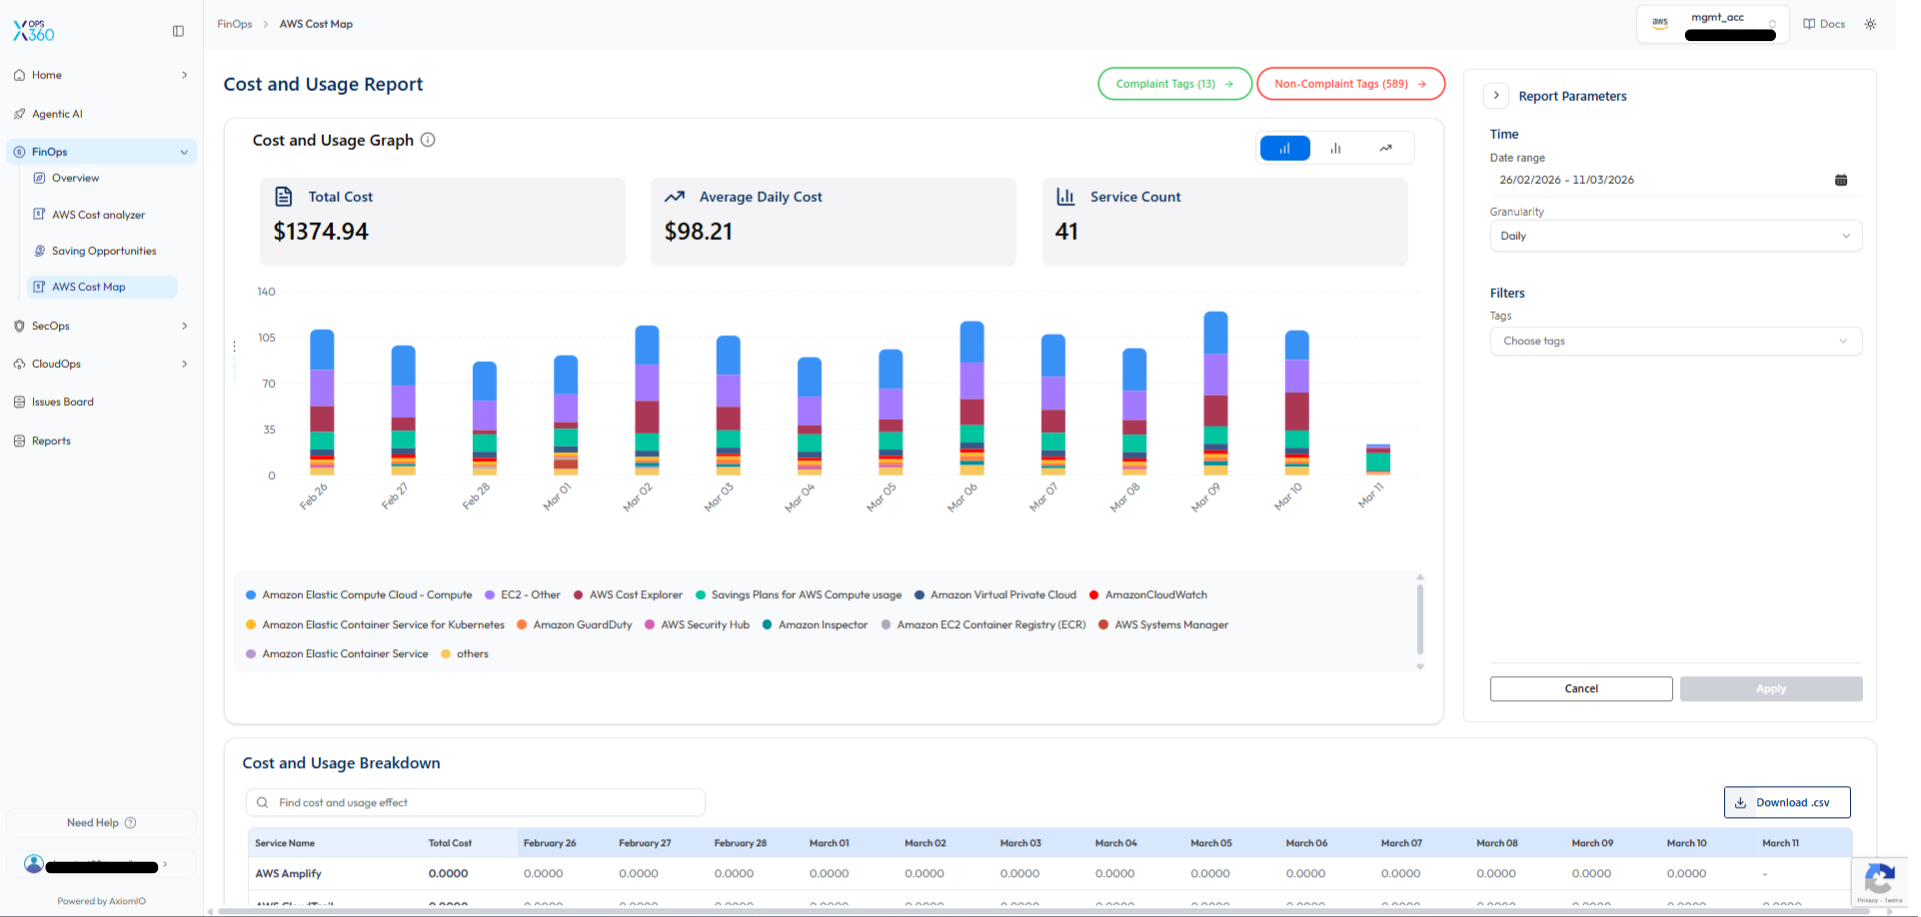
# Kubernetes Automation

Kubernetes Automation enables seamless creation and management of Kubernetes clusters. It provides a step-by-step guide on deploying clusters with configurable networking, node groups, and authentication settings. Additionally, it covers essential AWS and custom add-ons to enhance cluster functionality, along with best practices for organizing resources through tagging.

# EKS Deployment Guide

#### **Prerequisites**

- Before deploying EKS, ensure that the AWS role created via the Xops 360 portal has the necessary permissions. If no policies are found, please [add an AWS account ](https://xops-docs.axiomio.com/books/xops-360-documentation/page/aws-account-integration#bkmrk-initiating-aws-integ "AWS Account Integration")for EKS deployment.

> {  
>  "Version": "2012-10-17",  
>  "Statement": \[  
>  {  
>  "Action": \[  
>  "ec2:AuthorizeSecurityGroupIngress",  
>  "ec2:DescribeInstances",  
>  "ec2:AttachInternetGateway",  
>  "iam:PutRolePolicy",  
>  "iam:AddRoleToInstanceProfile",  
>  "ec2:DeleteRouteTable",  
>  "eks:DescribeAddon",  
>  "ec2:RevokeSecurityGroupEgress",  
>  "ec2:CreateRoute",  
>  "ec2:CreateInternetGateway",  
>  "ec2:DeleteInternetGateway",  
>  "iam:ListRolePolicies",  
>  "iam:DeleteOpenIDConnectProvider",  
>  "iam:GetRole",  
>  "iam:GetPolicy",  
>  "ec2:CreateTags",  
>  "iam:ListEntitiesForPolicy",  
>  "iam:DeleteRole",  
>  "ec2:RunInstances",  
>  "ec2:DisassociateRouteTable",  
>  "ec2:ReplaceNetworkAclAssociation",  
>  "ec2:RevokeSecurityGroupIngress",  
>  "ec2:DeleteNatGateway",  
>  "eks:UpdateNodegroupConfig",  
>  "eks:ListClusters",  
>  "iam:GetOpenIDConnectProvider",  
>  "ec2:CreateSubnet",  
>  "ec2:DescribeSubnets",  
>  "ec2:DeleteNetworkAclEntry",  
>  "iam:CreateInstanceProfile",  
>  "ec2:DisassociateAddress",  
>  "ec2:CreateNatGateway",  
>  "ec2:CreateVpc",  
>  "ec2:DescribeAddressesAttribute",  
>  "ec2:DescribeVpcAttribute",  
>  "iam:ListInstanceProfilesForRole",  
>  "iam:PassRole",  
>  "ec2:DescribeAvailabilityZones",  
>  "iam:DeleteRolePolicy",  
>  "sts:DecodeAuthorizationMessage",  
>  "ec2:DeleteLaunchTemplateVersions",  
>  "ec2:DeleteNetworkAcl",  
>  "eks:CreateCluster",  
>  "iam:DeleteInstanceProfile",  
>  "ec2:ReleaseAddress",  
>  "ec2:DeleteLaunchTemplate",  
>  "eks:UntagResource",  
>  "eks:AssociateAccessPolicy",  
>  "eks:UpdateAccessEntry",  
>  "ec2:DescribeSecurityGroups",  
>  "iam:CreatePolicy",  
>  "iam:CreateServiceLinkedRole",  
>  "ec2:CreateLaunchTemplate",  
>  "ec2:DescribeVpcs",  
>  "eks:TagResource",  
>  "eks:CreateAccessEntry",  
>  "iam:UpdateAssumeRolePolicy",  
>  "iam:GetPolicyVersion",  
>  "ec2:DeleteSubnet",  
>  "iam:RemoveRoleFromInstanceProfile",  
>  "iam:CreateRole",  
>  "iam:AttachRolePolicy",  
>  "eks:UpdateClusterConfig",  
>  "ssm:GetParameter",  
>  "ec2:AssociateRouteTable",  
>  "ec2:DescribeInternetGateways",  
>  "eks:DescribeNodegroup",  
>  "iam:DetachRolePolicy",  
>  "iam:ListAttachedRolePolicies",  
>  "ec2:DescribeNetworkAcls",  
>  "ec2:DescribeRouteTables",  
>  "eks:ListNodegroups",  
>  "ec2:DescribeLaunchTemplates",  
>  "ec2:CreateRouteTable",  
>  "ec2:DetachInternetGateway",  
>  "eks:DescribeAccessEntry",  
>  "eks:DeleteCluster",  
>  "eks:DeleteNodegroup",  
>  "ec2:DescribeInstanceTypes",  
>  "eks:CreateAddon",  
>  "eks:DescribeCluster",  
>  "ec2:DeleteVpc",  
>  "eks:DeleteAccessEntry",  
>  "eks:UpdateClusterVersion",  
>  "ec2:DescribeAddresses",  
>  "ec2:DeleteTags",  
>  "iam:DeletePolicy",  
>  "eks:UpdateNodegroupVersion",  
>  "eks:ListAssociatedAccessPolicies",  
>  "ec2:DescribeNetworkInterfaces",  
>  "ec2:CreateSecurityGroup",  
>  "ec2:CreateNetworkAcl",  
>  "ec2:ModifyVpcAttribute",  
>  "ec2:AuthorizeSecurityGroupEgress",  
>  "ec2:DeleteRoute",  
>  "ec2:DescribeLaunchTemplateVersions",  
>  "ec2:DescribeNatGateways",  
>  "eks:CreateNodegroup",  
>  "ec2:AllocateAddress",  
>  "ec2:CreateLaunchTemplateVersion",  
>  "iam:CreateOpenIDConnectProvider",  
>  "ec2:DescribeImages",  
>  "iam:ListPolicyVersions",  
>  "eks:DeleteAddon",  
>  "eks:DescribeUpdate",  
>  "eks:DisassociateAccessPolicy",  
>  "ec2:DeleteSecurityGroup",  
>  "ec2:CreateNetworkAclEntry"  
>  \],  
>  "Resource": "\*",  
>  "Effect": "Allow",  
>  "Sid": "EksPermissions"  
>  },  
>  {  
>  "Action": \[  
>  "lambda:GetFunction",  
>  "secretsmanager:GetSecretValue",  
>  "iam:ListAccessKeys",  
>  "s3:GetObject",  
>  "codecommit:GitPull"  
>  \],  
>  "Resource": "\*",  
>  "Effect": "Deny",  
>  "Sid": "ExplicitDeny"  
>  }  
>  \]  
> }

[![image.png](https://xops-docs.axiomio.com/uploads/images/gallery/2025-03/scaled-1680-/nHlF7RMVAIVVmgio-image.png)](https://xops-docs.axiomio.com/uploads/images/gallery/2025-03/nHlF7RMVAIVVmgio-image.png)
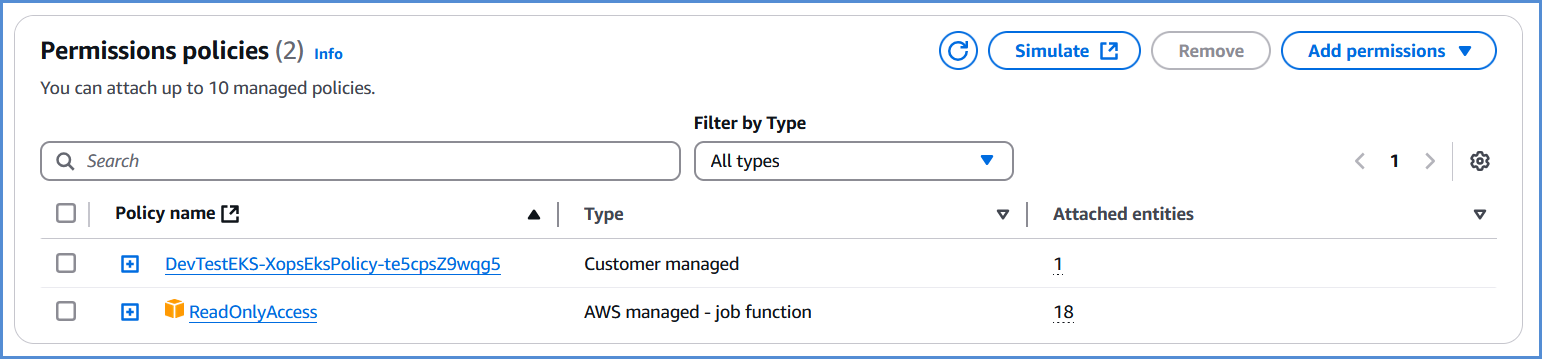
#### **EKS Deployment** 

- **Log in to the Platform**
    - Access the platform and sign in using your credentials.
- **Navigate to CloudOps**
    - Locate the Navigation Bar on the left-hand side of the screen.
    - Navigate to **Kubernetes Automation**, then select **EKS**.

[![image.png](https://xops-docs.axiomio.com/uploads/images/gallery/2025-02/scaled-1680-/i5CkRyDwxVPNw4Xd-image.png)](https://xops-docs.axiomio.com/uploads/images/gallery/2025-02/i5CkRyDwxVPNw4Xd-image.png)
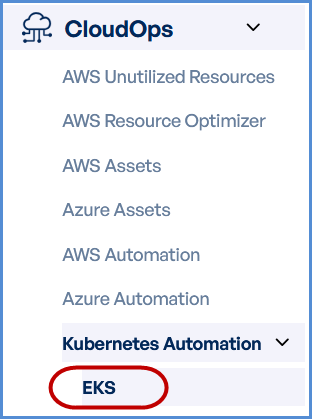
- Click on **Get Started** on EKS page.

[![image.png](https://xops-docs.axiomio.com/uploads/images/gallery/2025-02/scaled-1680-/1B0vJXdxzUqntYEL-image.png)](https://xops-docs.axiomio.com/uploads/images/gallery/2025-02/1B0vJXdxzUqntYEL-image.png)
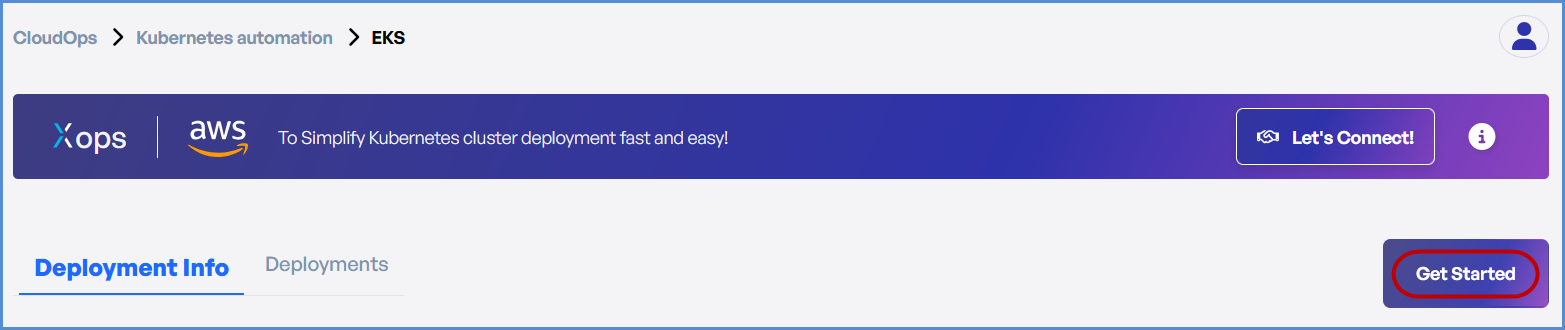
##### AWS Account Selection

Choose based on your **requirement**:

- If an AWS account has **not** been added: 
    - Click on **New Account**.
    
    
    - Provide a suitable name in the **AWS Account Name** field.
    - Paste the copied **AWS Role ARN** into the designated field.

Note: Follow [Initiating Account Integration](https://xops-docs.axiomio.com/books/xops-360-documentation/page/aws-account-integration#bkmrk-initiating-aws-integ) steps to retrieve the AWS Role ARN and connect your AWS account.
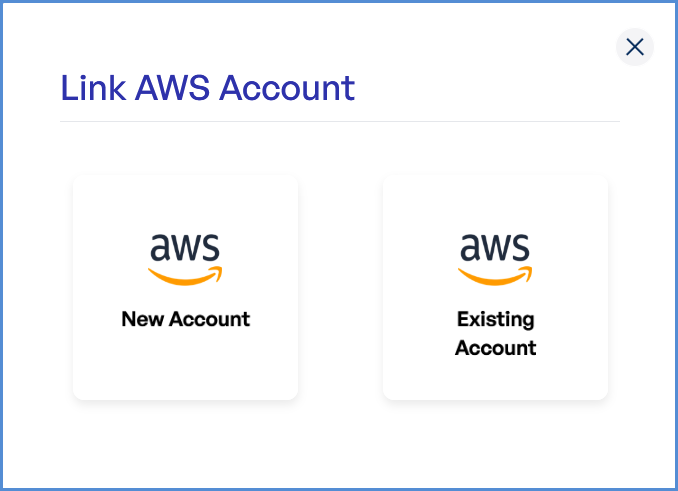
![image.png](https://xops-docs.axiomio.com/uploads/images/gallery/2025-02/scaled-1680-/smMuevC307lqRcCZ-image.png)

[![image.png](https://xops-docs.axiomio.com/uploads/images/gallery/2025-03/scaled-1680-/5XiLLpQXfjd23Rvz-image.png)](https://xops-docs.axiomio.com/uploads/images/gallery/2025-03/5XiLLpQXfjd23Rvz-image.png)

- If an AWS account is already integrated: 
    - Click on **Existing Account**.
    - Select **Select Existing Account**.
    - Choose the desired AWS account from the list.
    - Click **Proceed**.

![image.png](https://xops-docs.axiomio.com/uploads/images/gallery/2025-02/scaled-1680-/smMuevC307lqRcCZ-image.png)

[![image.png](https://xops-docs.axiomio.com/uploads/images/gallery/2025-02/scaled-1680-/V60H0GiSdLkajP5i-image.png)](https://xops-docs.axiomio.com/uploads/images/gallery/2025-02/V60H0GiSdLkajP5i-image.png)

##### **Step 1: Cluster Details**

- Enter a **unique Deployment Name**.
- Select the preferred **AWS Region** from the dropdown for deploying the Elastic Kubernetes Service (EKS).
- Enter the preferred **Cluster Name**.
- Choose the required **Kubernetes Version** from the drop down.
- Select **Amazon Linux 2** as the Operating System.
- Click **Next** to proceed.

[![image.png](https://xops-docs.axiomio.com/uploads/images/gallery/2025-02/scaled-1680-/i63sn2oar5lRkQB9-image.png)](https://xops-docs.axiomio.com/uploads/images/gallery/2025-02/i63sn2oar5lRkQB9-image.png)
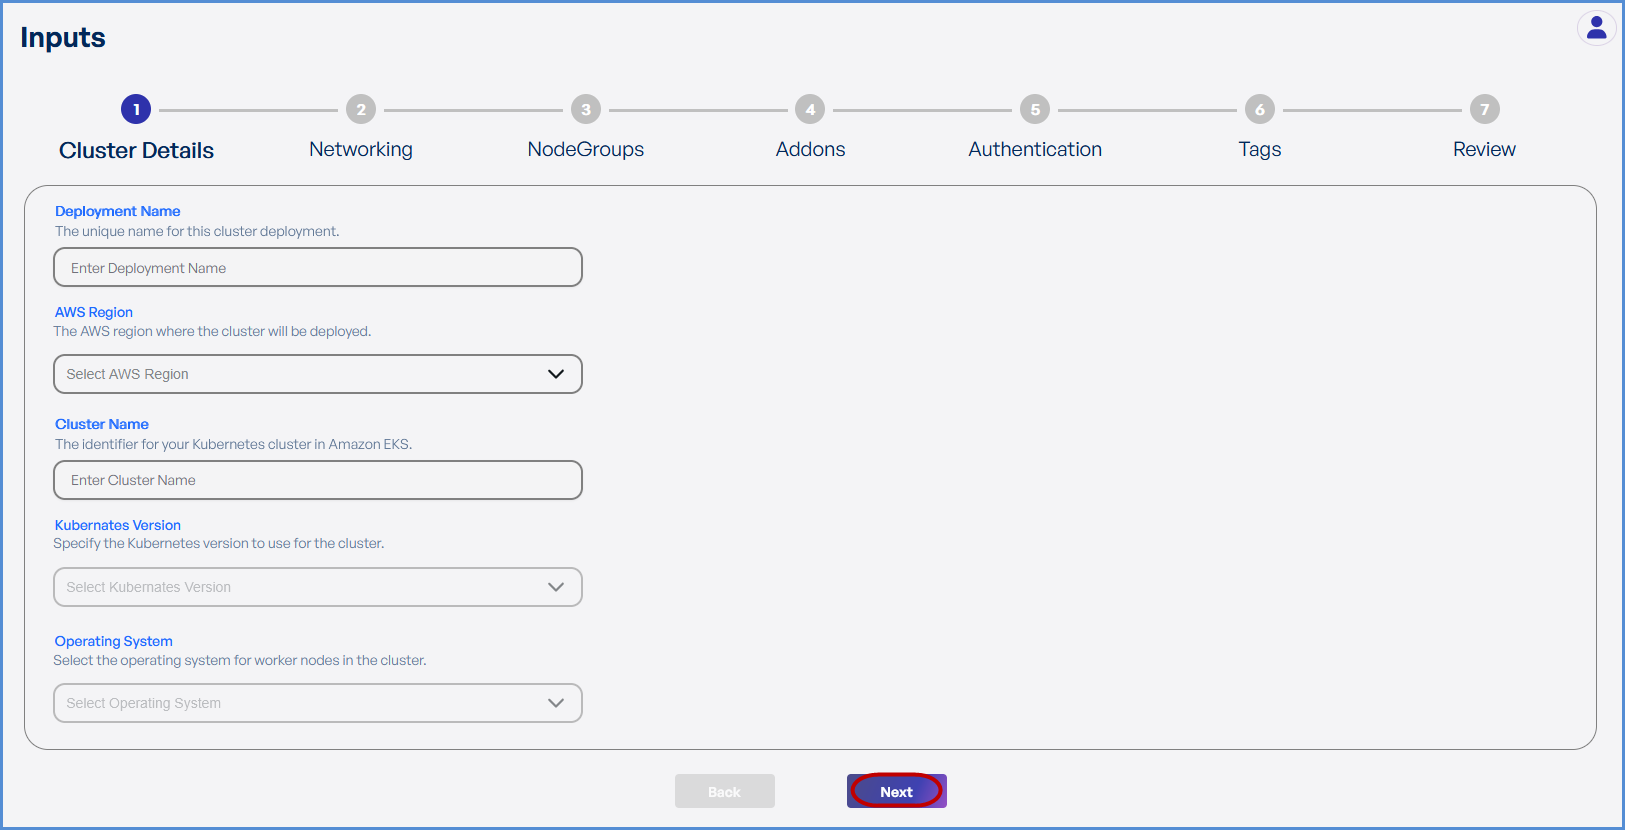

##### **Step 2: Networking**

Choose based on your **requirement**:

- **If an existing VPC is available** in the selected region: 
    - Select **Use Existing**.
    - Choose the **VPC ID** from the drop down.
    - Select the **two Private Subnets** with different Availability Zones from the list of all subsets in the drop down.

[![image.png](https://xops-docs.axiomio.com/uploads/images/gallery/2025-02/scaled-1680-/pfPFPpcrMhdgiKup-image.png)](https://xops-docs.axiomio.com/uploads/images/gallery/2025-02/pfPFPpcrMhdgiKup-image.png)
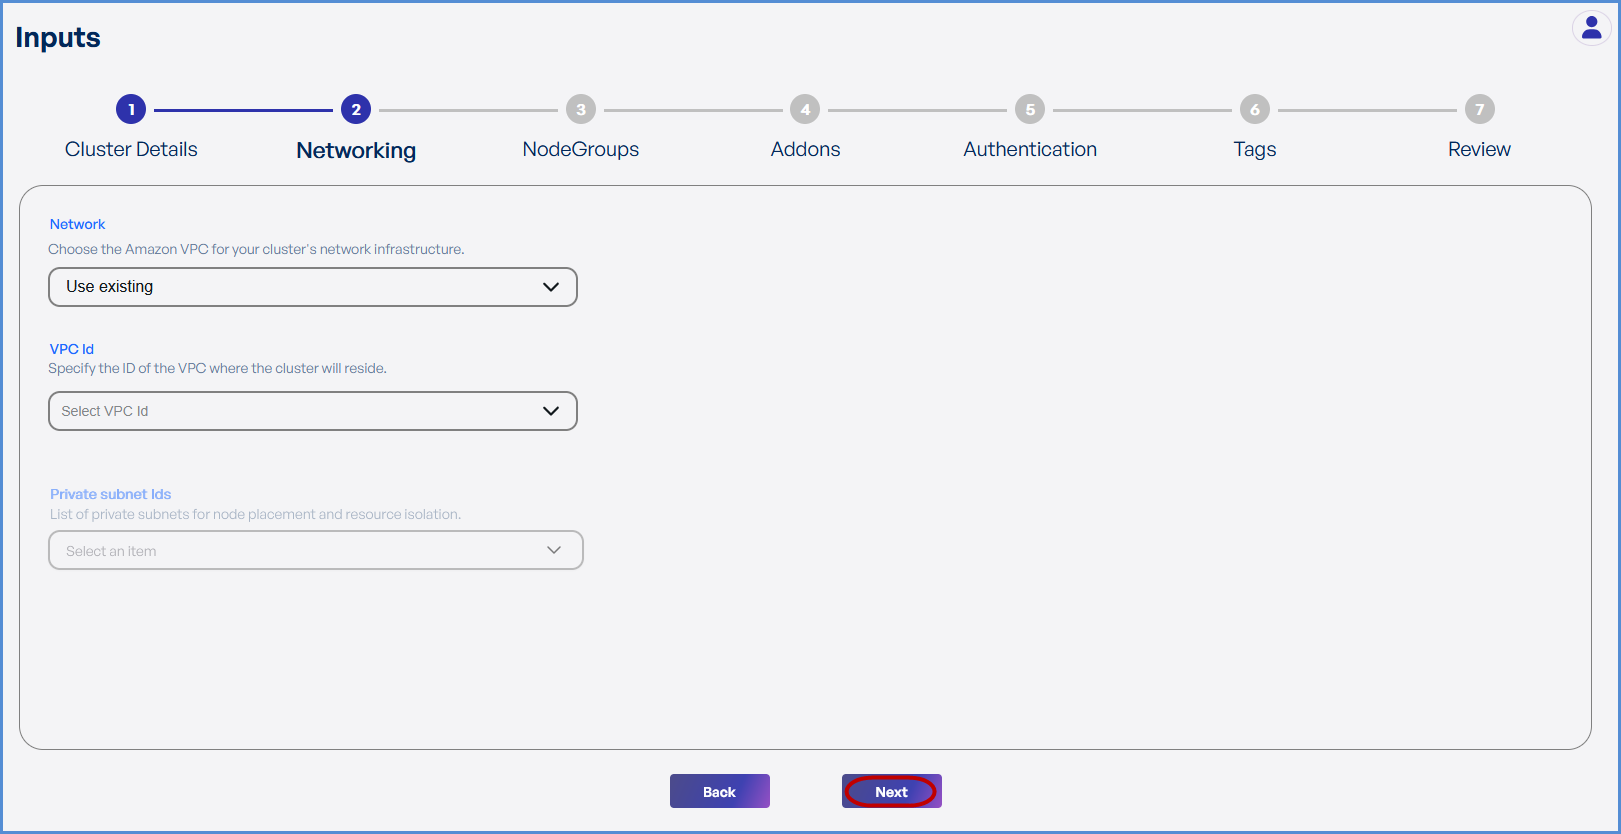
- **If a new VPC is required**: 
    - Select **Create New**.
    - Enter the **VPC CIDR**.
    - Add **Public and Private Subnets** with different Availability Zones as needed.
- Click **Next** to continue.
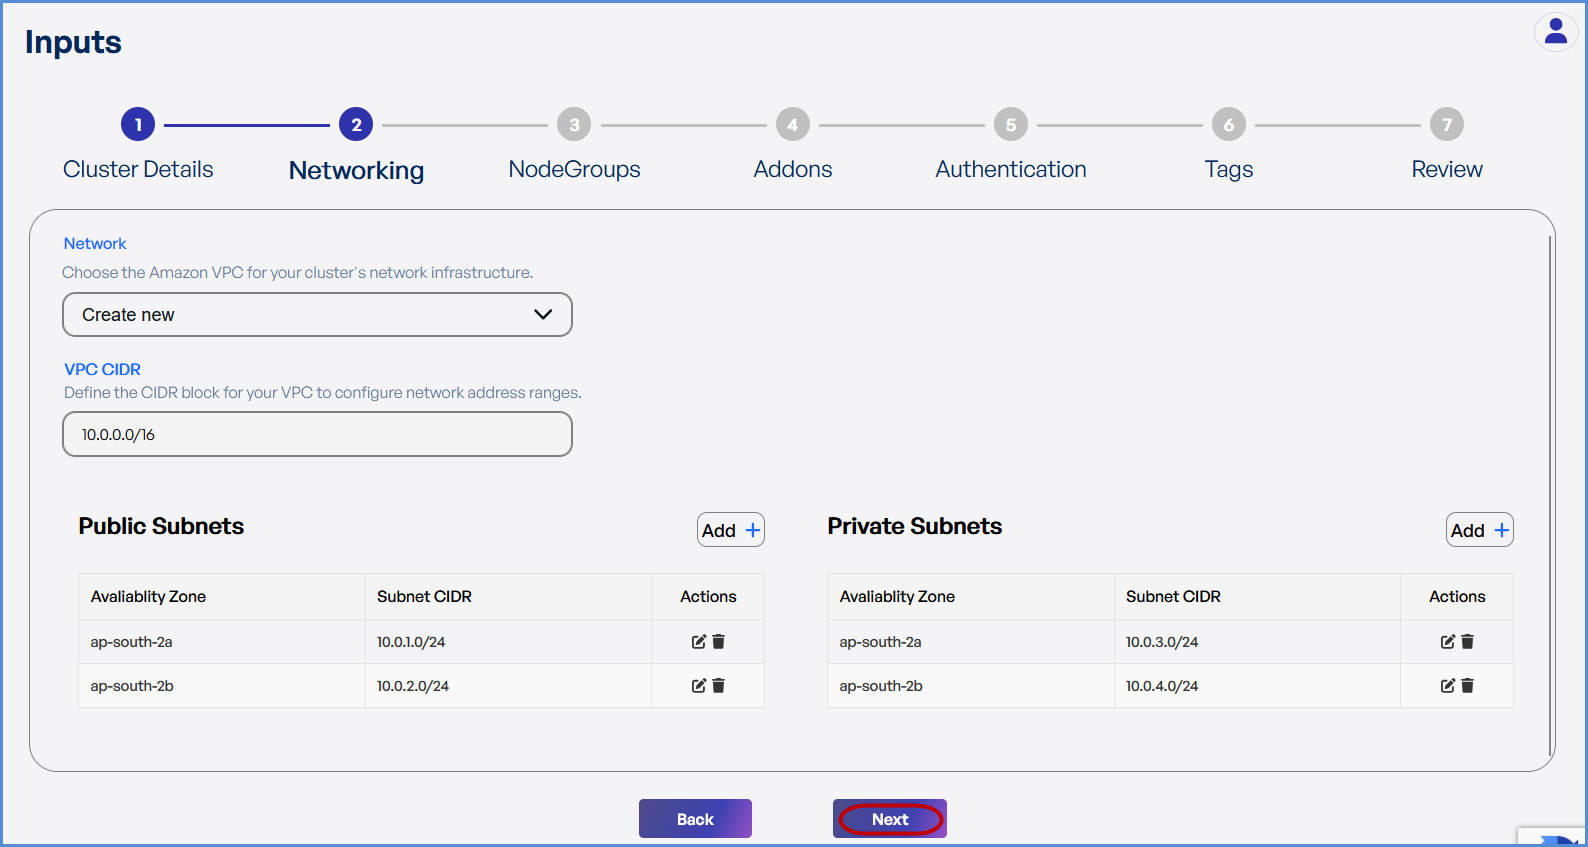
  
![image.png](https://xops-docs.axiomio.com/uploads/images/gallery/2025-02/scaled-1680-/E16hrBDQlS2docRx-image.png)


##### **Step 3: Node Groups**

- Click **+** to **Add a Node Group**.
- Provide a **Node Group Name**.
- Select the desired **Instance Types** from the drop down.
- Configure **Scaling Settings**:
    
    
    - Set **Minimum, Desired, and Maximum** number of nodes.
- Add **Labels** by entering Key-Value pairs.
- Define the **Volume Size** which should be a Minimum of 30GB.
- Click **Save** and then **Next**.

[![image.png](https://xops-docs.axiomio.com/uploads/images/gallery/2025-02/scaled-1680-/67bdHVwTLtsUPuiI-image.png)](https://xops-docs.axiomio.com/uploads/images/gallery/2025-02/67bdHVwTLtsUPuiI-image.png)
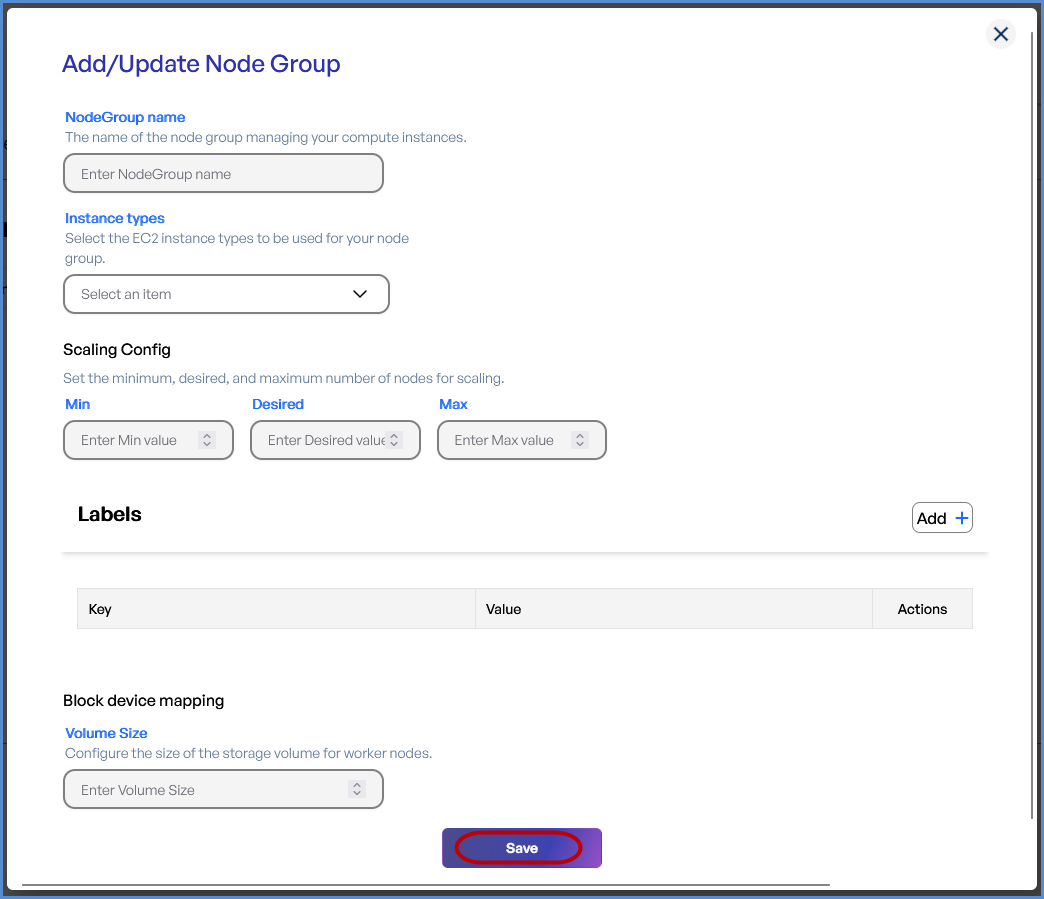
**Tip:** Taints can be applied from the second node group:

- Enter the **Key and Value** for the Taints.
- Choose the **Effect** for scheduling of pods.
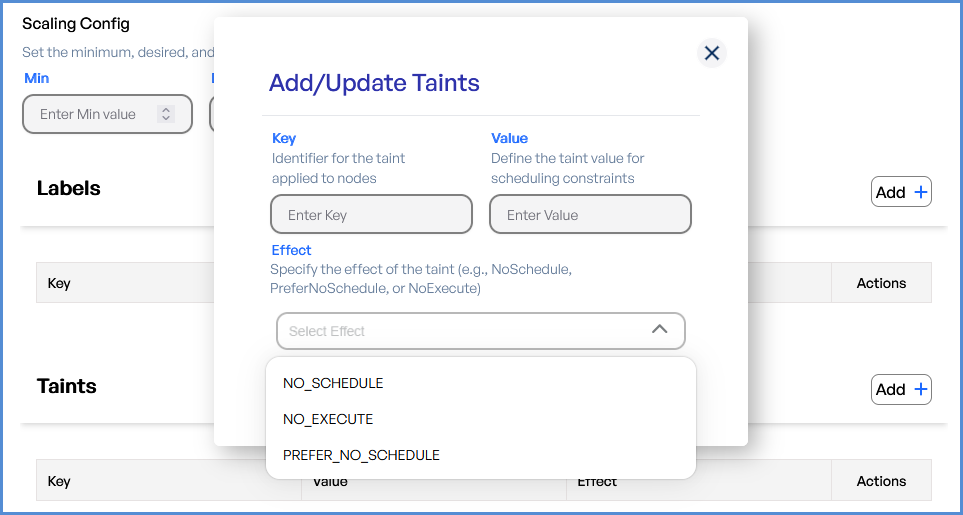
![image.png](https://xops-docs.axiomio.com/uploads/images/gallery/2025-02/scaled-1680-/QnOHHdTPcrK2zQU6-image.png)

##### **Step 4: Add-ons**

- Choose the required **AWS Managed Add-ons** from the drop down .
- Choose the desired **Custom Add-ons** from the drop down.
- Click **Next**.

[![image.png](https://xops-docs.axiomio.com/uploads/images/gallery/2025-02/scaled-1680-/41LhzZexqSkZagy4-image.png)](https://xops-docs.axiomio.com/uploads/images/gallery/2025-02/41LhzZexqSkZagy4-image.png)
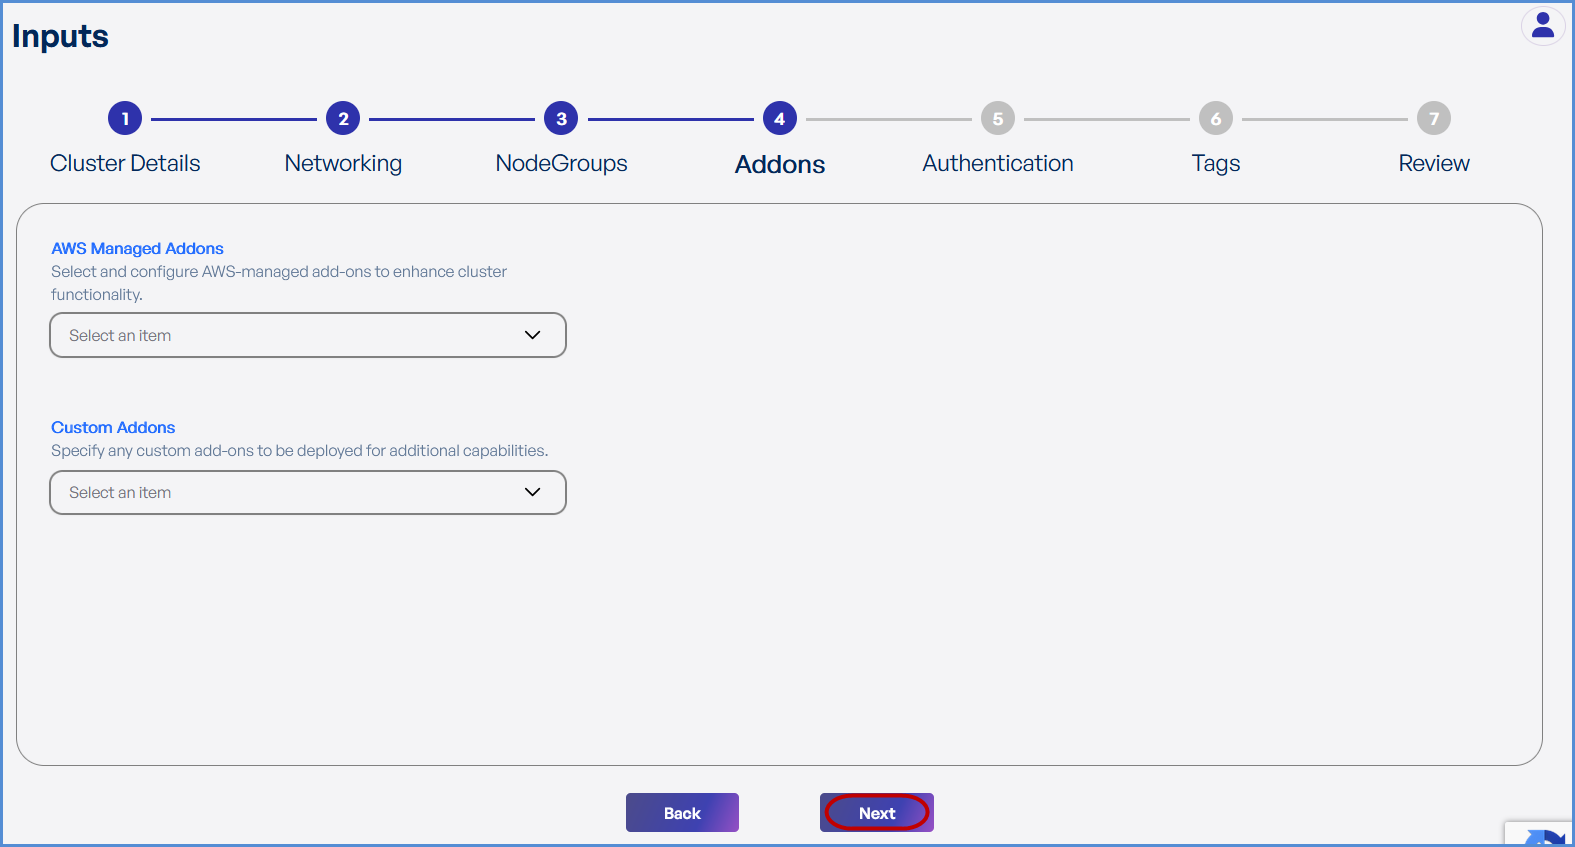
##### **Step 5: Authentication**

- Choose the existing **IAM Users and Roles** from the drop down to grant **ADMIN** access to EKS environment.

<p class="callout warning">The Role with suffix **-XopsRole-###** is created at the time of account integration and will get an admin role by default.</p>

- Click **Next**.

[![image.png](https://xops-docs.axiomio.com/uploads/images/gallery/2025-02/scaled-1680-/RiJyCFkSrRlEkZq2-image.png)](https://xops-docs.axiomio.com/uploads/images/gallery/2025-02/RiJyCFkSrRlEkZq2-image.png)

##### **Step 6: Tags**

- Click **Add** to enter Key-Value pairs for tagging resources.
- Click **Submit** and then **Next**.

[![image.png](https://xops-docs.axiomio.com/uploads/images/gallery/2025-02/scaled-1680-/kDvGvYSBW3UQlEUi-image.png)](https://xops-docs.axiomio.com/uploads/images/gallery/2025-02/kDvGvYSBW3UQlEUi-image.png)
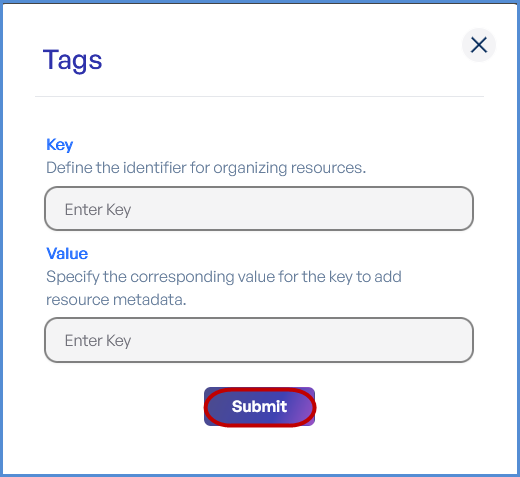
##### **Step 7: Review and Deployment**

- Review all configuration details.
- Click **Submit**.

**Note:** To make modifications, navigate back through each step sequentially and apply the necessary changes before proceeding.

[![image.png](https://xops-docs.axiomio.com/uploads/images/gallery/2025-02/scaled-1680-/4XRvfsUCh2mWJ0zI-image.png)](https://xops-docs.axiomio.com/uploads/images/gallery/2025-02/4XRvfsUCh2mWJ0zI-image.png)
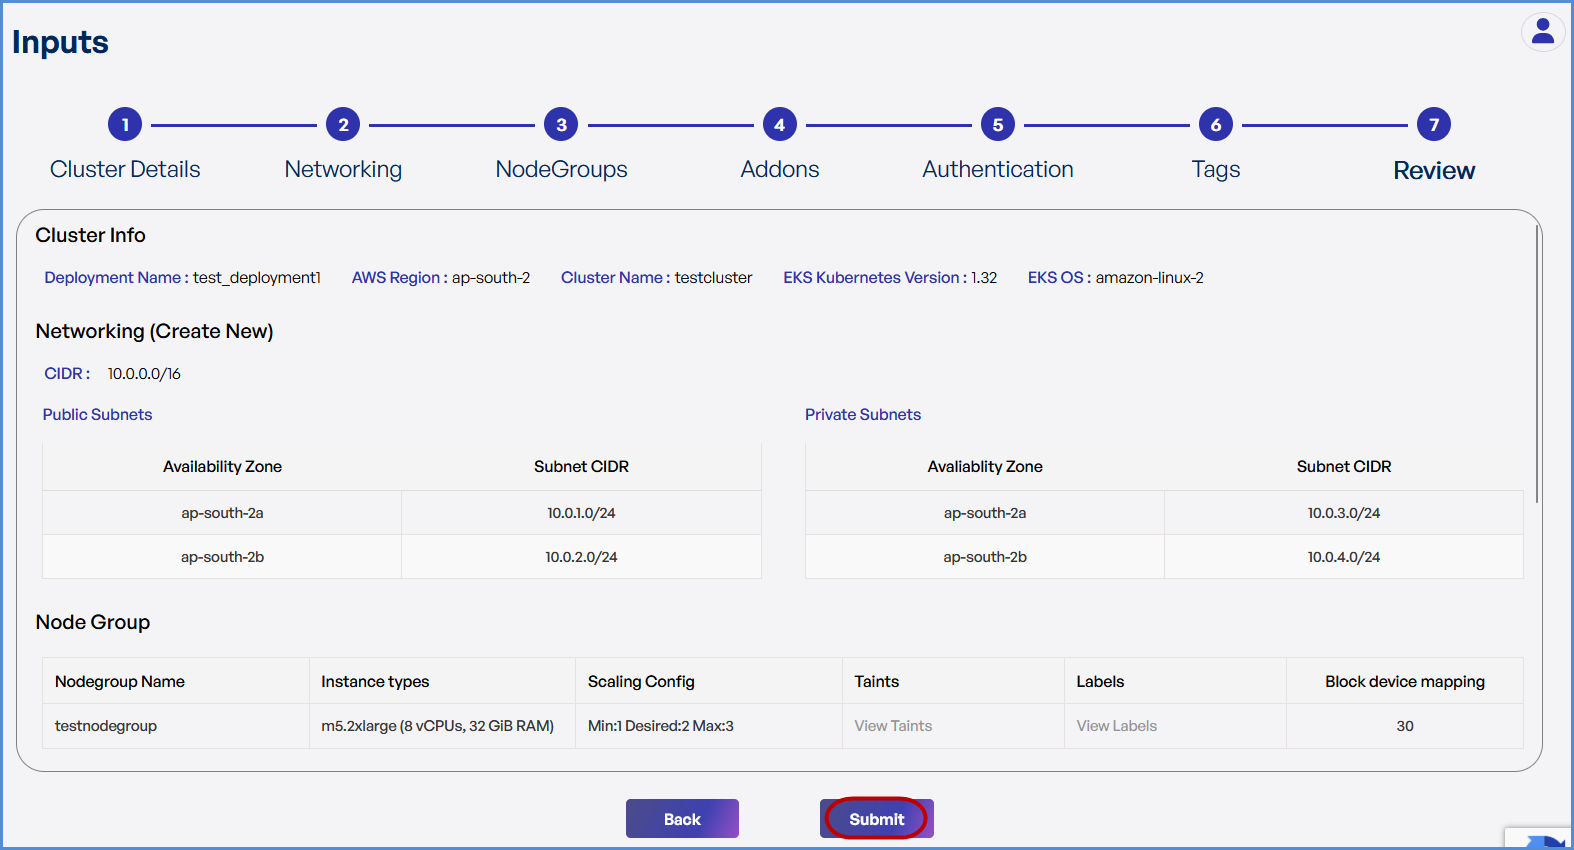
- The system redirects to the **Deployments Page**, displaying a loader.

[![image.png](https://xops-docs.axiomio.com/uploads/images/gallery/2025-02/scaled-1680-/CIuXSaY2bnfl27kS-image.png)](https://xops-docs.axiomio.com/uploads/images/gallery/2025-02/CIuXSaY2bnfl27kS-image.png)
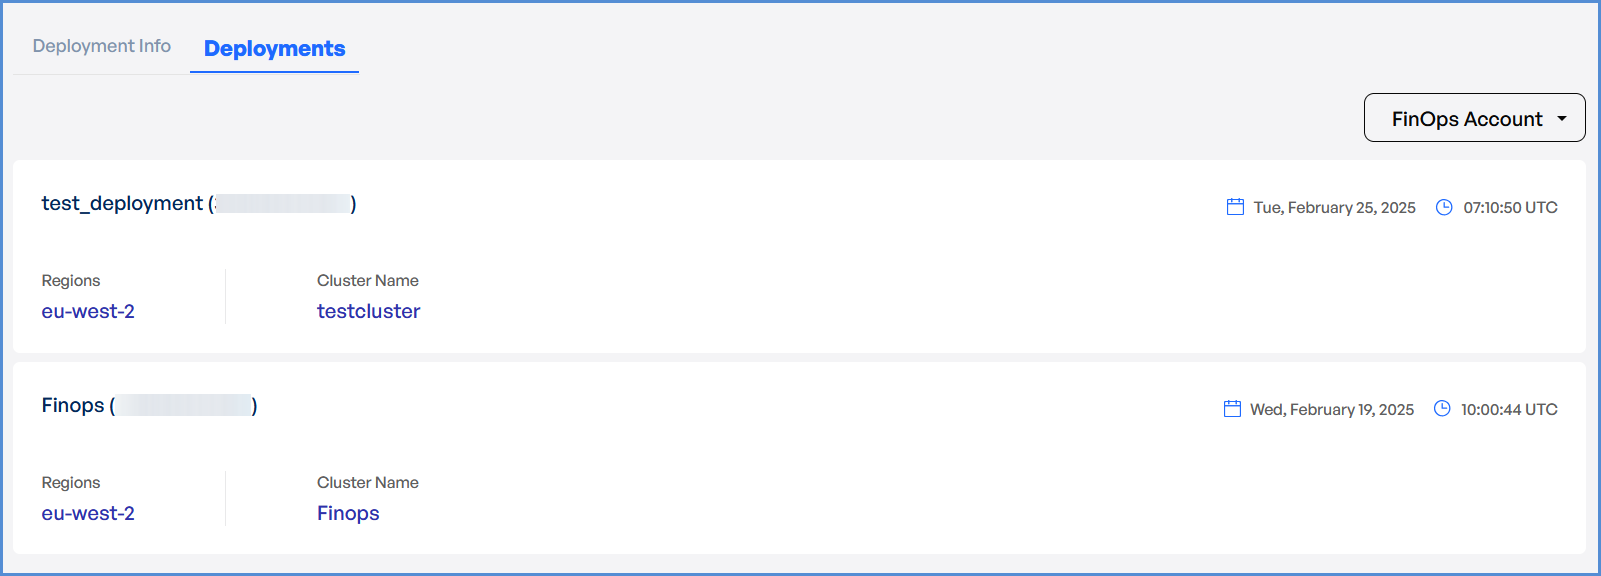
- Once deployment is completed: 
    - Click on the **Deployment** to view **Inputs, Outputs, Instructions, and Logs**.

[![image.png](https://xops-docs.axiomio.com/uploads/images/gallery/2025-02/scaled-1680-/YVXeLFVx3yHpF5MO-image.png)](https://xops-docs.axiomio.com/uploads/images/gallery/2025-02/YVXeLFVx3yHpF5MO-image.png)
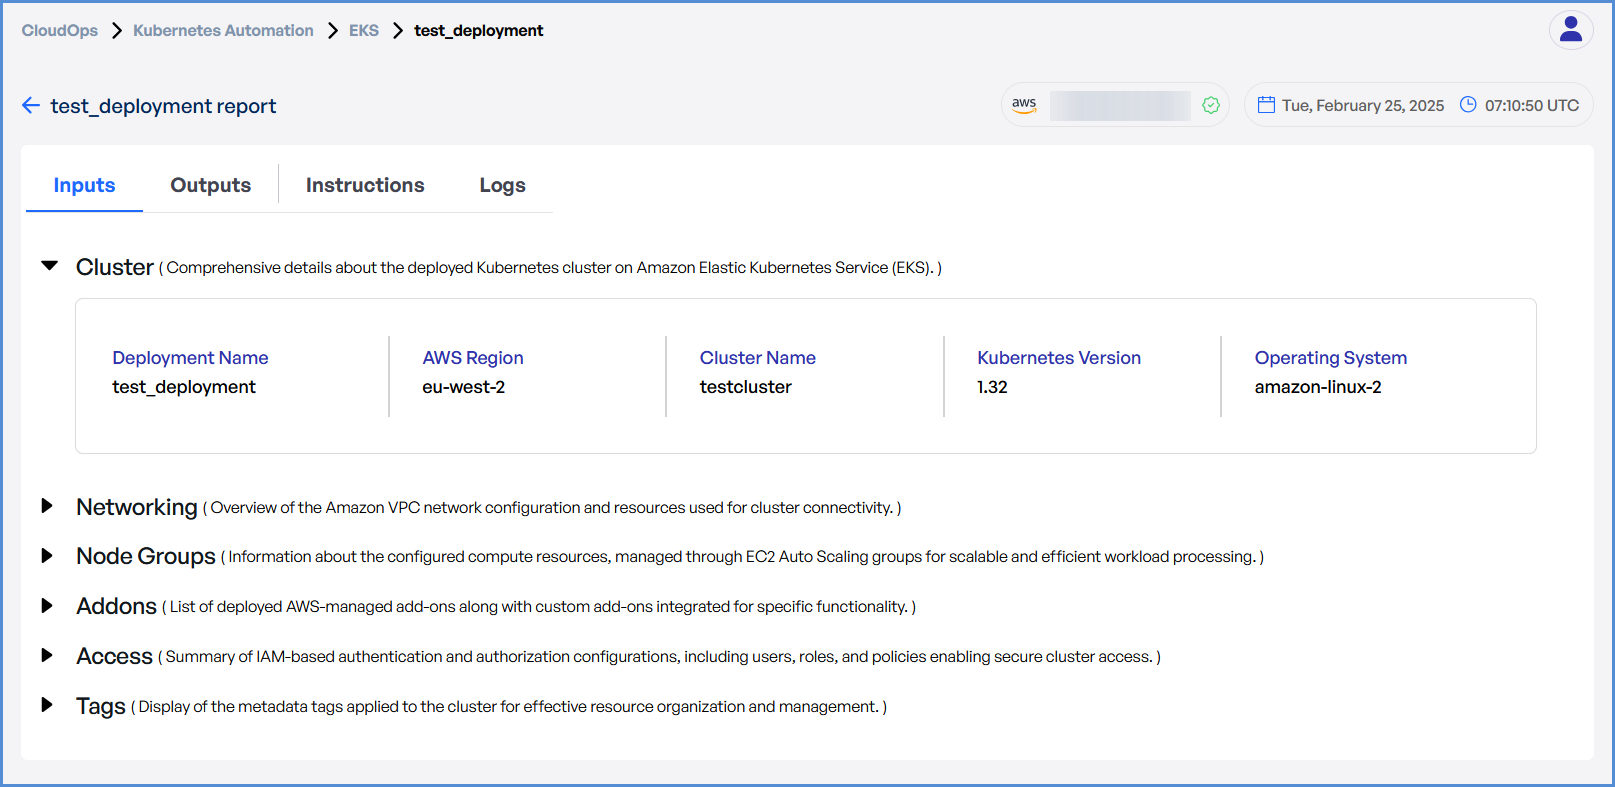
- In case of an EKS deployment failure, click on the failure message to access the detailed logs.

[![image.png](https://xops-docs.axiomio.com/uploads/images/gallery/2025-03/scaled-1680-/IgtPMUhYAgxxutWt-image.png)](https://xops-docs.axiomio.com/uploads/images/gallery/2025-03/IgtPMUhYAgxxutWt-image.png)

**Note:** The error message will vary depending on the stage at which the deployment failure occurs.

- Analyze the logs to identify the root cause and take appropriate corrective actions.

[![image.png](https://xops-docs.axiomio.com/uploads/images/gallery/2025-03/scaled-1680-/McrtCl7vNlBNguhM-image.png)](https://xops-docs.axiomio.com/uploads/images/gallery/2025-03/McrtCl7vNlBNguhM-image.png)
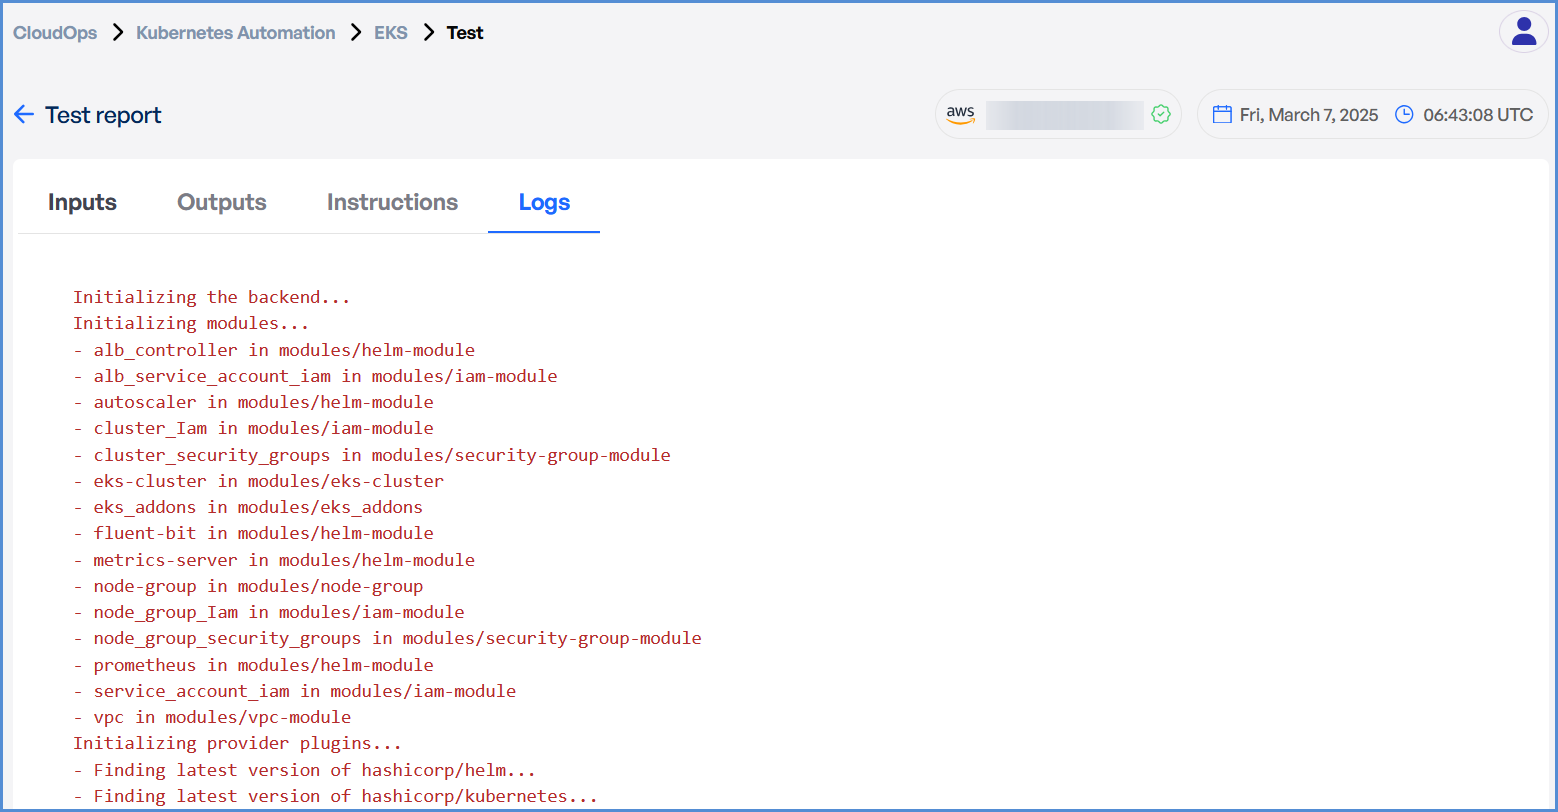
# AWS and Azure Automation

Cloud Automation: Your Gateway to Effortless Infrastructure Excellence.

# AWS Automation Suite - Production Ready Services

### **AWS Cloud Automation Deployment Guide**

1. **Select an AWS Service**.
    
    
    - In X-ops, navigate to **CloudOps → AWS Automation**.
    - Click on the desired service (e.g., Virtual Private Cloud, Elastic Compute Cloud, S3).
2. **Review Prerequisites**.
    
    
    - Check the **Overview** for service description.
    - Confirm **Terraform** (&gt;=1.0) and **AWS Provider** versions.
    - Ensure your AWS IAM role permissions allow resource creation.
3. **Configure Inputs**.
    
    
    - Open the **Inputs** section.
    - Fill in required parameters (e.g., `vpc_cidr`, `availability_zones`).
    - Accept sensible defaults for optional settings or customize as needed.
4. **Copy and Customize Terraform**.
    
    
    - Scroll to **Usage** and click **Copy Code**.
    - Paste into `main.tf` and replace placeholders with your values.
    - Update network ranges, region, and tags.
5. **Initialize and Deploy**.
    
    
    - Run `terraform init` to set up providers.
    - Run `terraform fmt` and `terraform validate`.
    - Run `terraform plan` to preview changes.
    - Run `terraform apply` to create resources.
6. **Verify Outputs**.
    
    
    - Check the **Outputs** section for IDs, IPs, and endpoints.
    - Log in to the AWS Console to confirm resources exist.
    - Test connectivity and review security settings.

####  **Virtual Private Cloud (VPC)**

*Create and manage a scalable, isolated cloud network for your AWS resources.*

- **What it does**: Automatically provisions secure network infrastructure with public/private subnets, NAT gateways, and routing tables.
- **Why you'll love it**: Deploy enterprise-grade networking in minutes, not hours.
- **Perfect for**: Applications requiring secure, multi-tier architecture.

#### **Elastic Container Service (ECS)**

*Deploy and orchestrate containerized applications with Amazon's fully managed container service.*

- **What it does**: Sets up container clusters, task definitions, and load balancing for your applications.
- **Why you'll love it**: Scale your applications seamlessly without managing servers.
- **Perfect for**: Microservices architectures and modern application deployments.

#### **Simple Storage Service (S3)**

*Store and retrieve any amount of data with high durability and availability on Amazon's object storage service.*

- **What it does**: Creates secure, scalable storage buckets with lifecycle policies and access controls.
- **Why you'll love it**: 99.999999999% (11 9's) of durability with intelligent cost optimization.
- **Perfect for**: Data backup, content distribution, and data lakes.

#### **Application Load Balancer (ALB)**

*Distribute incoming application traffic across multiple targets for seamless load balancing and improved availability.*

- **What it does**: Routes traffic intelligently across multiple availability zones with health checks.
- **Why you'll love it**: Automatic failover and SSL termination for high availability.
- **Perfect for**: Web applications requiring high performance and reliability.

#### **Relational Database Service (RDS)**

*Set up, operate, and scale a relational database in the cloud with automated administration and maintenance.*

- **What it does**: Deploys managed databases with automated backups, patches, and monitoring.
- **Why you'll love it**: Focus on your data, not database management.
- **Perfect for**: Applications requiring ACID compliance and complex queries.

#### **Amazon CloudFront**

*Deliver content securely to global users with low latency through Amazon's content delivery network.*

- **What it does**: Sets up global edge locations for fast content delivery with SSL/TLS encryption.
- **Why you'll love it**: Accelerate your website performance worldwide.
- **Perfect for**: Global applications and content distribution.

#### **Elastic Compute Cloud (EC2)**

*Provision and manage virtual servers in the cloud, with scalable computing capacity on-demand.*

- **What it does**: Launches configured virtual machines with auto-scaling and security groups.
- **Why you'll love it**: Pay only for what you use with instant scalability.
- **Perfect for**: Web servers, development environments, and compute-intensive applications.

#### **Elastic Kubernetes Service (EKS)**

*Run and manage Kubernetes clusters at scale on Amazon's managed Kubernetes service.*

- **What it does**: Deploys production-ready Kubernetes clusters with worker nodes and networking.
- **Why you'll love it**: Container orchestration without the operational overhead.
- **Perfect for**: Modern applications requiring container orchestration.

#### **Identity and Access Management (IAM)**

*Allows you to securely delegate access to AWS resources for users, applications, or services without needing to share long-term credentials.*

- **What it does**: Creates secure access policies, roles, and permissions for your AWS resources.
- **Why you'll love it**: Zero-trust security with granular access control.
- **Perfect for**: Enterprise environments requiring strict security governance.

[![Screenshot 2025-09-23 155811.png](https://xops-docs.axiomio.com/uploads/images/gallery/2025-09/scaled-1680-/FAyMEEwz7fGzdcam-screenshot-2025-09-23-155811.png)](https://xops-docs.axiomio.com/uploads/images/gallery/2025-09/FAyMEEwz7fGzdcam-screenshot-2025-09-23-155811.png)
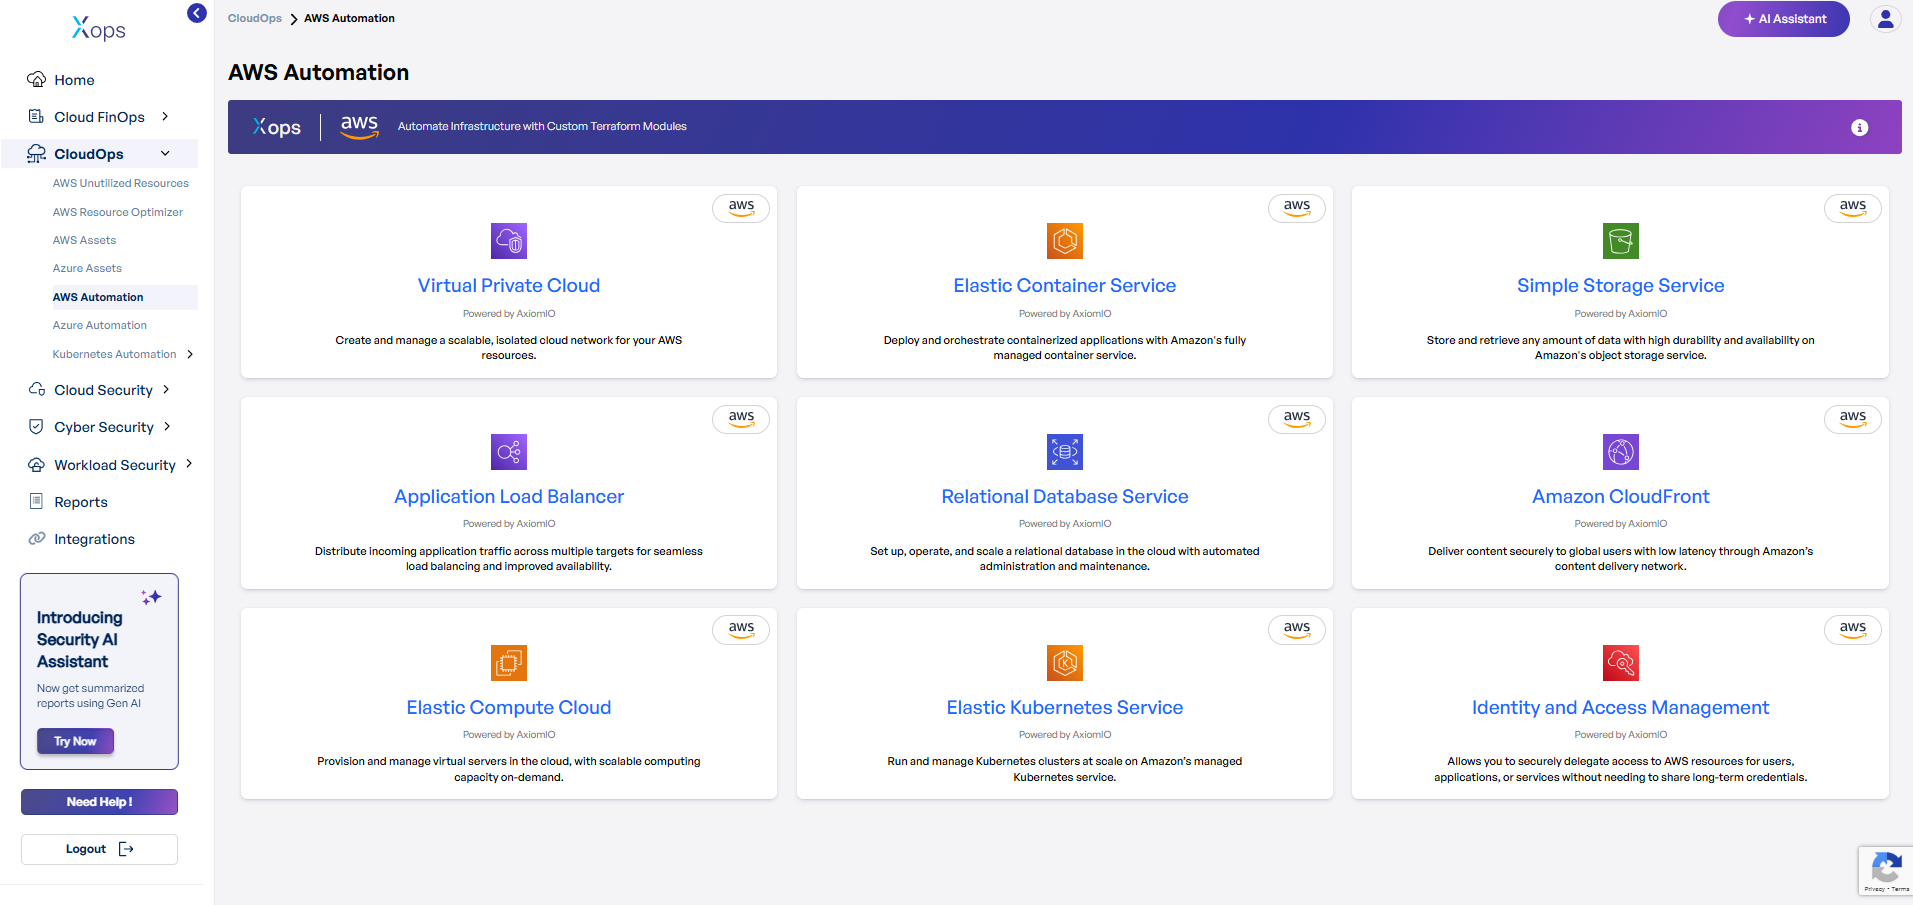
# Azure Automation Suite -  Enterprise Ready Services

### **Azure Cloud Automation Deployment Guide**

1. **Select an Azure Service**.
    
    
    - In X-ops, navigate to **CloudOps → Azure Automation**.
    - Click on the desired service (e.g., Virtual Network, Storage Account, Virtual Machine).
2. **Review Prerequisites**.
    
    
    - Check the **Overview** for service capabilities.
    - Confirm **Terraform** (&gt;=1.0) and **Azure Provider** versions.
    - Ensure your Azure service principal has necessary RBAC roles.
3. **Configure Inputs**.
    
    
    - Open the **Inputs** section.
    - Complete required fields (e.g., `resource_group_name`, `location`).
    - Use default values for optional parameters or tailor them.
4. **Copy and Customize Terraform**.
    
    
    - Scroll to **Usage** and click **Copy Code**.
    - Paste into `main.tf` and replace placeholders with your specifics.
    - Adjust subnets, VM sizes, and tags to fit your environment.
5. **Initialize and Deploy**.
    
    
    - Run `terraform init` to initialize providers.
    - Run `terraform fmt` and `terraform validate`.
    - Run `terraform plan` to review planned changes.
    - Run `terraform apply` to provision resources.
6. **Verify Outputs**.
    
    
    - Check the **Outputs** section for resource IDs and endpoints.
    - Log in to the Azure Portal to confirm resource creation.
    - Validate network connectivity and role assignments.

####  **Virtual Network**

*Securely connects Azure resources and on-premises environments within an isolated, private network.*

- **What it does**: Creates secure network infrastructure with subnets, security groups, and routing.
- **Why you'll love it**: Enterprise-grade networking with hybrid connectivity options.
- **Perfect for**: Multi-tier applications and secure communication.

#### **Storage Account**

*Scalable, durable cloud storage for unstructured data, supporting blobs, files, queues, and tables.*

- **What it does**: Provisions secure storage with lifecycle management and redundancy options.
- **Why you'll love it**: Multiple storage tiers for cost optimization.
- **Perfect for**: Data archiving, application storage, and backup solutions.

#### **Virtual Machine**

*Scalable, customizable Azure compute resource for on-demand virtual server deployment and management.*

- **What it does**: Deploys configured VMs with networking, storage, and security settings.
- **Why you'll love it**: Full control over your computing environment.
- **Perfect for**: Legacy applications and specialized workloads.

#### **Key Vault**

*Cloud service for secure management of secrets, encryption keys, and certificates, ensuring data protection and compliance.*

- **What it does**: Centralized secret management with access policies and audit logging.
- **Why you'll love it**: Hardware security module (HSM) backed encryption.
- **Perfect for**: Securing application secrets and encryption keys.

#### **Load Balancer**

*Cloud service for secure management of secrets, encryption keys, and certificates, ensuring data protection and compliance.*

- **What it does**: Distributes traffic across healthy instances with automatic failover.
- **Why you'll love it**: High availability with health monitoring.
- **Perfect for**: Applications requiring consistent performance and uptime.

#### **Cosmos DB**

*Cloud service for secure management of secrets, encryption keys, and certificates, ensuring data protection and compliance.*

- **What it does**: Deploys globally distributed, multi-model database with automatic scaling.
- **Why you'll love it**: Single-digit millisecond latency worldwide.
- **Perfect for**: Global applications requiring fast data access.

#### **MySQL Database**

*Cloud service for secure management of secrets, encryption keys, and certificates, ensuring data protection and compliance.*

- **What it does**: Sets up managed MySQL instances with automated maintenance.
- **Why you'll love it**: Focus on your applications while we handle database operations.
- **Perfect for**: Web applications and content management systems.

#### **Azure Kubernetes Service (AKS)**

*Cloud Service for Secure Management of deploying, configuring and managing Kubernetes on the Azure platform.*

- **What it does**: Provisions managed Kubernetes clusters with integrated monitoring.
- **Why you'll love it**: Container orchestration with Azure integration.
- **Perfect for**: Cloud-native applications and DevOps workflows.

#### **App Service**

*Azure App Service is a fully managed platform for building, deploying, and scaling web apps.*

- **What it does**: Deploys web applications with automatic scaling and SSL certificates.
- **Why you'll love it**: Deploy from code to production in minutes.
- **Perfect for**: Web applications and APIs requiring rapid deployment.

[![Screenshot 2025-09-23 155833.png](https://xops-docs.axiomio.com/uploads/images/gallery/2025-09/scaled-1680-/KuFUj8gBhdchlvqj-screenshot-2025-09-23-155833.png)](https://xops-docs.axiomio.com/uploads/images/gallery/2025-09/KuFUj8gBhdchlvqj-screenshot-2025-09-23-155833.png)
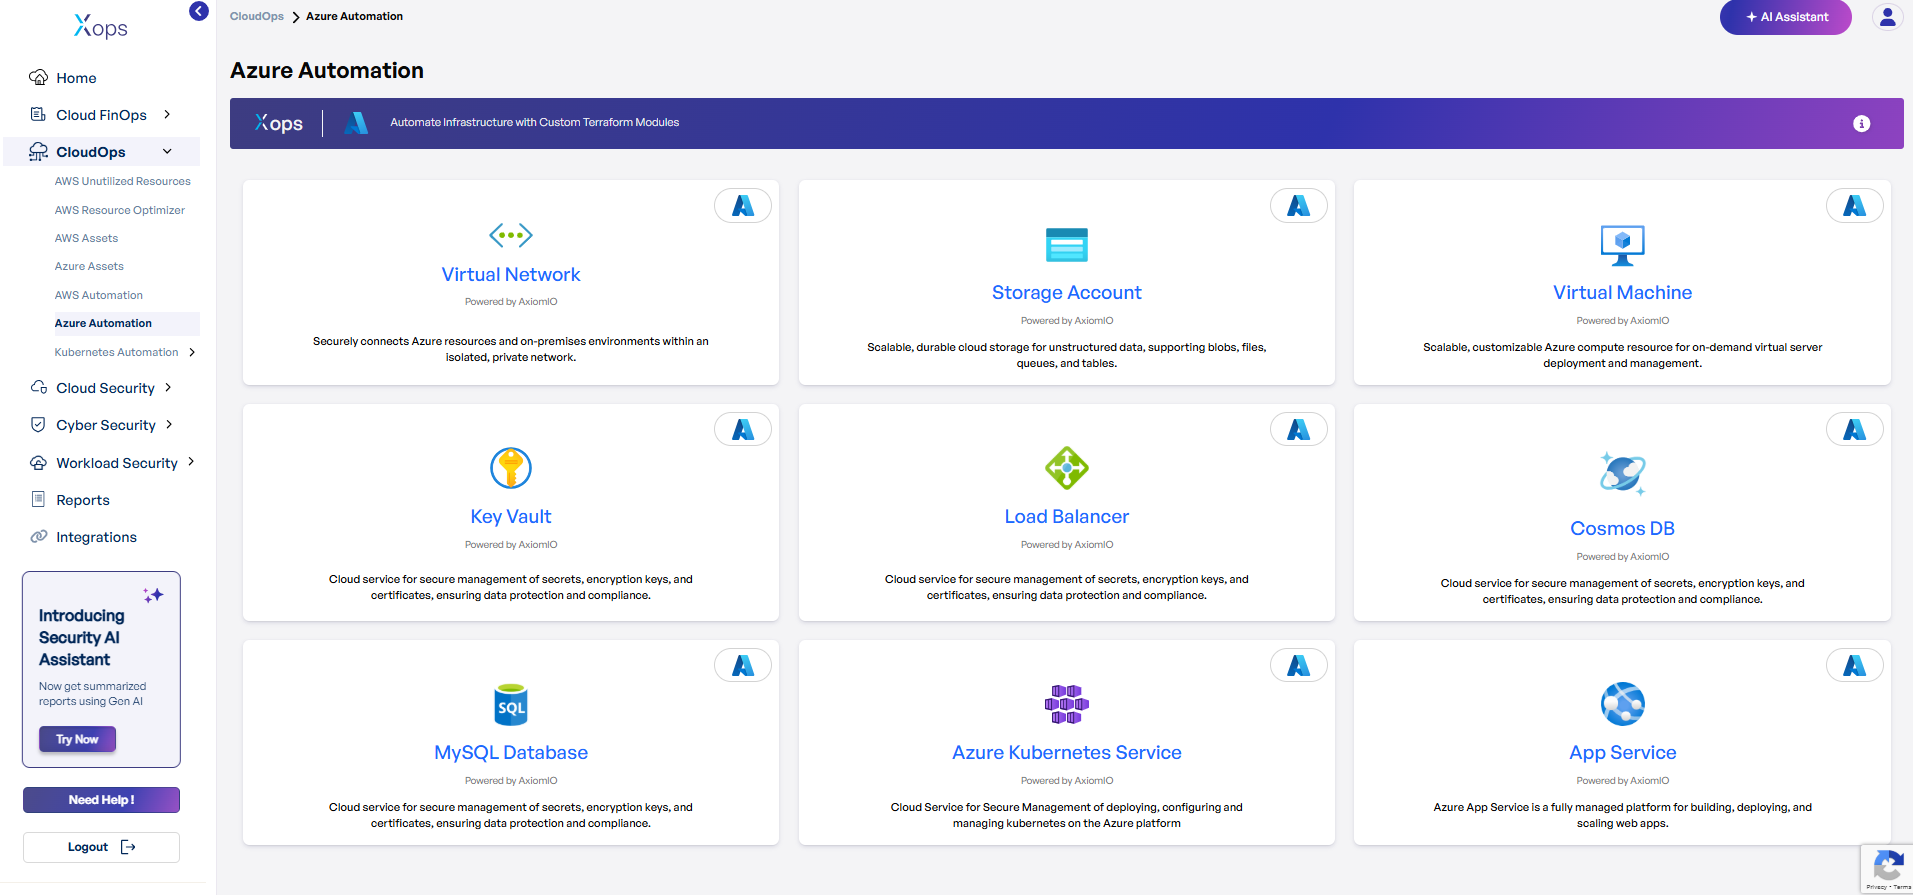
# AI Assistant

Guidance on using the X-Ops AI Assistant to generate FinOps and security reports for cost and risk optimization.

# Generating a Cloud FinOps Report

#### **Generating a Cloud FinOps Report**

To generate a Cloud FinOps report using the X-Ops AI Assistant, follow these steps:

- **Log in to the Platform**
    
    
    - Access the platform and sign in using your credentials.
- **Access AI Assistant**
    
    
    - Locate the AI Assistant icon in the top right corner of the screen and click on it.
    - This action will open the AI Assistant, it will open as a side panel on the right side of the page.
    - [![image.png](https://xops-docs.axiomio.com/uploads/images/gallery/2025-06/scaled-1680-/NSMMTGAVf9riYR5R-image.png)](https://xops-docs.axiomio.com/uploads/images/gallery/2025-06/NSMMTGAVf9riYR5R-image.png)
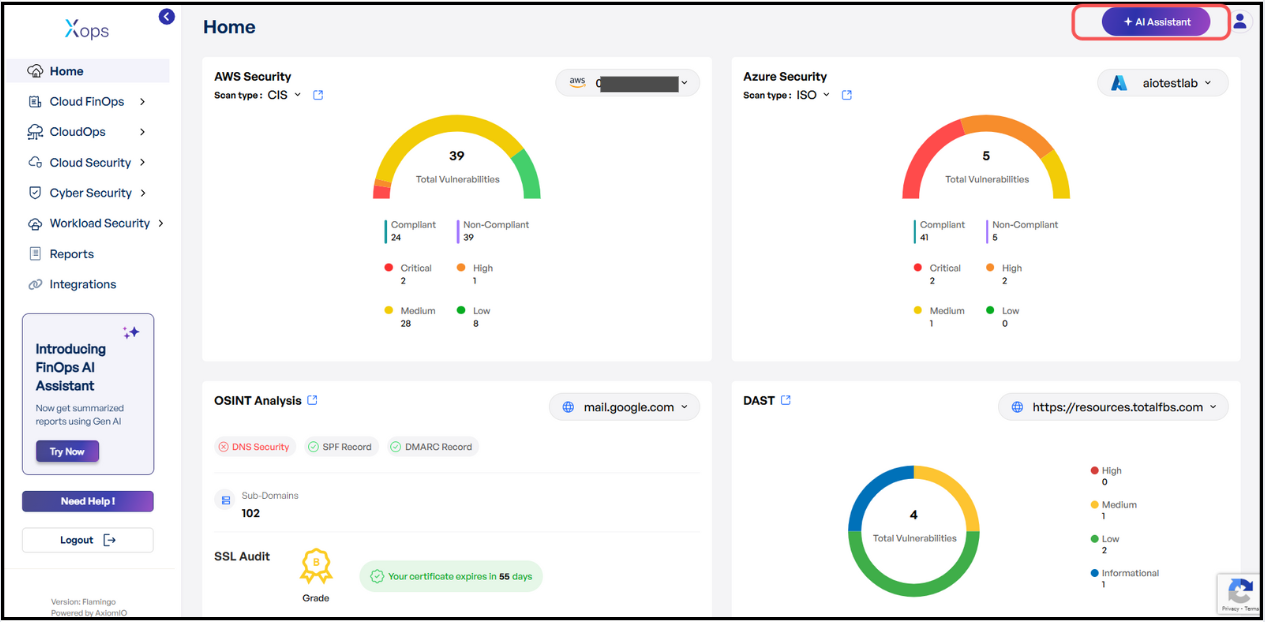
        
        [![image.png](https://xops-docs.axiomio.com/uploads/images/gallery/2025-06/scaled-1680-/ADULgDgGOHvOufRk-image.png)](https://xops-docs.axiomio.com/uploads/images/gallery/2025-06/ADULgDgGOHvOufRk-image.png)
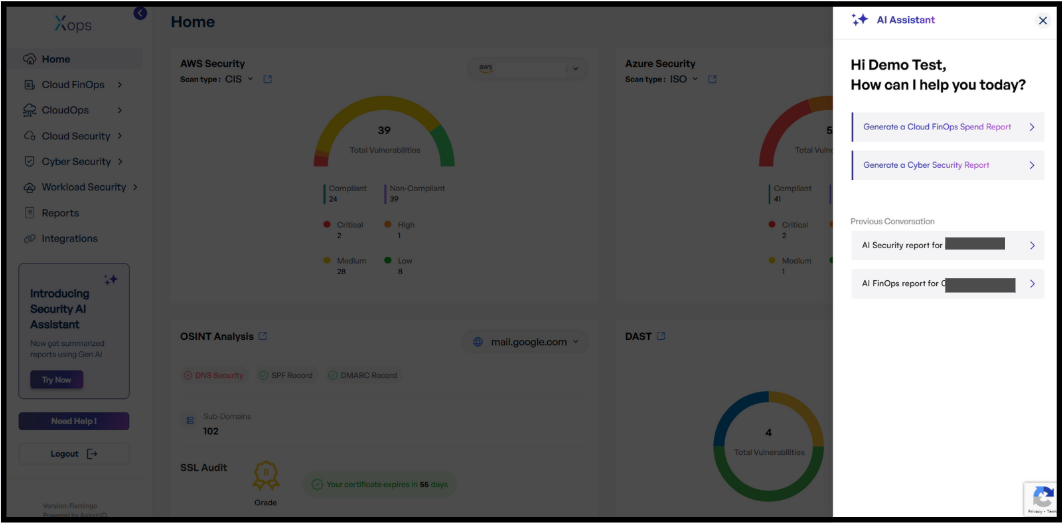
- **Report Generation**
    - - Select **Generate a Cloud FinOps Report** from the options displayed.
        - The AI Assistant will automatically begin generating the FinOps report for the management account integrated with the X-Ops application.
        - The report generation process typically takes between 5 to 10 minutes.
            
            [![image.png](https://xops-docs.axiomio.com/uploads/images/gallery/2025-06/scaled-1680-/wuinlnITOV8TCzpX-image.png)](https://xops-docs.axiomio.com/uploads/images/gallery/2025-06/wuinlnITOV8TCzpX-image.png)[![image.png](https://xops-docs.axiomio.com/uploads/images/gallery/2025-06/scaled-1680-/0ZwIrLsjHgwoe7S5-image.png)](https://xops-docs.axiomio.com/uploads/images/gallery/2025-06/0ZwIrLsjHgwoe7S5-image.png)
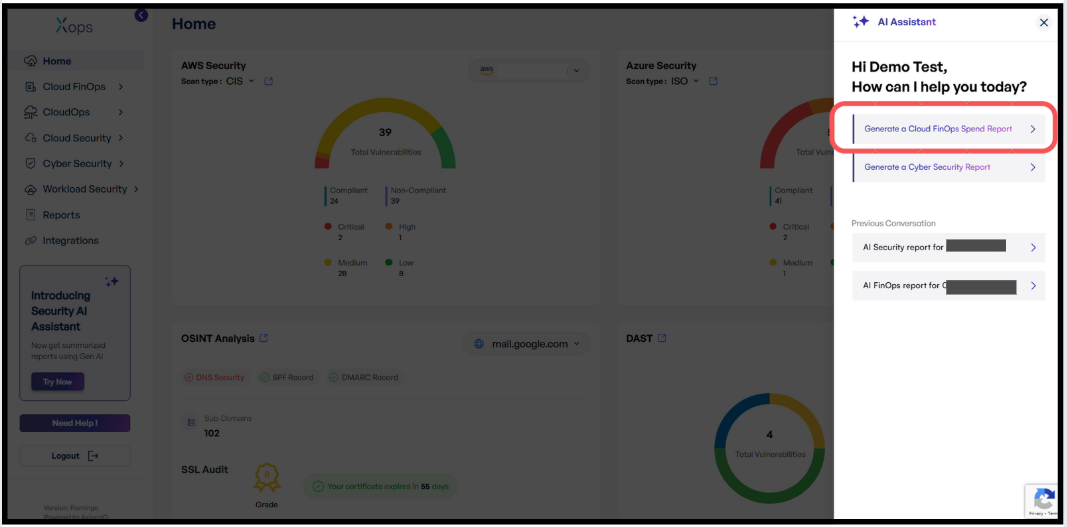
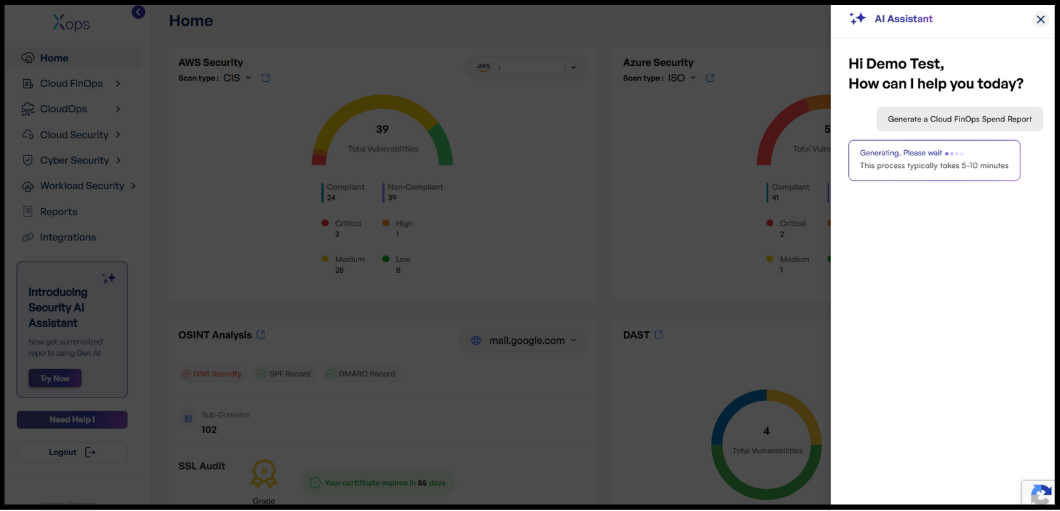
- **Receiving and Viewing the Report**  
    
    - Once the report is ready, you will receive a report with an **Open Report** option.
    - Click **Open Report** to view the complete FinOps report.
        
        [![image.png](https://xops-docs.axiomio.com/uploads/images/gallery/2025-06/scaled-1680-/SQAz8f6S7L3ygCai-image.png)](https://xops-docs.axiomio.com/uploads/images/gallery/2025-06/SQAz8f6S7L3ygCai-image.png)
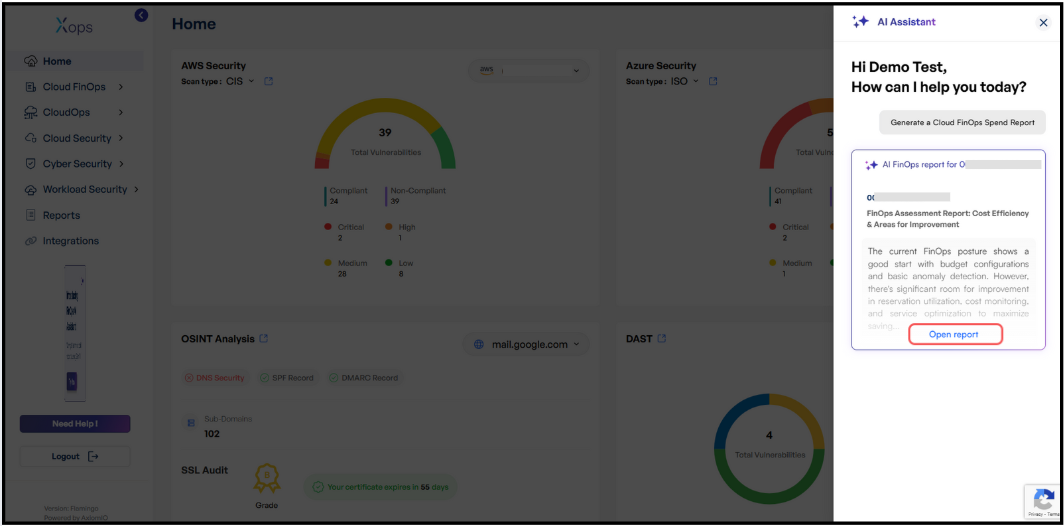
        
          
        [![image.png](https://xops-docs.axiomio.com/uploads/images/gallery/2025-06/scaled-1680-/ynyolLReN3YpppoC-image.png)](https://xops-docs.axiomio.com/uploads/images/gallery/2025-06/ynyolLReN3YpppoC-image.png)
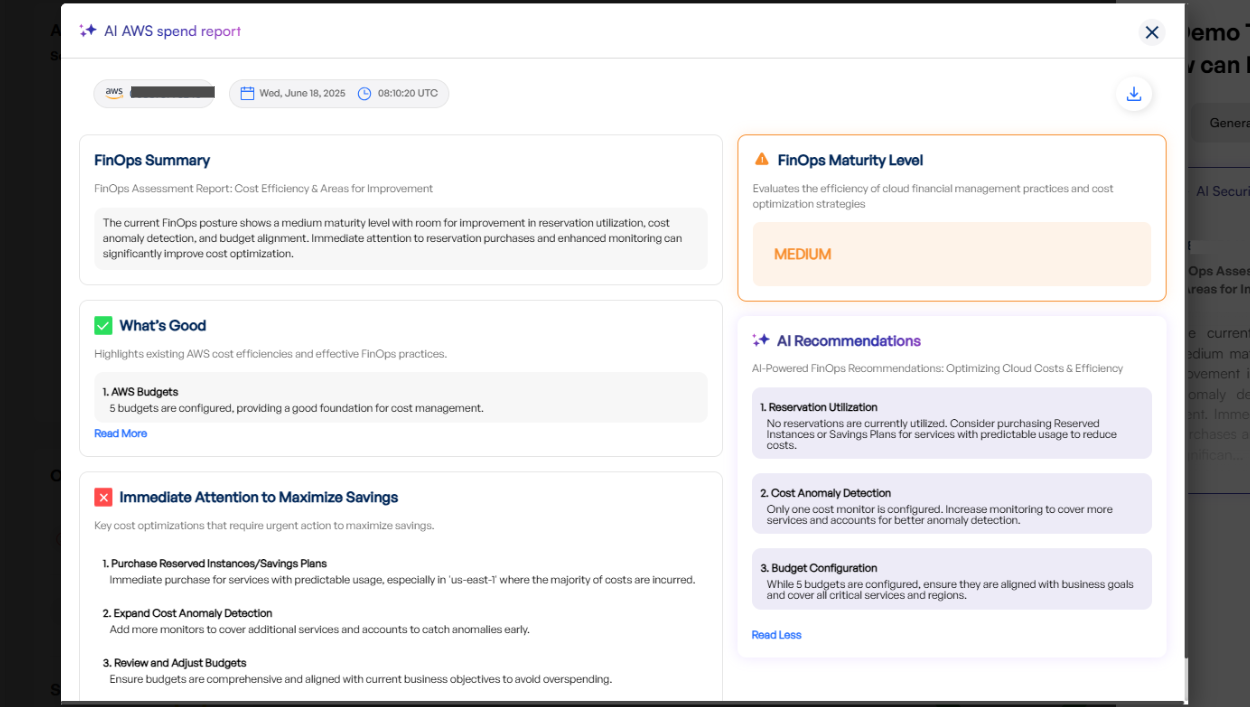
- **Downloading the Report**
    - Inside the report view, locate the **Download** button at the top right corner.
    - Click **Download** to save the report to your device.[![image.png](https://xops-docs.axiomio.com/uploads/images/gallery/2025-06/scaled-1680-/WIqWlSJwCDHSeLyz-image.png)](https://xops-docs.axiomio.com/uploads/images/gallery/2025-06/WIqWlSJwCDHSeLyz-image.png)
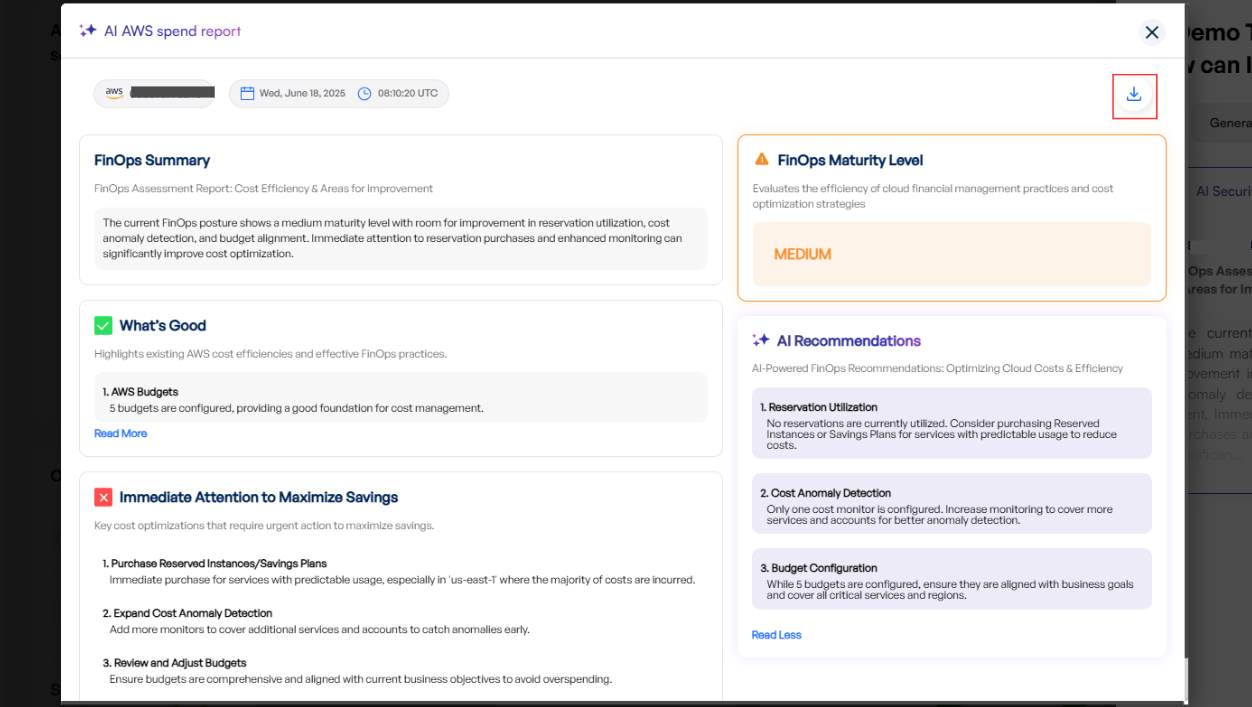
# Generating a Cyber Security Report

#### **Generating a Cyber Security Report**

To generate a Cyber Security report using the X-Ops AI Assistant, follow these steps:

- **Log in to the Platform**
    
    
    - Access the platform and sign in using your credentials.
- **Access AI Assistant**
    
    
    - Locate the AI Assistant icon in the top right corner of the screen and click on it.
    - This action will open the AI Assistant, it will open as a side panel on the right side of the page.
    - 
    
    [![image.png](https://xops-docs.axiomio.com/uploads/images/gallery/2025-06/scaled-1680-/NSMMTGAVf9riYR5R-image.png)](https://xops-docs.axiomio.com/uploads/images/gallery/2025-06/NSMMTGAVf9riYR5R-image.png)

    
    [![image.png](https://xops-docs.axiomio.com/uploads/images/gallery/2025-06/scaled-1680-/ADULgDgGOHvOufRk-image.png)](https://xops-docs.axiomio.com/uploads/images/gallery/2025-06/ADULgDgGOHvOufRk-image.png)

- **Report Generation**
    - - Select **Generate a Cyber Security Report** from the options displayed.
        - When prompted, enter the domain or IP address for which you want to generate the report.
        - The AI Assistant will begin generating the Cyber Security report based on the provided details.
        - The report generation process typically takes between 5 to 10 minutes.[![image.png](https://xops-docs.axiomio.com/uploads/images/gallery/2025-06/scaled-1680-/xOKjrrQp7e87WXaz-image.png)](https://xops-docs.axiomio.com/uploads/images/gallery/2025-06/xOKjrrQp7e87WXaz-image.png)[![image.png](https://xops-docs.axiomio.com/uploads/images/gallery/2025-06/scaled-1680-/YyHv3PiMMRxWyB8I-image.png)](https://xops-docs.axiomio.com/uploads/images/gallery/2025-06/YyHv3PiMMRxWyB8I-image.png)[![image.png](https://xops-docs.axiomio.com/uploads/images/gallery/2025-06/scaled-1680-/WFkQ6UayyIAkRSwG-image.png)](https://xops-docs.axiomio.com/uploads/images/gallery/2025-06/WFkQ6UayyIAkRSwG-image.png)
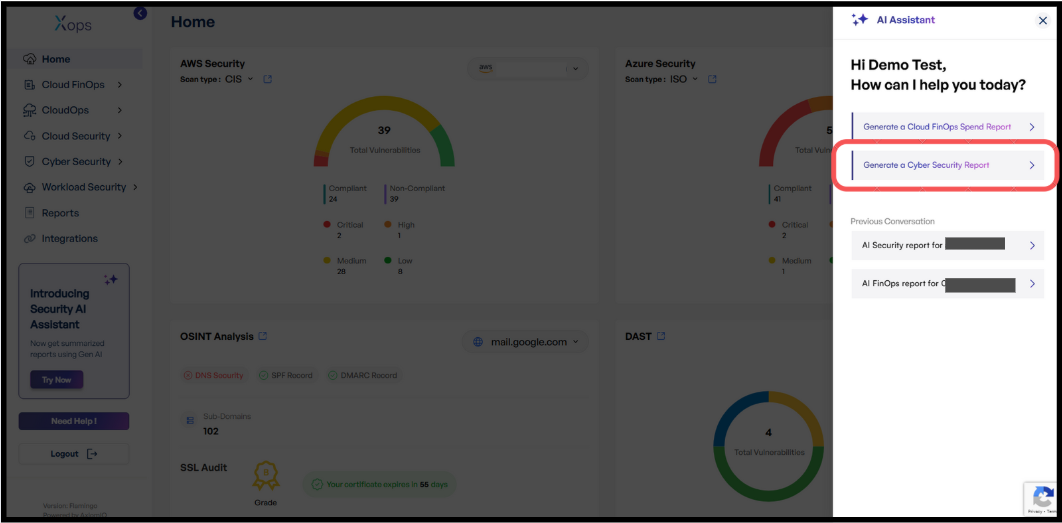
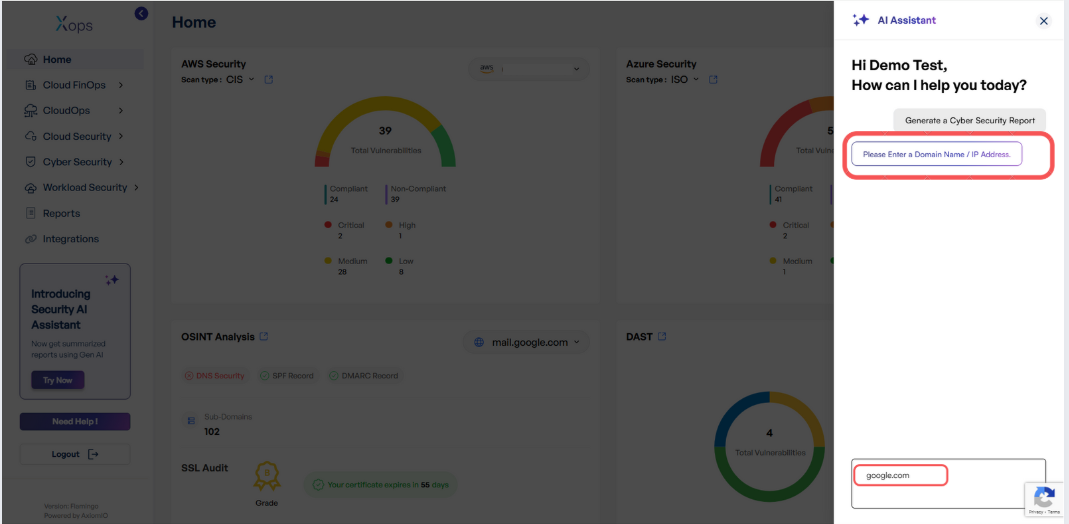
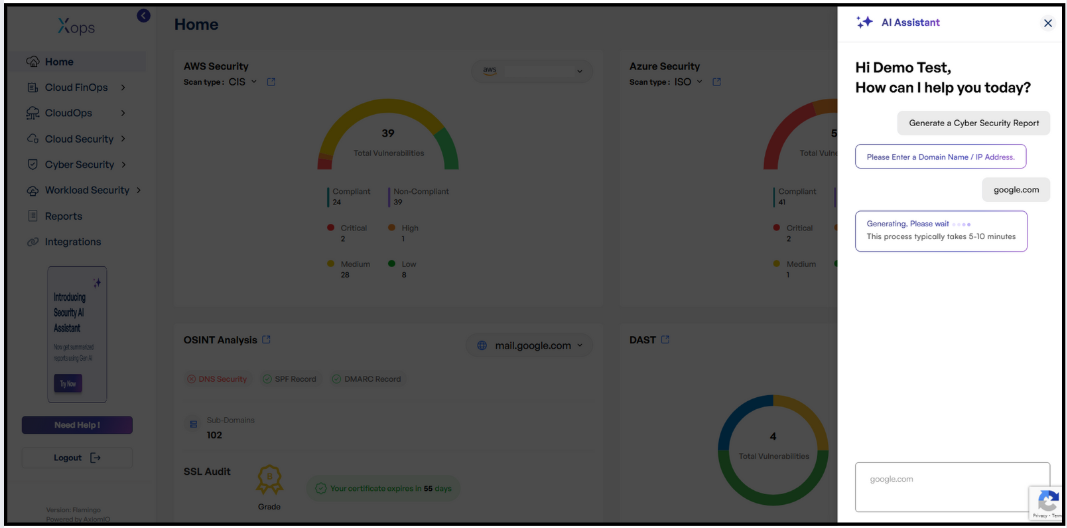
- **Receiving and Viewing the Report**  
    
    - Once the report is ready, you will receive a report with an **Open Report** option.
    - Click **Open Report** to view the complete Cyber Security report.  
        [![image.png](https://xops-docs.axiomio.com/uploads/images/gallery/2025-06/scaled-1680-/NBCwFotM2aWoNTLO-image.png)](https://xops-docs.axiomio.com/uploads/images/gallery/2025-06/NBCwFotM2aWoNTLO-image.png)[![image.png](https://xops-docs.axiomio.com/uploads/images/gallery/2025-06/scaled-1680-/Tid9DMrQ8BOKLMFT-image.png)](https://xops-docs.axiomio.com/uploads/images/gallery/2025-06/Tid9DMrQ8BOKLMFT-image.png)
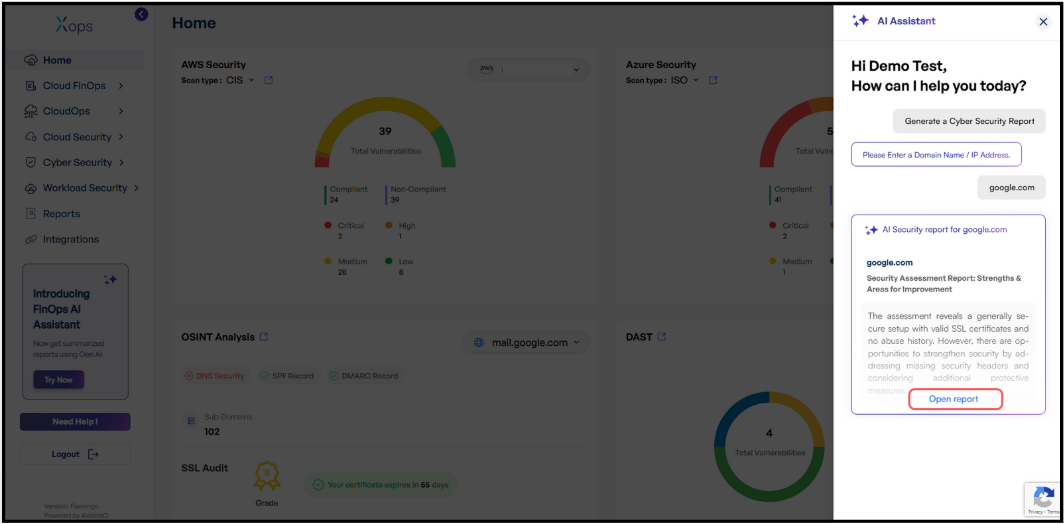
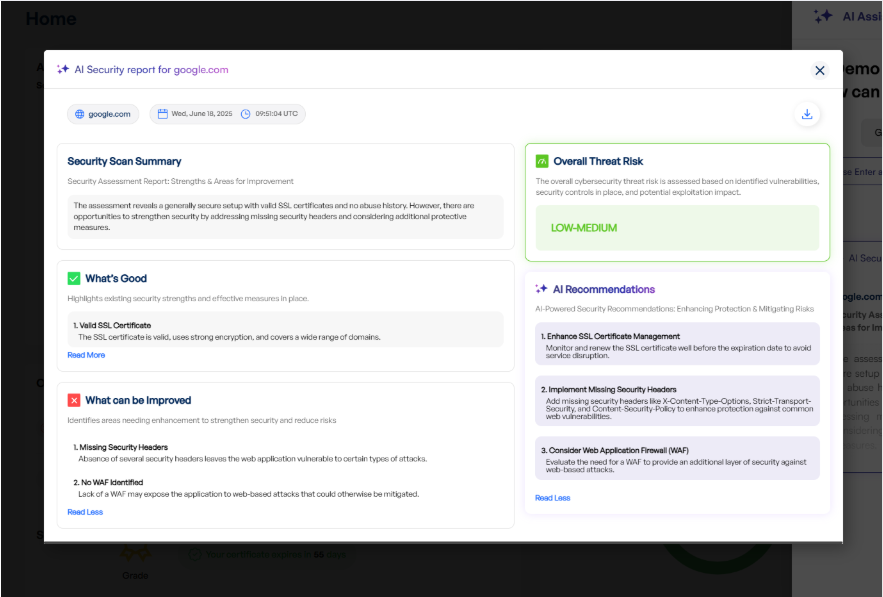
- **Downloading the Report**
    - Inside the report view, locate the **Download** button at the top right corner.
    - Click **Download** to save the report to your device.[![image.png](https://xops-docs.axiomio.com/uploads/images/gallery/2025-06/scaled-1680-/ykW8P1DwlI34vWMj-image.png)](https://xops-docs.axiomio.com/uploads/images/gallery/2025-06/ykW8P1DwlI34vWMj-image.png)
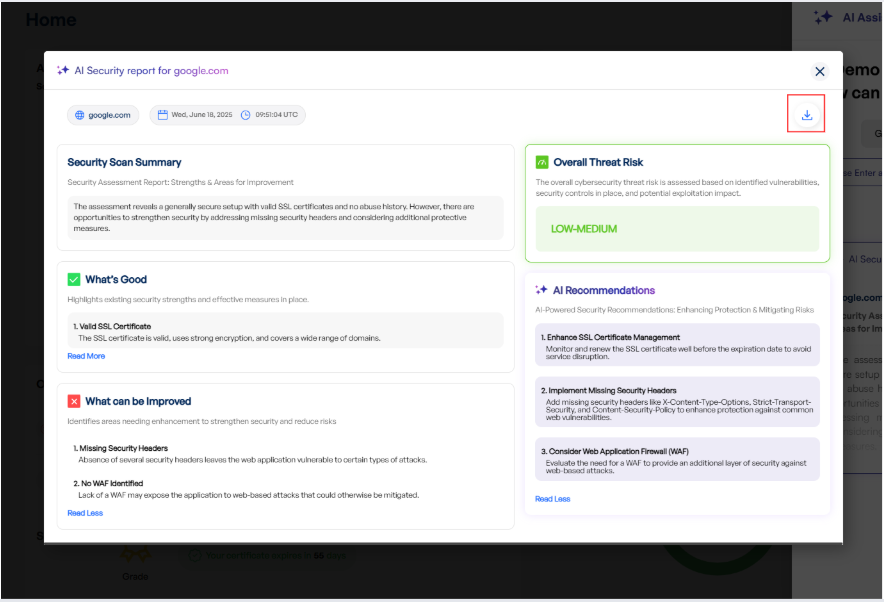
# Reviewing Historical Reports

Guide on navigating, filtering, and analyzing historical reports within the platform.

# Accessing and Managing Report History

### **Reviewing Historical Reports**

- **Log in to the Platform**
    
    
    - Access the platform and sign in using your credentials.
- **Navigate to the Reports Section**
    - Locate the **Reports** option in the side navigation bar.
    - Click on it to access the report management dashboard.
    - This page provides a list of all previously generated reports.
- **Search and Filter Reports** Apply filters such as: 
    - **Date Range** – View reports generated within a specific time frame.
    - **Status** – Identify In Progress, Pending, Completed or Error reports.
    - **Scan Type** - Filter by specific Scan
- **View Report**
    - Locate the desired report from the list.
    - Click on the **View** **Report** link to open it.
- **View Error Message** – Click the **"View Error"** button under the **Actions** column to access detailed error information.

[![image.png](https://xops-docs.axiomio.com/uploads/images/gallery/2026-03/scaled-1680-/k97UKOlQRrRVxGWT-image.png)](https://xops-docs.axiomio.com/uploads/images/gallery/2026-03/k97UKOlQRrRVxGWT-image.png)
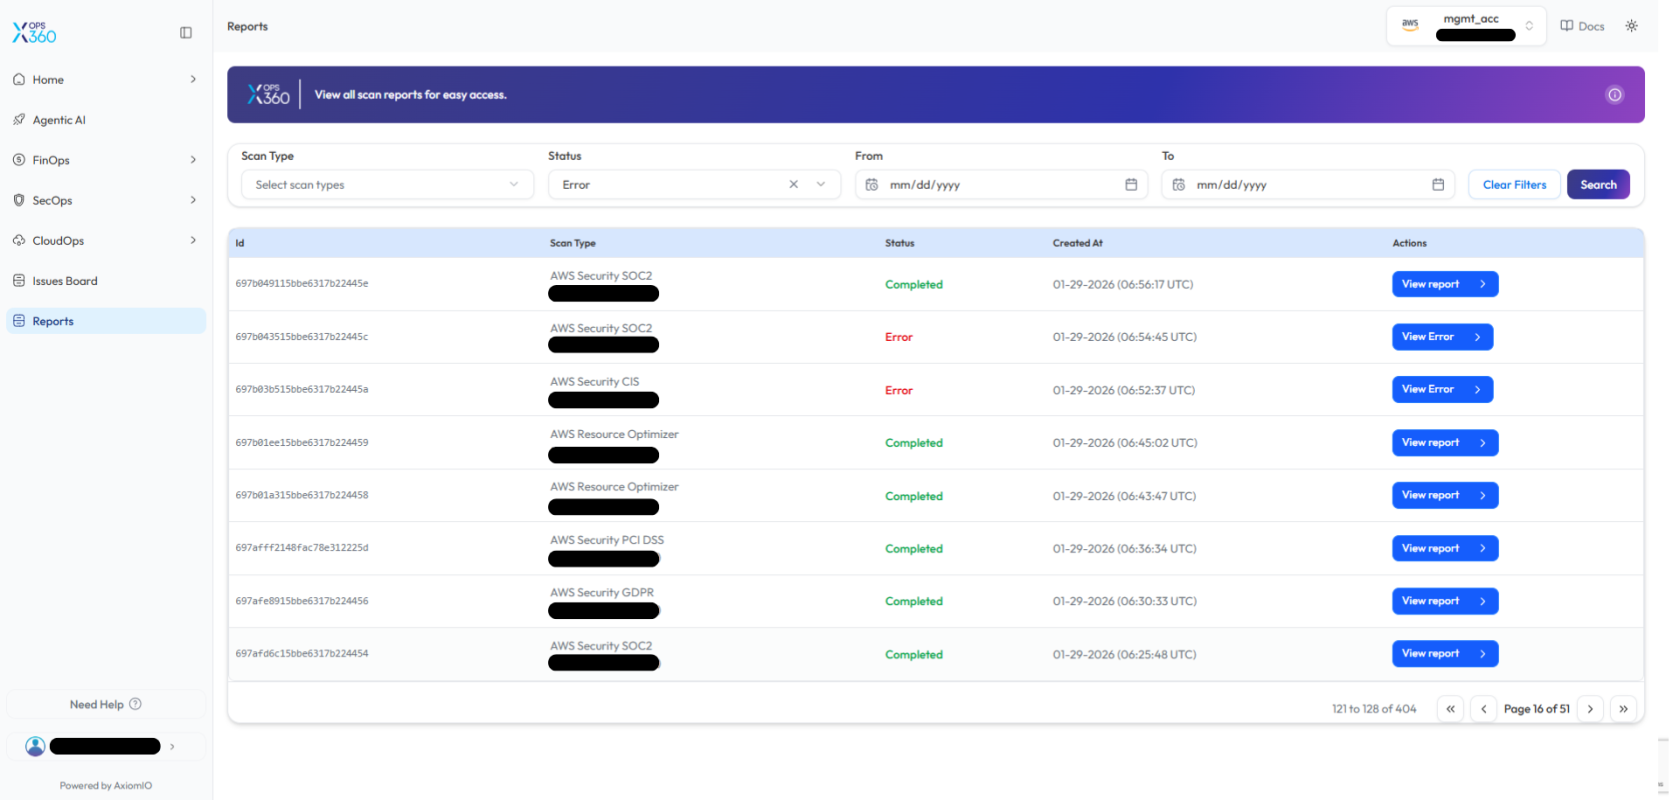
# Support and Assistance

This section provides comprehensive guidance on accessing support and submitting help requests.

# Submitting Support Requests

#### **Submitting Support Requests**

To ensure a smooth experience, users can submit support requests through the platform's **Need Help** section. Follow the steps below to request assistance.

- **Log in to the Platform**
    
    
    - Access the platform and sign in using your credentials.
- **Locate the "Need Help" Option**
    
    
    - Navigate to the **side navigation panel** on the left-hand side of the screen.
    - Scroll to the bottom and click on the **Need Help** option.

[![image.png](https://xops-docs.axiomio.com/uploads/images/gallery/2026-03/scaled-1680-/BGRC9PRxO1IvH3Wc-image.png)](https://xops-docs.axiomio.com/uploads/images/gallery/2026-03/BGRC9PRxO1IvH3Wc-image.png)
- - - This action will open the **Let’s Connect** support request pop-up.

**Fill in the Help Request Form**

**[![image.png](https://xops-docs.axiomio.com/uploads/images/gallery/2026-03/scaled-1680-/RVngfsmqdQIrUYc0-image.png)](https://xops-docs.axiomio.com/uploads/images/gallery/2026-03/RVngfsmqdQIrUYc0-image.png)**
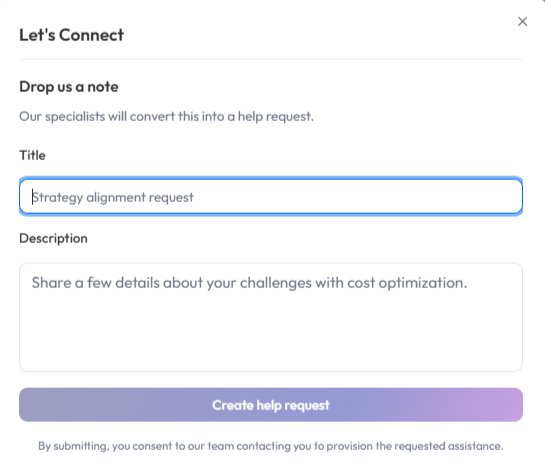
In the **Let’s Connect** window, provide the following details:

- - **Title Field:**
        
        
        - Enter a clear and concise title for your request (for example: *Strategy alignment request*, *Issue with scan results*, or *Access support*).
    - **Description Field:**
        
        
        - Provide detailed information about your request or issue.
        - Include relevant details such as the problem you are experiencing, required assistance, or any additional context that will help the support team understand your request.

- **Submit the Request**
    - After entering the required details, click **Create help request** to submit your support request.
- **Confirmation** 
    - A confirmation message will appear once the request is successfully submitted.