# Microsoft 365 Account Integration
#### **Navigating to the Integrations Page**
- **Log in to the Platform**
- Access the platform and sign in using your credentials.
- **Open the Integrations Section**
- Locate the side navigation panel on the left.
- Click on the **Integrations** tab.
- **Select Microsoft Integration**
- On the Integrations page, you will see available options for **AWS, Azure, and Microsoft accounts**.
- Click on the **Microsoft card** then click on **M365** to open the “Link a New Microsoft Account” page.
[](https://xops-docs.axiomio.com/uploads/images/gallery/2025-01/wHf6mDfxuPWl23ZH-arhimage.png)
Note: Follow **Initiating M365 Integration** steps to Connect Microsoft 365 Account in Xops 360, ensure that the following permissions are assigned
#### **Initiating M365 Integration**
##### **Registering an Application and configuration in Microsoft Entra Admin center**
- Navigate to the **[Microsoft Entra Admin Center](https://aka.ms/MSEntraPortal)** **Portal**.
- In the search bar, enter **App Registrations** and select it from the results.
[](https://xops-docs.axiomio.com/uploads/images/gallery/2025-02/1WBuI1zCB756M681-image.png)
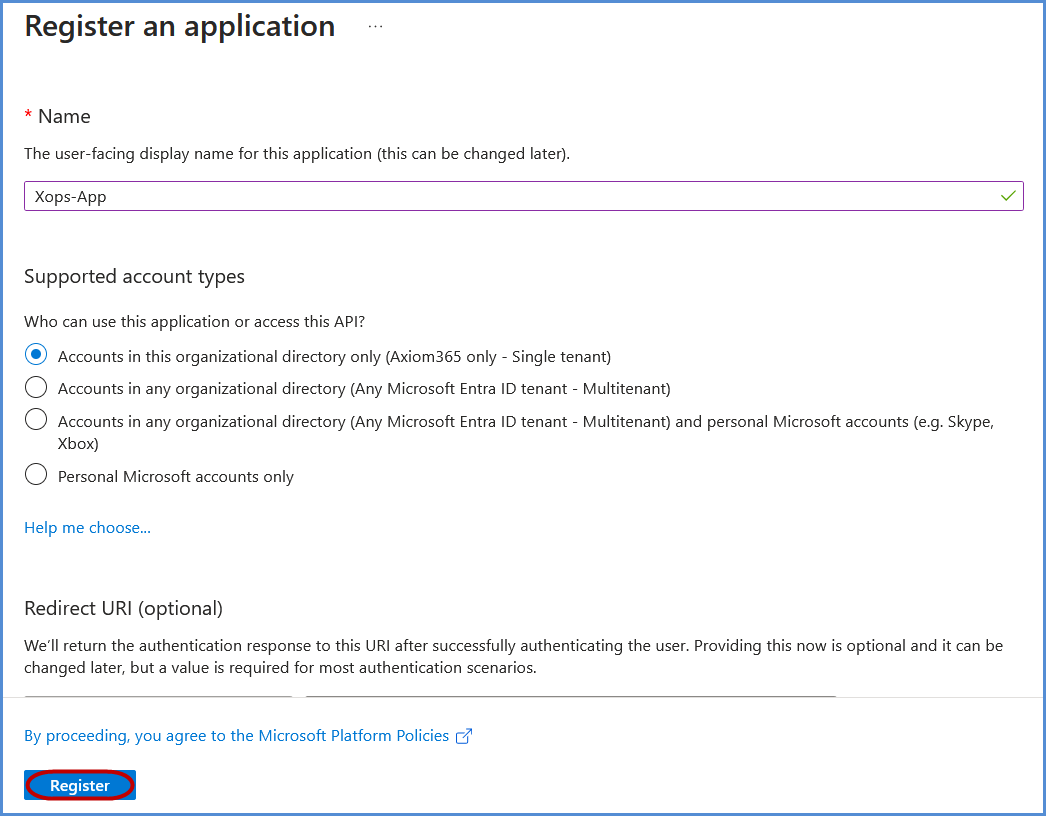
- Click on **New Registration**.
- Register the application:
- Provide a name for the application.
- Under **Supported account types**, select **Accounts in this organizational directory only** if not set by default.
- Click **Register** to complete the process.
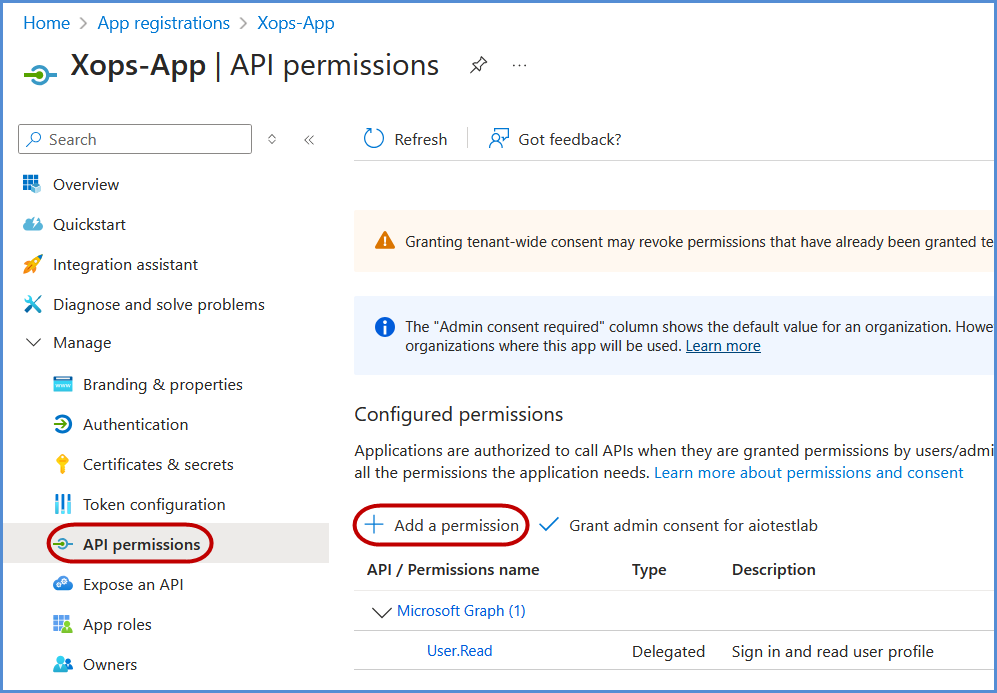
- Navigate to **Manage** and click on **API Permissions**.
- Click on **Add a permission**.
[](https://xops-docs.axiomio.com/uploads/images/gallery/2025-02/5xcQPcc2AbhsgERB-image.png)
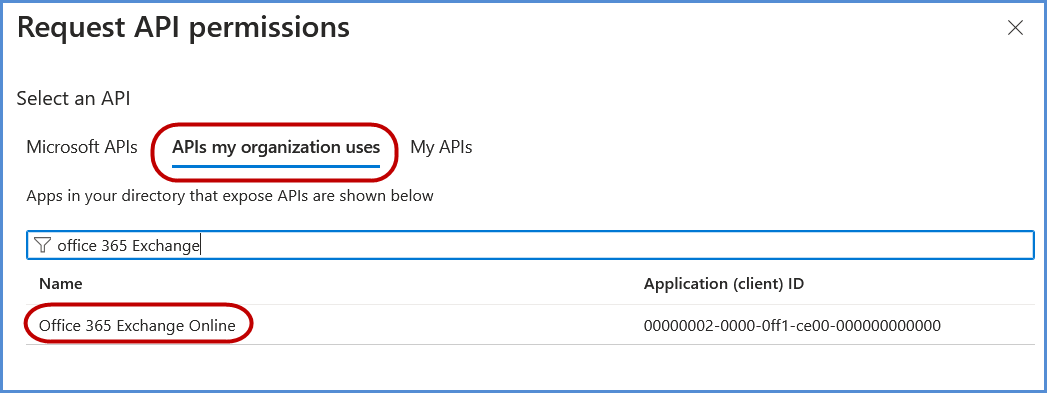
- Select **APIs my organization uses** and search for **Office 365 Exchange Online**, then click on it.
[](https://xops-docs.axiomio.com/uploads/images/gallery/2025-02/NoxidNsHYp6byF78-image.png)
- Choose **Application permissions**, search for **Exchange.ManageAsApp**, select it, and click **Add permissions**.
[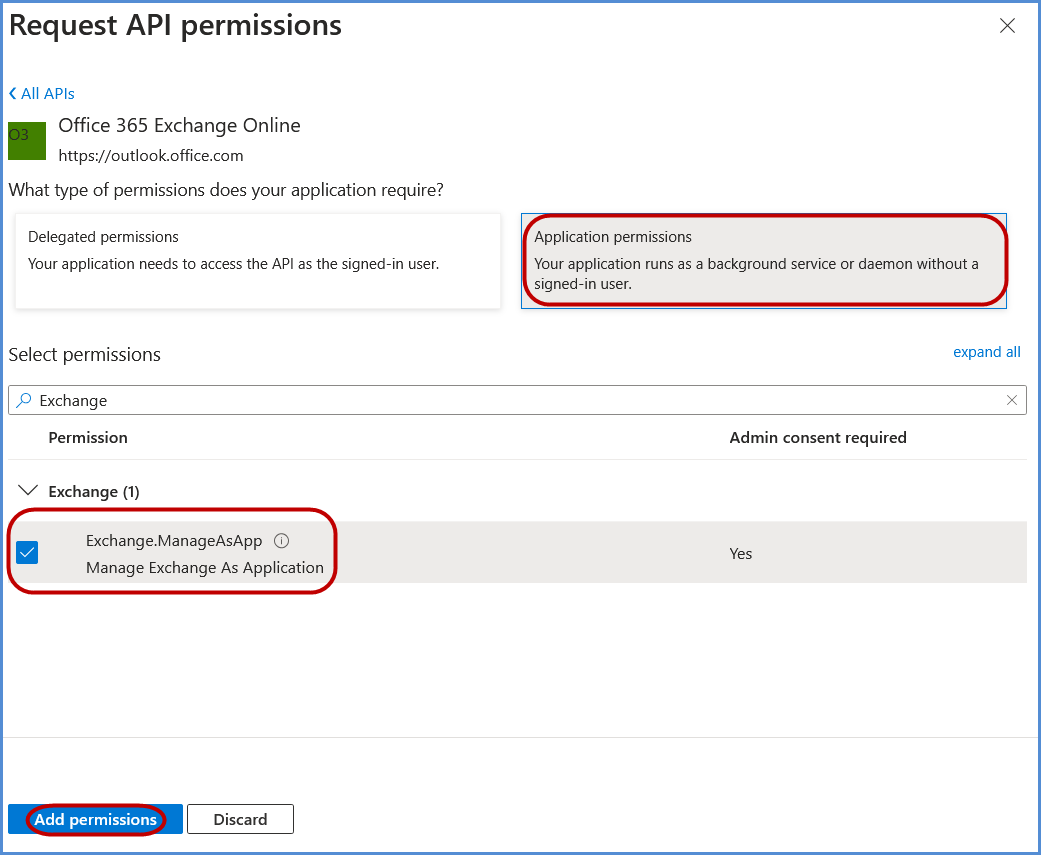](https://xops-docs.axiomio.com/uploads/images/gallery/2025-02/Ubf7YTqJpnckSS3a-image.png)
- Click on **Grant admin consent** and confirm by selecting **Yes** in the confirmation popup.
[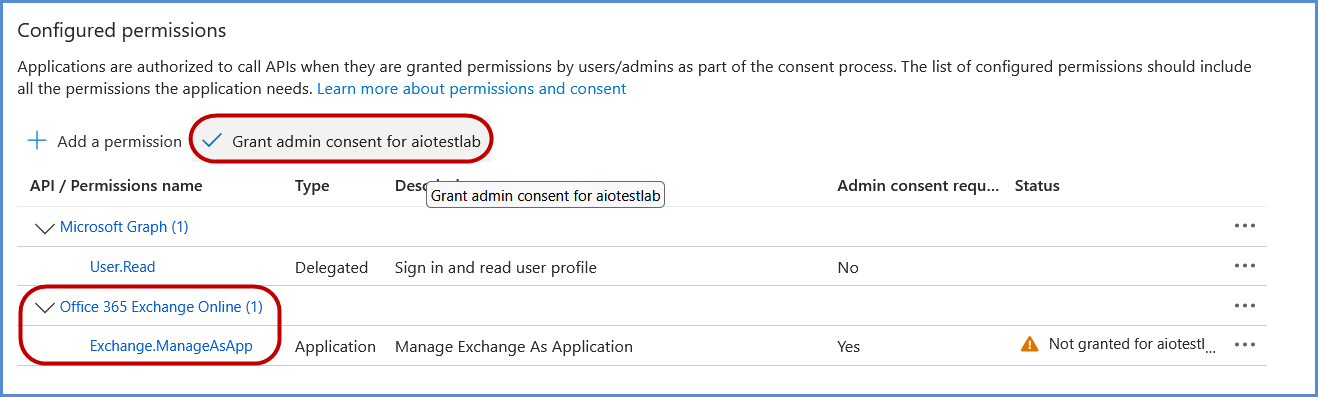](https://xops-docs.axiomio.com/uploads/images/gallery/2025-02/57x0zIfk6LOIqPnO-image.png)
[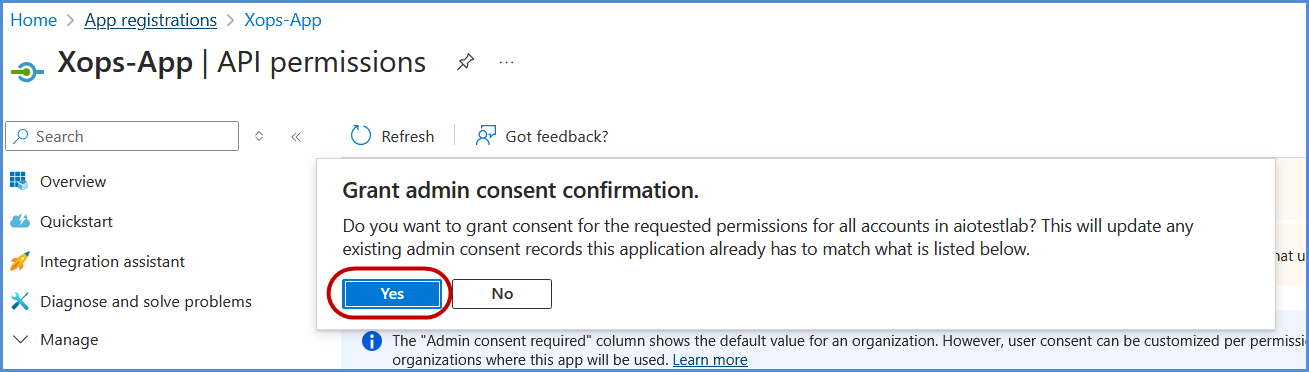](https://xops-docs.axiomio.com/uploads/images/gallery/2025-02/AsOogaAC82YDW4D9-image.png)
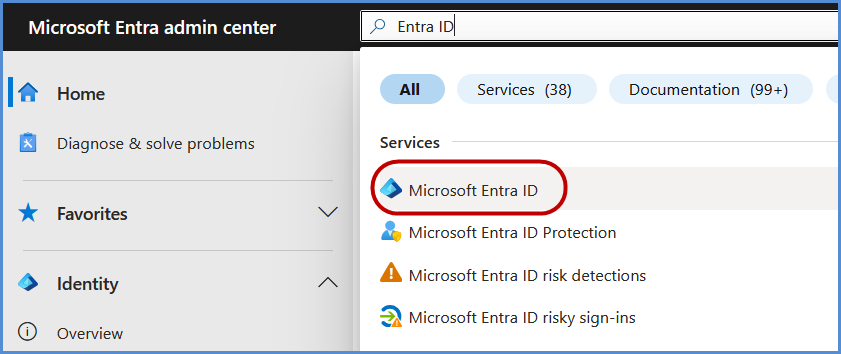
##### **Assigning Entra ID Permissions**
- In the **Azure Portal**, search for **Entra ID** and select it.
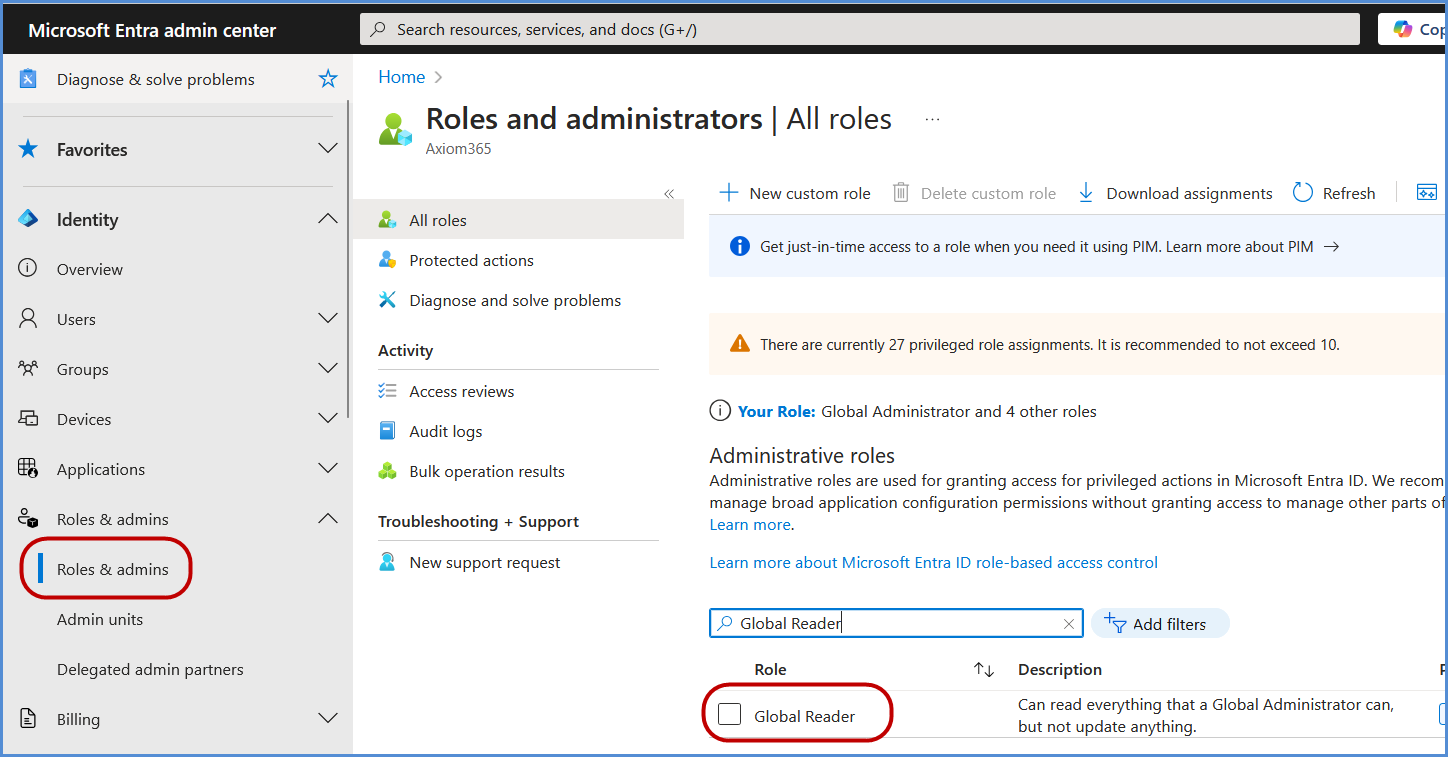
- Go to **Overview**, and in the left navigation pane, click **Roles and Administrators**.
- Search for **Global Reader** and select it.
[](https://xops-docs.axiomio.com/uploads/images/gallery/2025-02/v5mR8RgLjni2zhpY-image.png)
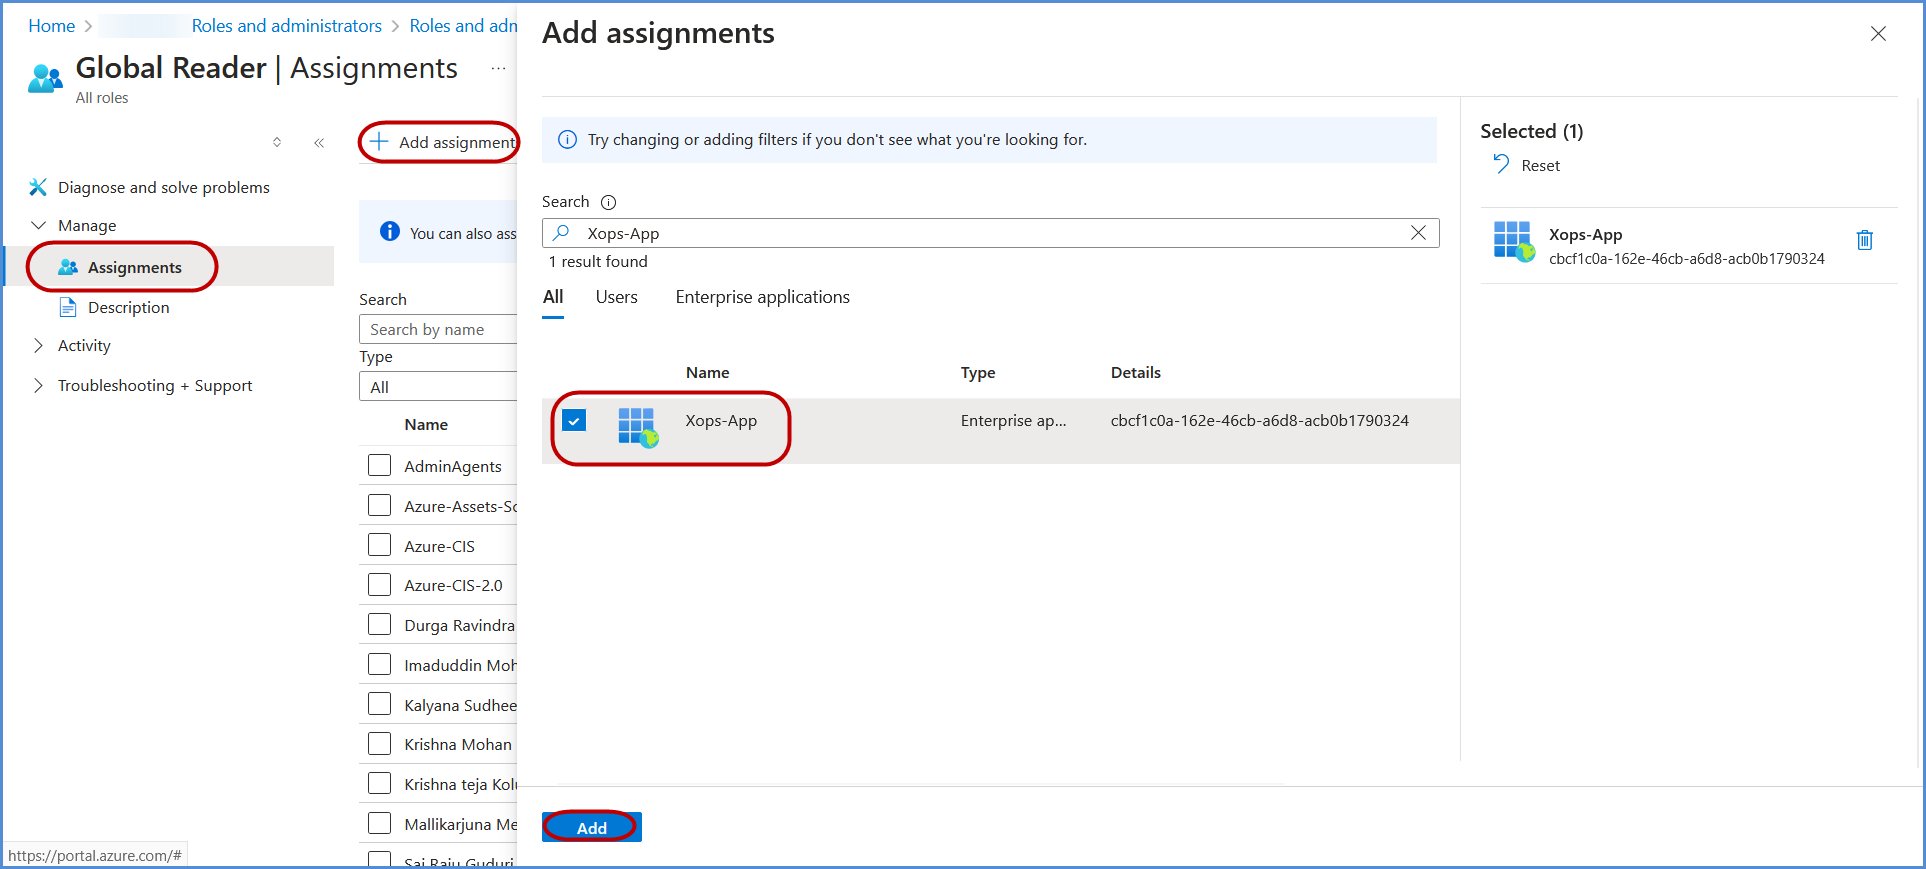
- Under **Assignments**, search for the application registered in the previous step, select it, and click **Add** to grant the **Global Reader** role to the application.
[](https://xops-docs.axiomio.com/uploads/images/gallery/2025-02/TGiIMtv54JGZCPOR-image.png)
##### **Adding a Certificate for Authentication**
- Navigate to the previously created **Application Registration**.
- Copy the **Application (Client) ID** and **Directory (Tenant) ID**.
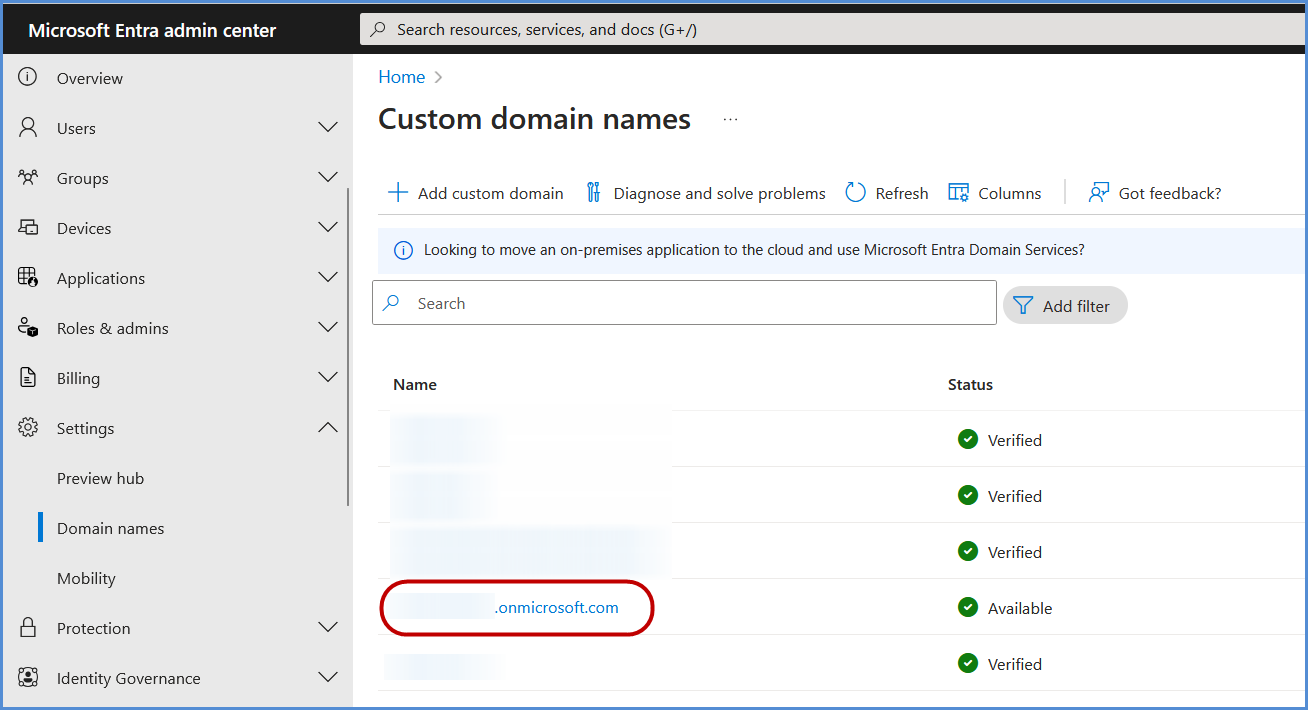
- Go to Domain names, copy the **Organization ID**
[](https://xops-docs.axiomio.com/uploads/images/gallery/2025-02/ctedUZhTWjm64flS-image.png)
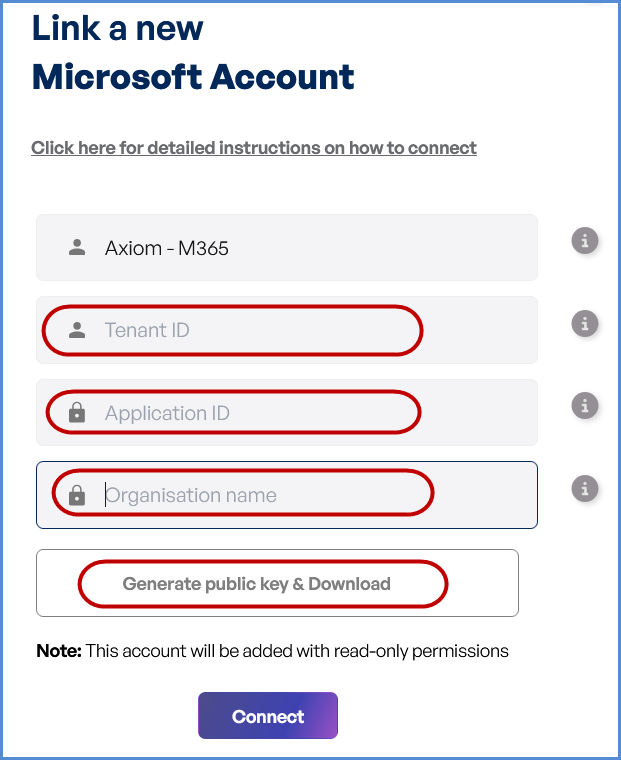
- Access the **[Xops 360 Portal](https://xops.axiomio.com/)** and navigate to **Integrations** , Select **Microsoft** icon then click on **Add Account for Microsoft**.
- Enter a friendly name for the account.
- Provide the **App ID, Tenant ID** copied earlier.
- Provide the **Organization ID copied earlier.**
- Click **Generate Public Key & Download** the generated key.
[](https://xops-docs.axiomio.com/uploads/images/gallery/2025-02/kyUWtwzbKVLs5NTW-image.png)
- Return to the **Microsoft Entra Admin center Portal**, open the application, and go to **Manage** > **Certificates & Secrets**.
- Click **Upload Certificate**, select the certificate file downloaded earlier, and click **Add** to complete the upload process.
**Note:** The M365 scan requires all users/accounts to have the **O365\_BUSINESS\_PREMIUM** license; missing licenses may cause scan failure.
[](https://xops-docs.axiomio.com/uploads/images/gallery/2025-02/gRf9XelYLknxttzY-image.png)
**Note:**
- For any challenges, please contact our support team at ****
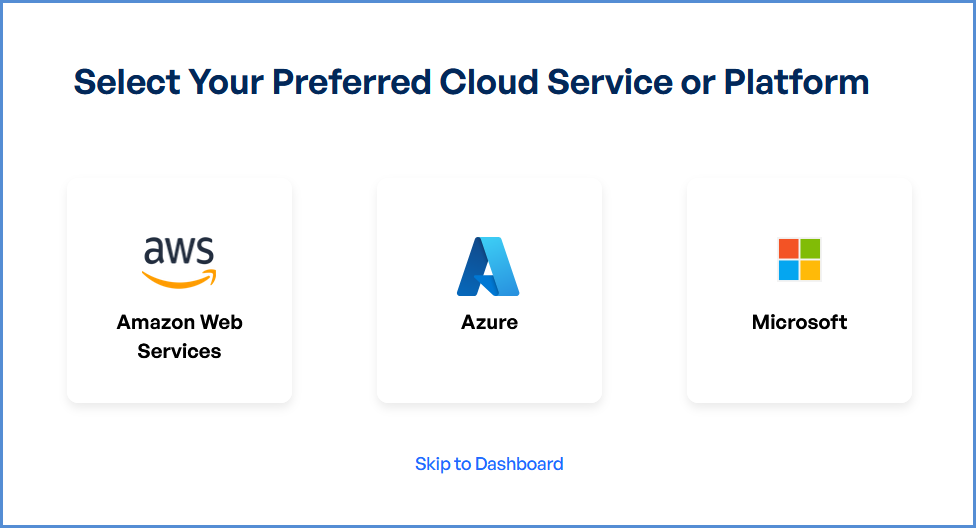
- **First-Time Login Experience**
- When you log in for the first time, you will be prompted to select your preferred **cloud service or platform** (AWS, Azure, or Microsoft). This selection is required to establish the initial account connection.
- Once your account is successfully connected to AWS, Azure, or Microsoft, this selection screen **will not appear** in subsequent logins. Instead, you will be directed **automatically to the Home page**.
- To manage or modify integrations, navigate to the **"Integrations"** section from the left panel in the dashboard.