AWS Account Integration
Navigating to the Integrations Page
-
Log in to the Platform
- Access the platform and sign in using your credentials.
-
Open the Integrations Section
- Locate the side navigation panel on the left.
- Click on the Integrations tab.
-
Select AWS Integration
- On the Integrations page, you will see available options for AWS, Azure, and Microsoft accounts.
- Click on the AWS card to open the “Link a New AWS Account” page.

Initiating AWS Integration
-
Access Setup Instructions
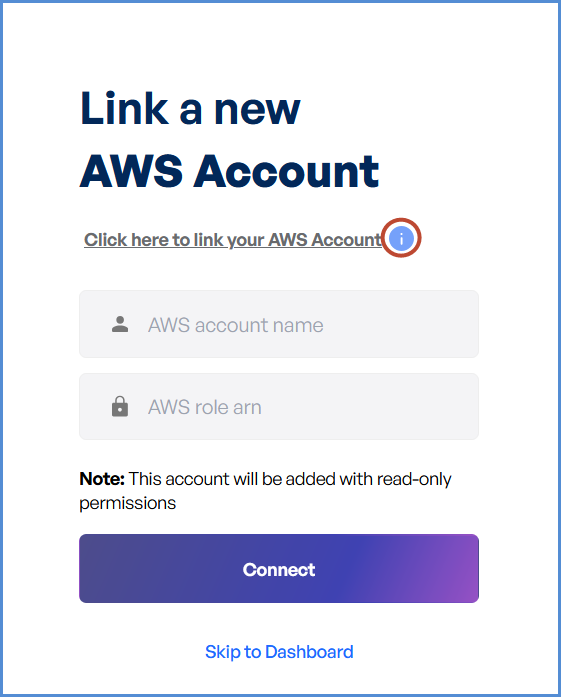
- Click the Information ("i") button to view step-by-step setup guidance.
-
Retrieve AWS Role ARN
- Follow the setup guide to create a required CloudFormation stack in the AWS Management Console.
- Once the stack is created, navigate to the Outputs tab in the stack details page.
- Copy the AWS Role ARN from the output.
-
Configure AWS Integration
- Return to the platform’s AWS Integration page.
- Provide a suitable name in the AWS Account Name field.
- Paste the copied AWS Role ARN into the designated field.
- Click Connect to finalize the integration.
Renaming an AWS Account
Access AWS Integration Settings
-
Log in to the Platform
- Sign in and open the platform dashboard.
-
Navigate to AWS Integration
- Open the Side Navigation Panel and select the Integrations tab.
- Click on the AWS card to access its integration settings.
Updating the Account Name
-
Edit the AWS Account Name
- Locate the Edit option next to the existing AWS account name.
- Click the Edit button to enable modifications.
-
Save the New Name
- Enter the new AWS account name in the provided field.
- Click Proceed to confirm the changes.
- A success message will appear, indicating the account name update.