EKS Deployment Guide
- Log in to the Platform
- Access the platform and sign in using your credentials.
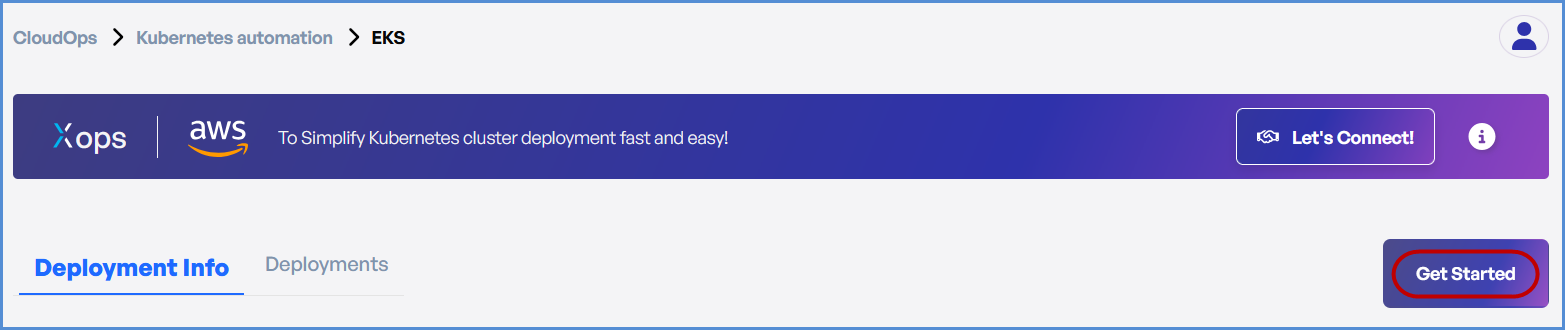
- Navigate to CloudOps
-
Locate the Side Navigation Bar on the left-hand side of the screen.
-
Navigate to Kubernetes Automation, then select EKS.
-

- Click on Get Started on EKS page.
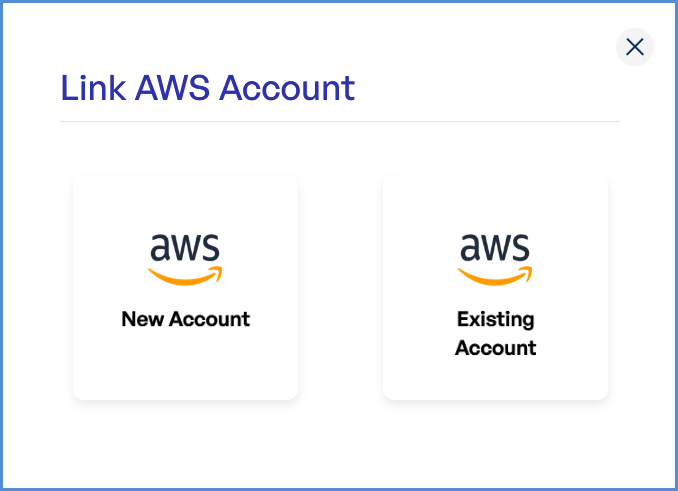
- Based on your requirement:
-
- Click on Add AWS Account and
Note: follow the Initiating Account Integration guide to add a new AWS account.
-
- If an AWS account is already integrated, click on Existing Account.
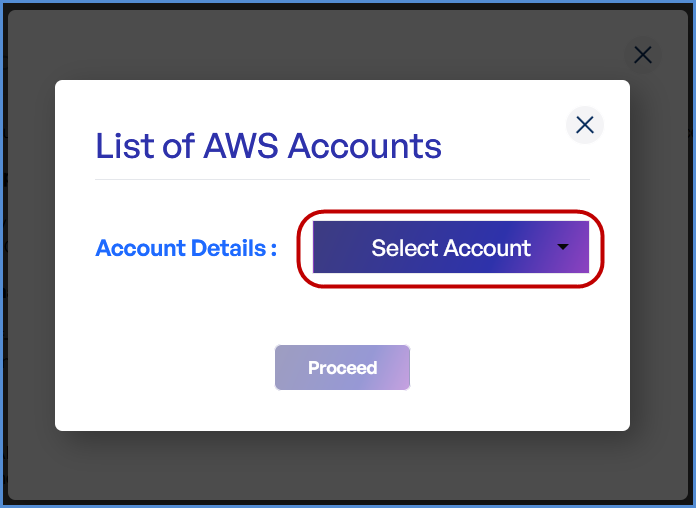
- In the next screen, select Select Existing Account.
- Choose the desired account from the list and click Proceed.
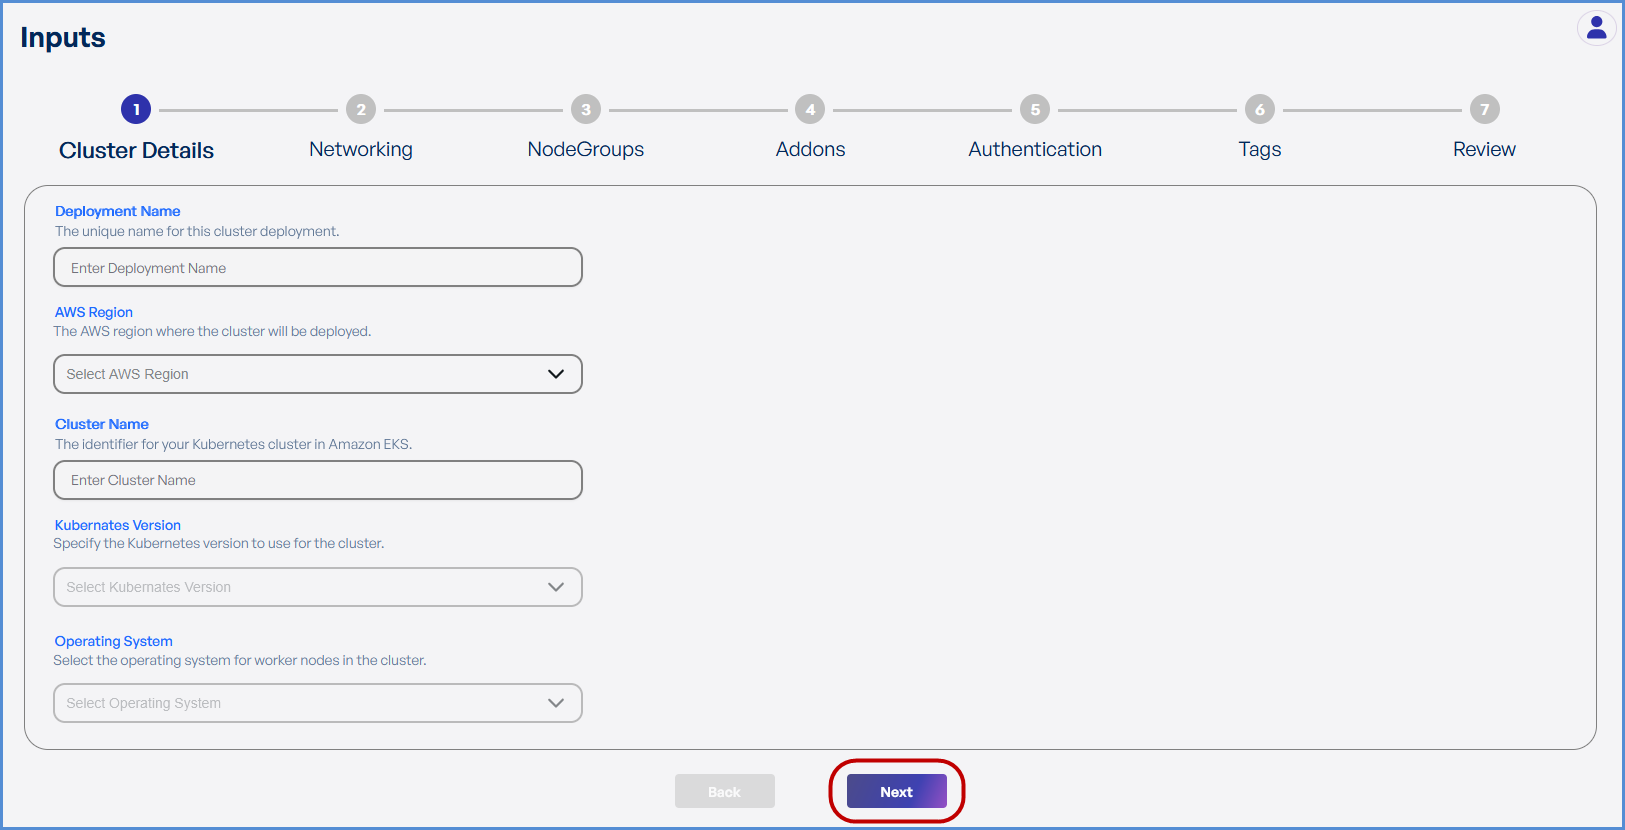
Step 1: Cluster Details
- Enter a unique Deployment Name.
- Select the desired AWS Region from the drop down.
- Enter the preferred Cluster Name.
- Choose the required Kubernetes Version from the drop down.
- Select Amazon Linux 2 as the Operating System.
- Click Next to proceed.
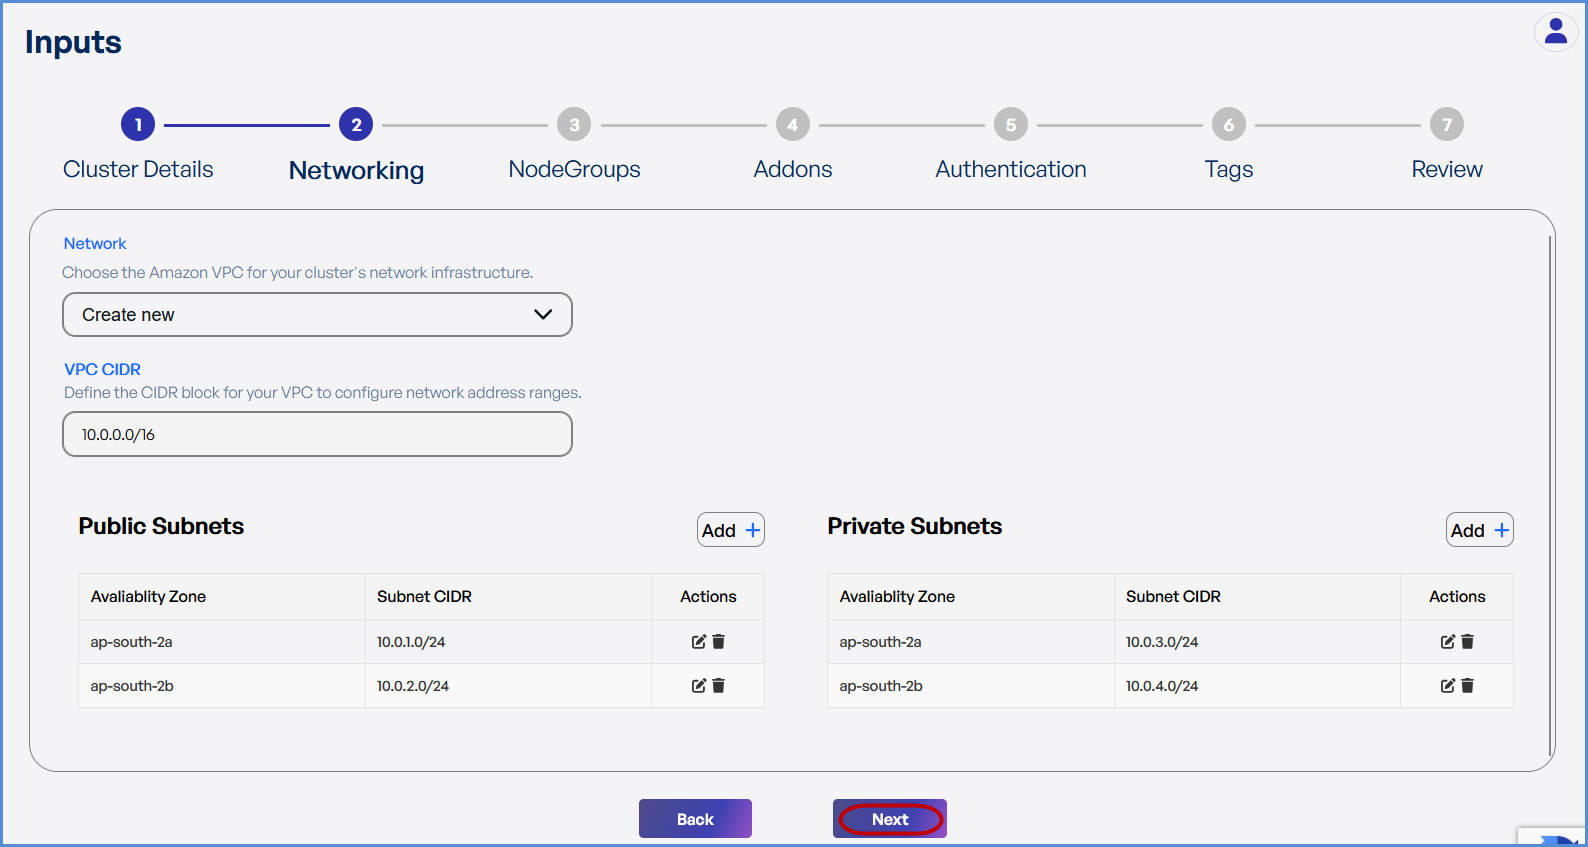
Step 2: Networking
- If an existing VPC is available in the selected region:
- Select Use Existing.
- Choose the VPC ID from the drop down.
- Select two Private Subnets with different Availability Zones.
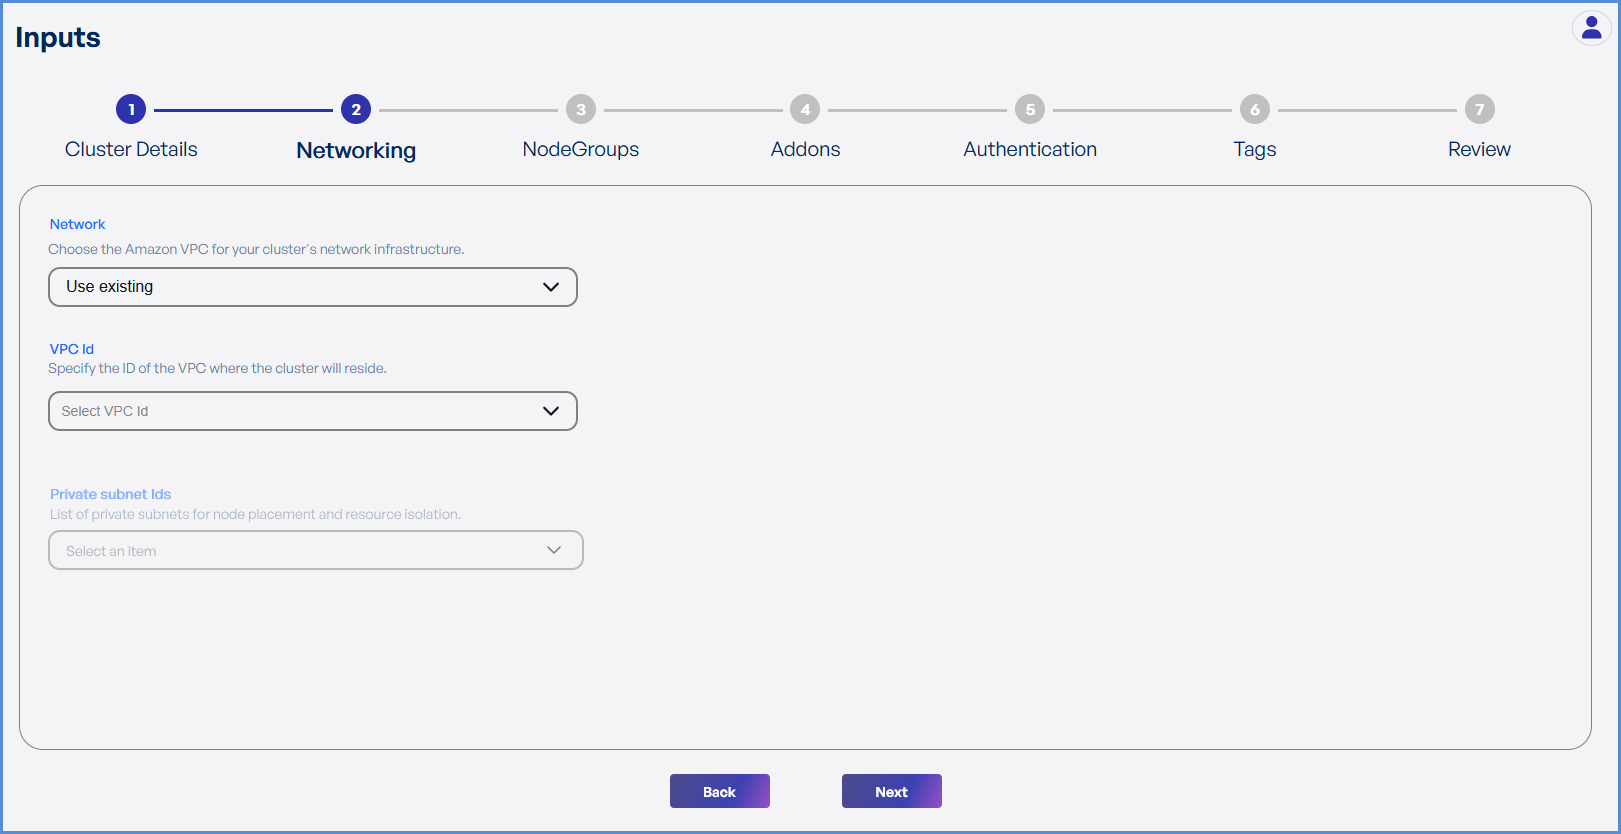
- If a new VPC is required:
- Select Create New.
- Enter the VPC CIDR.
- Add Public and Private Subnets with different Availability Zones.
-
Click Next to continue.