EKS Deployment Guide
- Log in to the Platform
- Access the platform and sign in using your credentials.
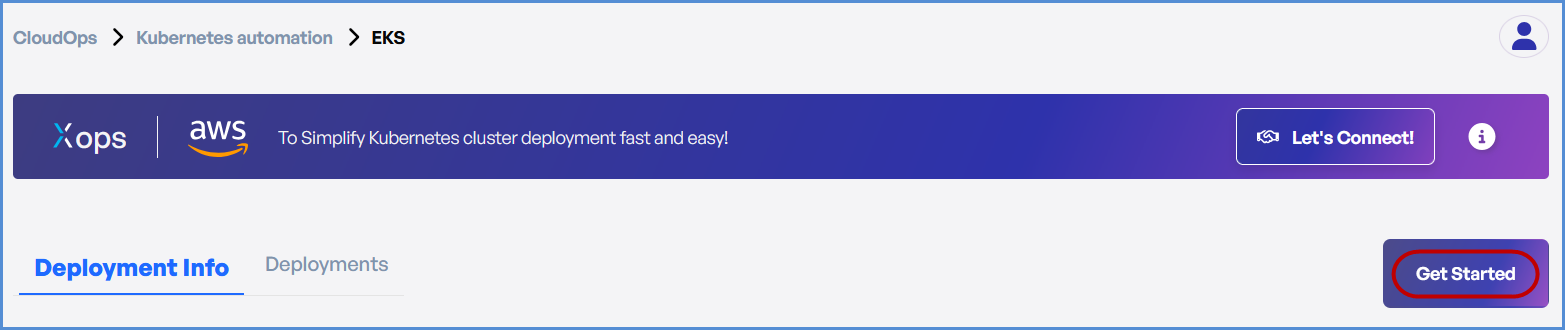
- Navigate to CloudOps
-
Locate the Side Navigation Bar on the left-hand side of the screen.
-
Navigate to Kubernetes Automation, then select EKS.
-

- Click on Get Started on EKS page.
- Based on your requirement:
-
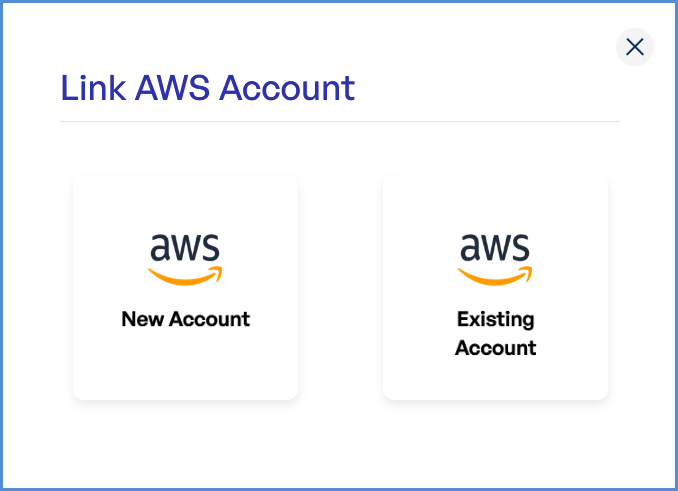
- Click on New Account if an AWS account has not been added.
- Click on Add AWS Account and
Note: follow the Initiating Account Integration guide to add a new AWS account.
-
- If an AWS account is already integrated, click on Existing Account.
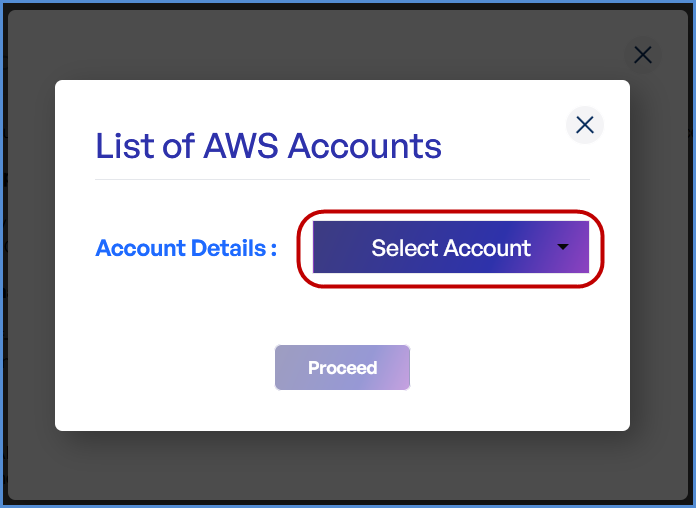
- In the next screen, select Select Existing Account.
- Choose the desired account from the list and click Proceed.
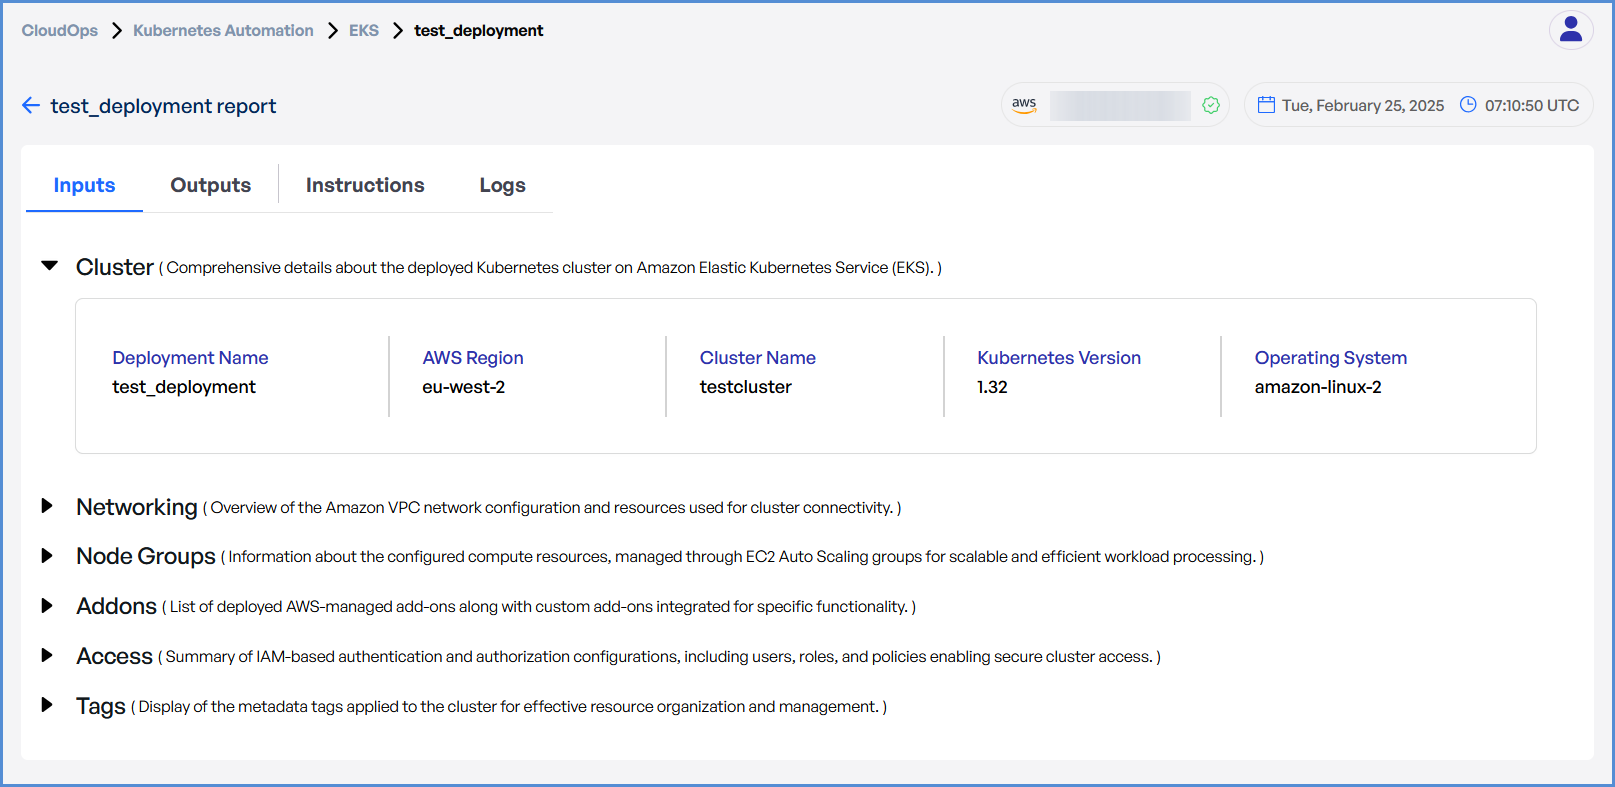
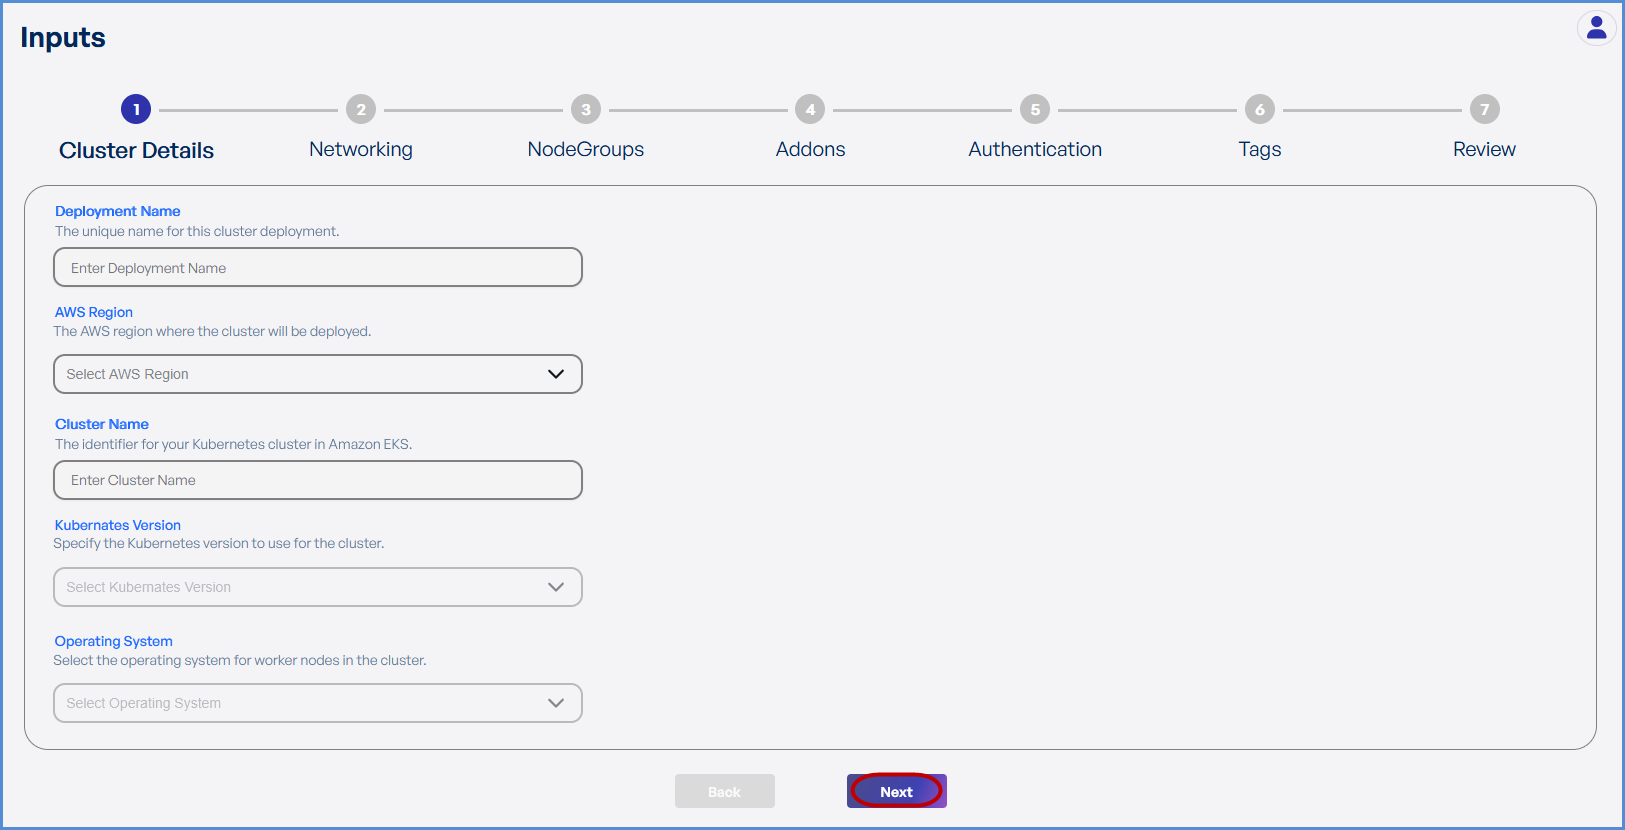
Step 1: Cluster Details
- Enter a unique Deployment Name.
- Select the desired AWS Region from the drop down.
- Enter the preferred Cluster Name.
- Choose the required Kubernetes Version from the drop down.
- Select Amazon Linux 2 as the Operating System.
- Click Next to proceed.
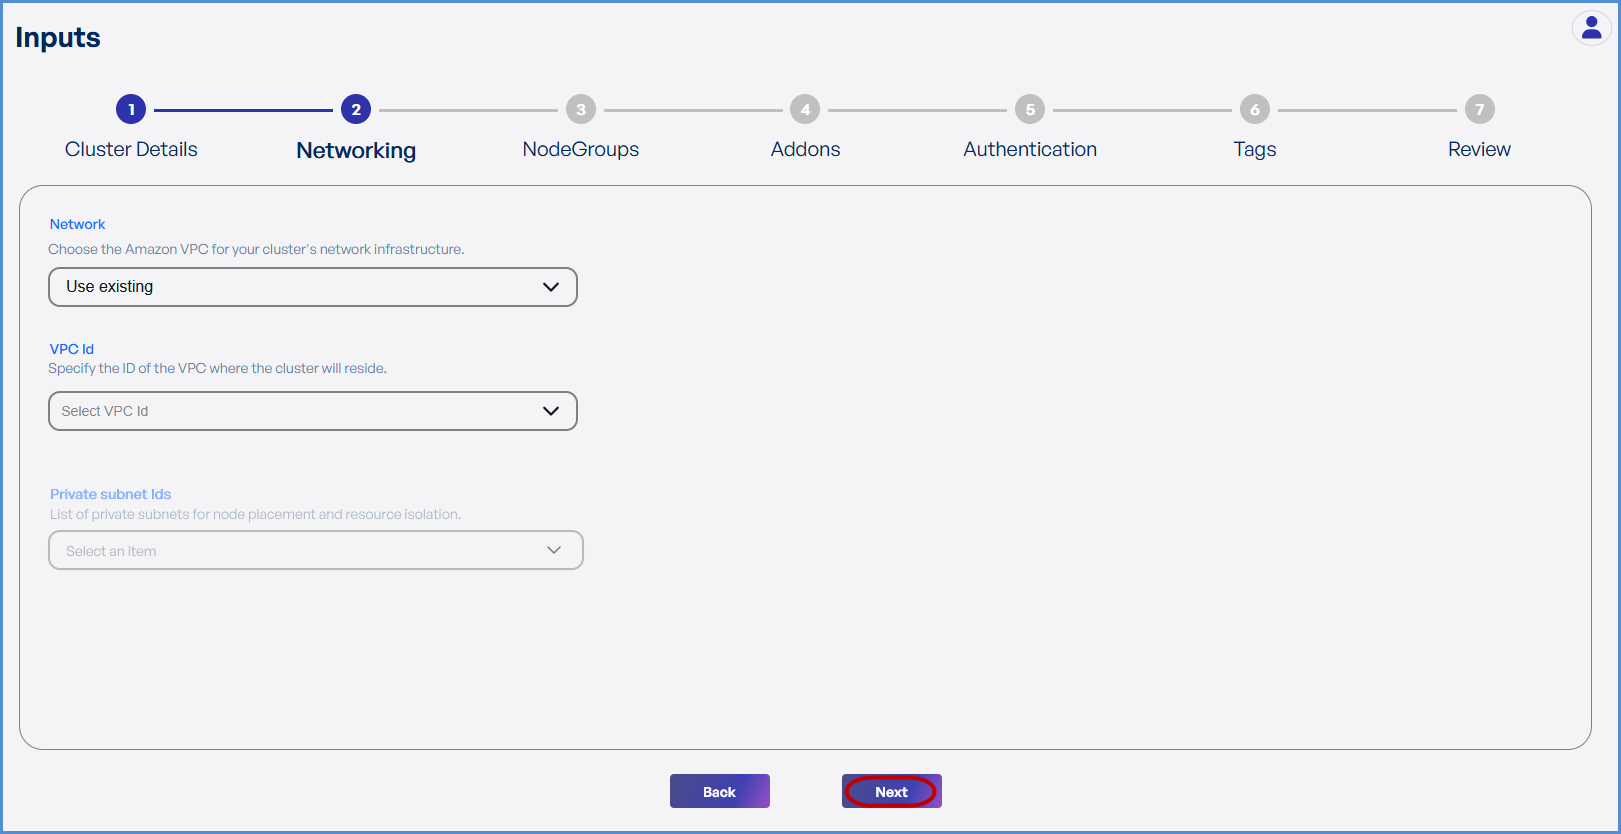
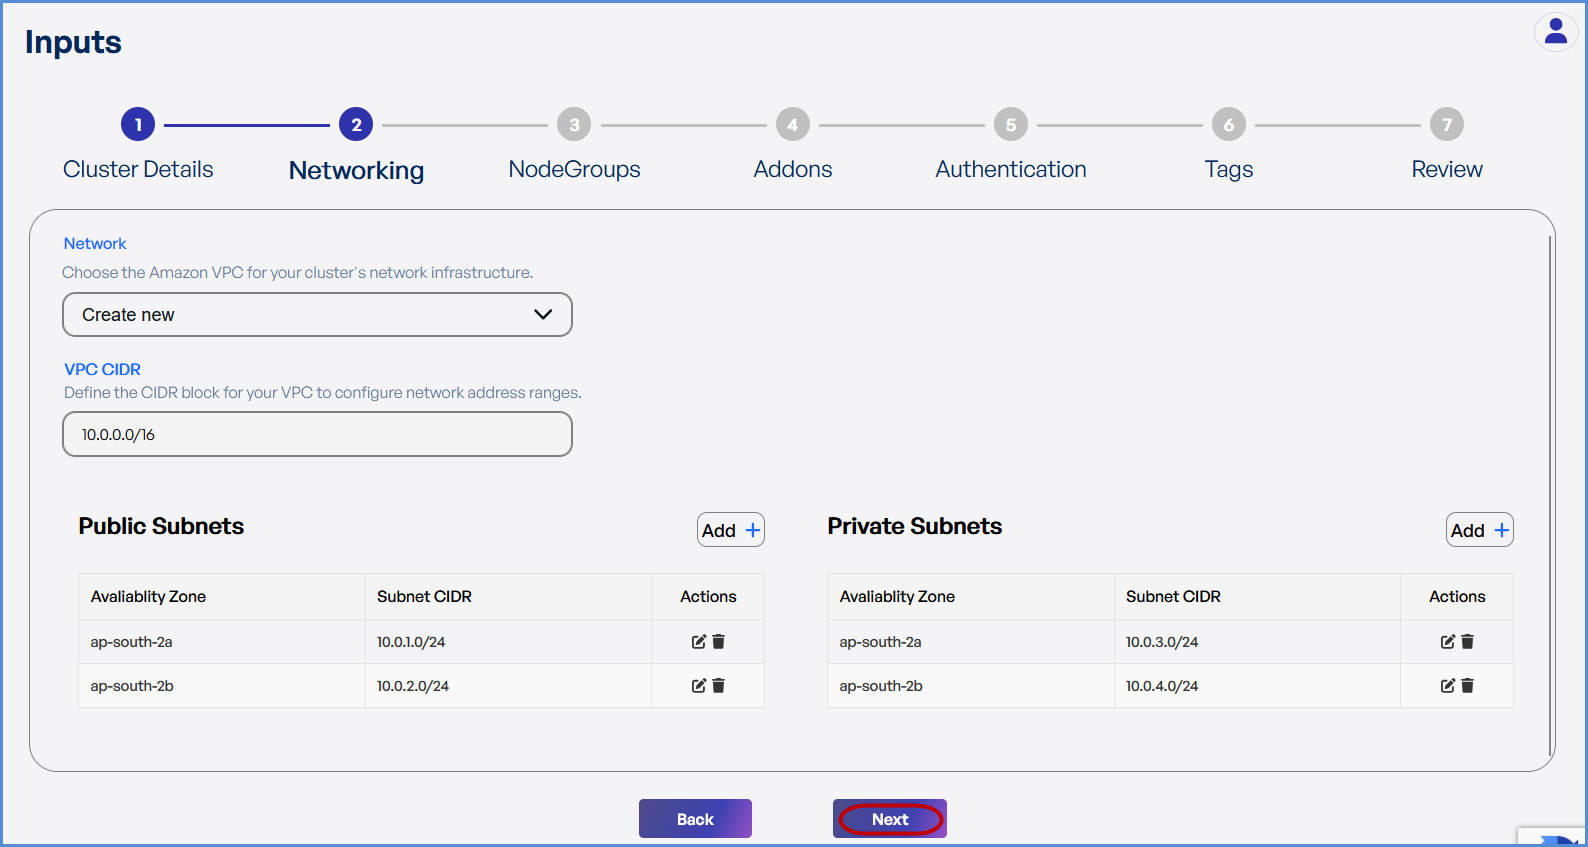
Step 2: Networking
- If an existing VPC is available in the selected region:
- Select Use Existing.
- Choose the VPC ID from the drop down.
- Select two Private Subnets with different Availability Zones.
- If a new VPC is required:
- Select Create New.
- Enter the VPC CIDR.
- Add Public and Private Subnets with different Availability Zones.
-
Click Next to continue.
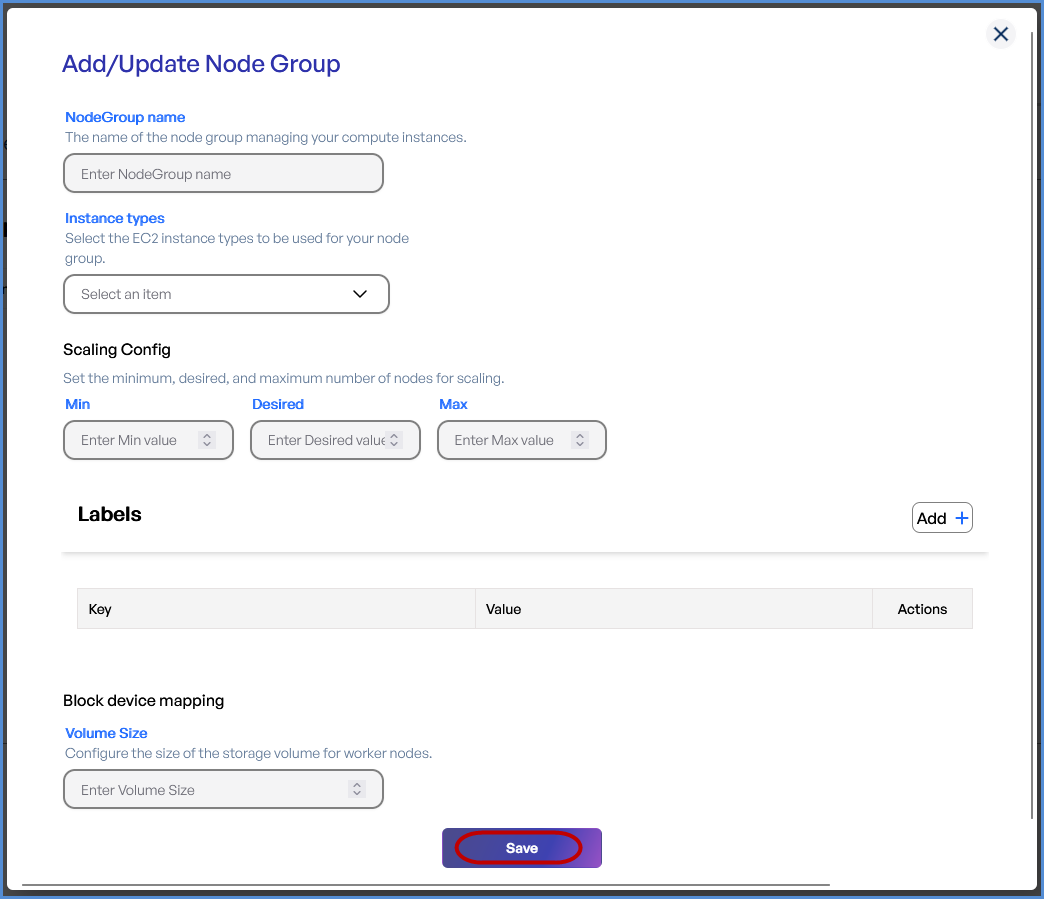
Step 3: Node Groups
- Click Add to Node Group.
-
Provide a Node Group Name.
-
Select the desired Instance Types from the dropdown.
-
Configure Scaling Settings:
-
Set Minimum, Desired, and Maximum node counts.
-
-
Add Labels by entering Key-Value pairs.
-
Define the Volume Size (Minimum: 30GB).
- Click Save and then Next.
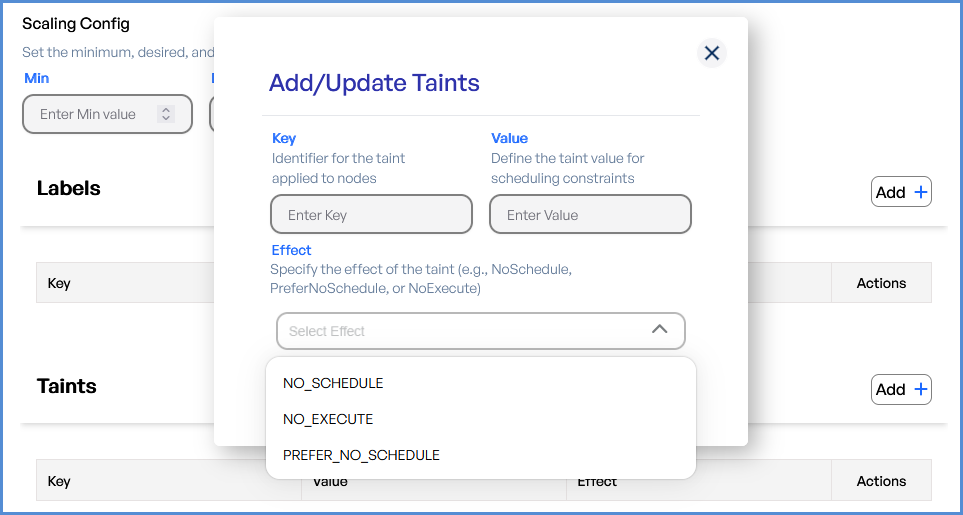
Note: Taints can be applied only to the second node:
- Select the Effect.
- Enter the Key and Value for the Taints.
- This option is not available for the first node.
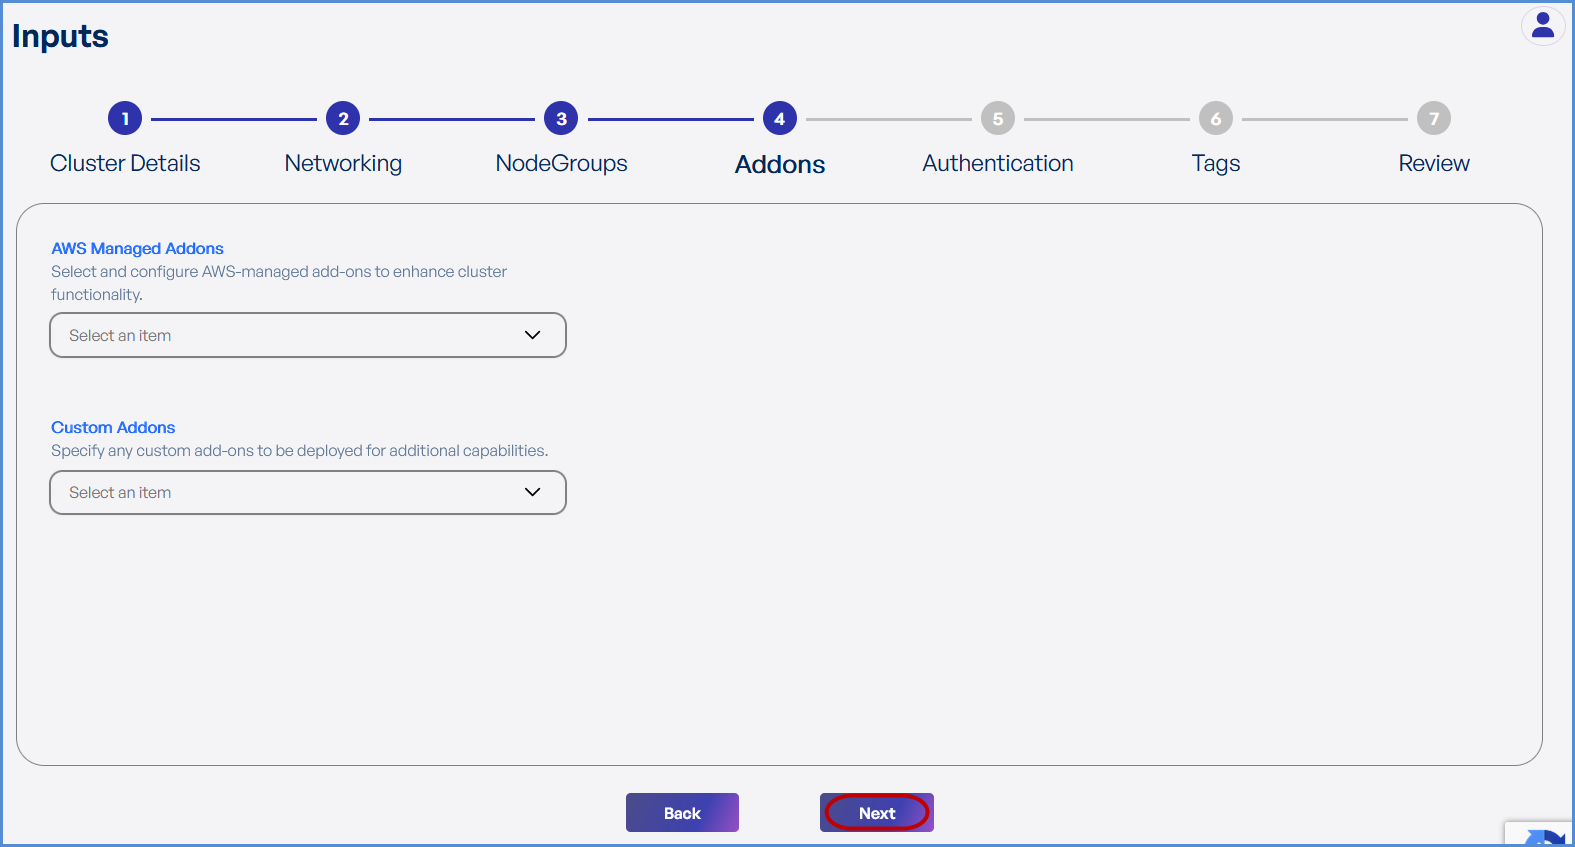
Step 4: Add-ons
-
Select the desired AWS Managed Add-ons from the drop down.
-
Choose the required Custom Add-ons from the drop down.
- Click Next.
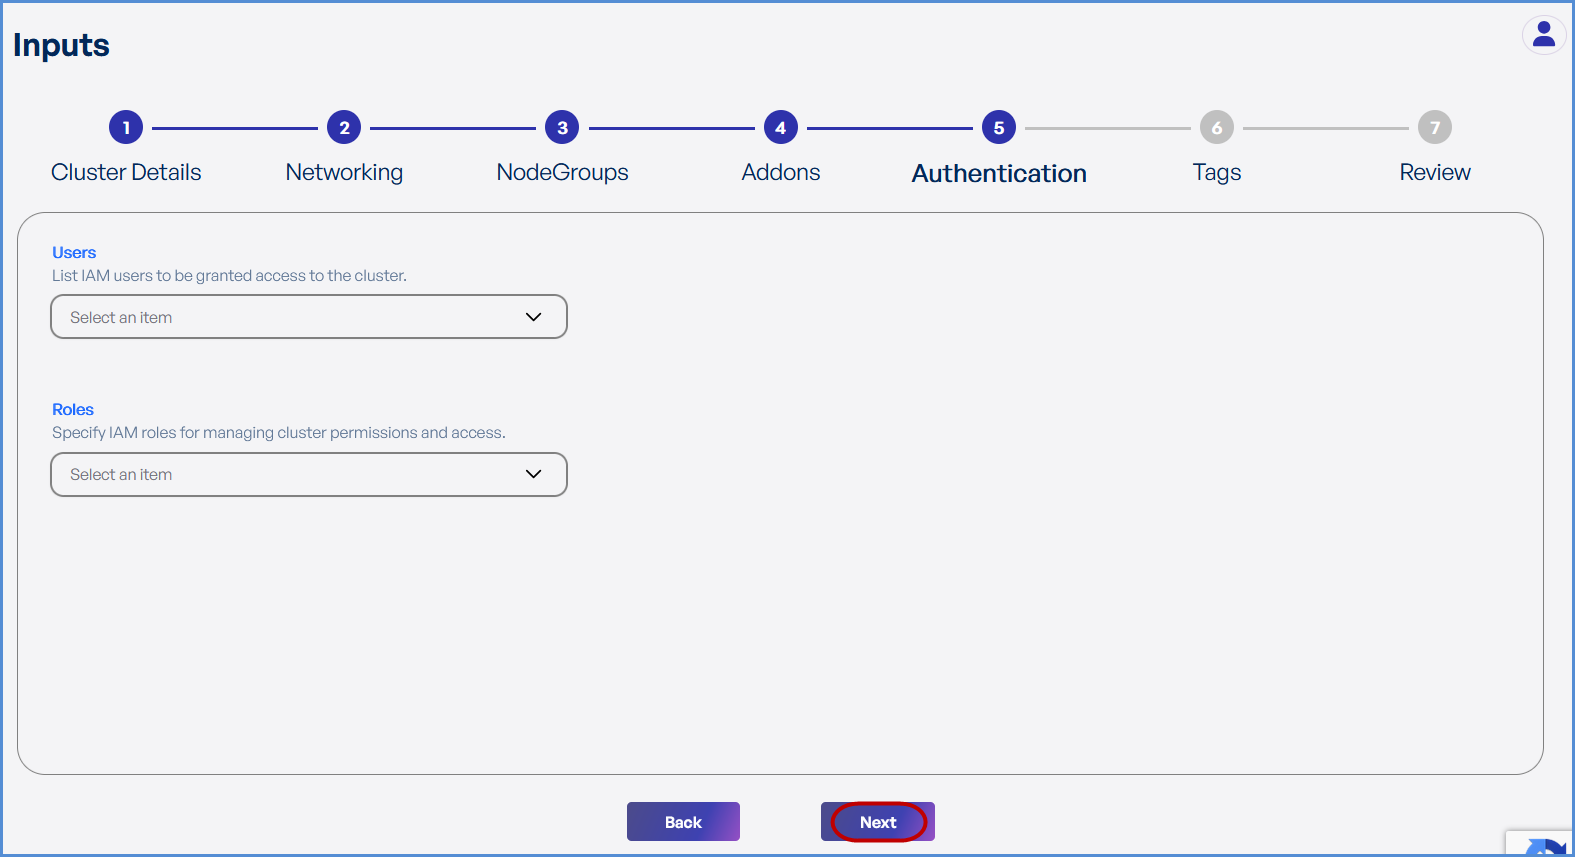
Step 5: Add-onsAuthentication
-
Select IAM Users from the drop down to grant cluster access.
-
Choose IAM Roles for managing cluster permissions and access.
- Click Next.
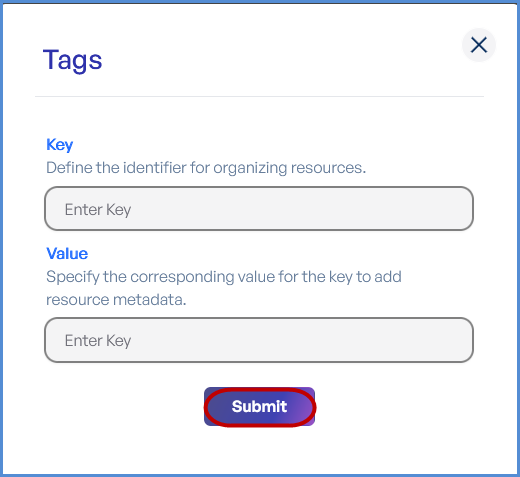
Step 6: Tags
-
Click Add to enter Key-Value pairs for tagging resources.
-
Click Submit and then Next.
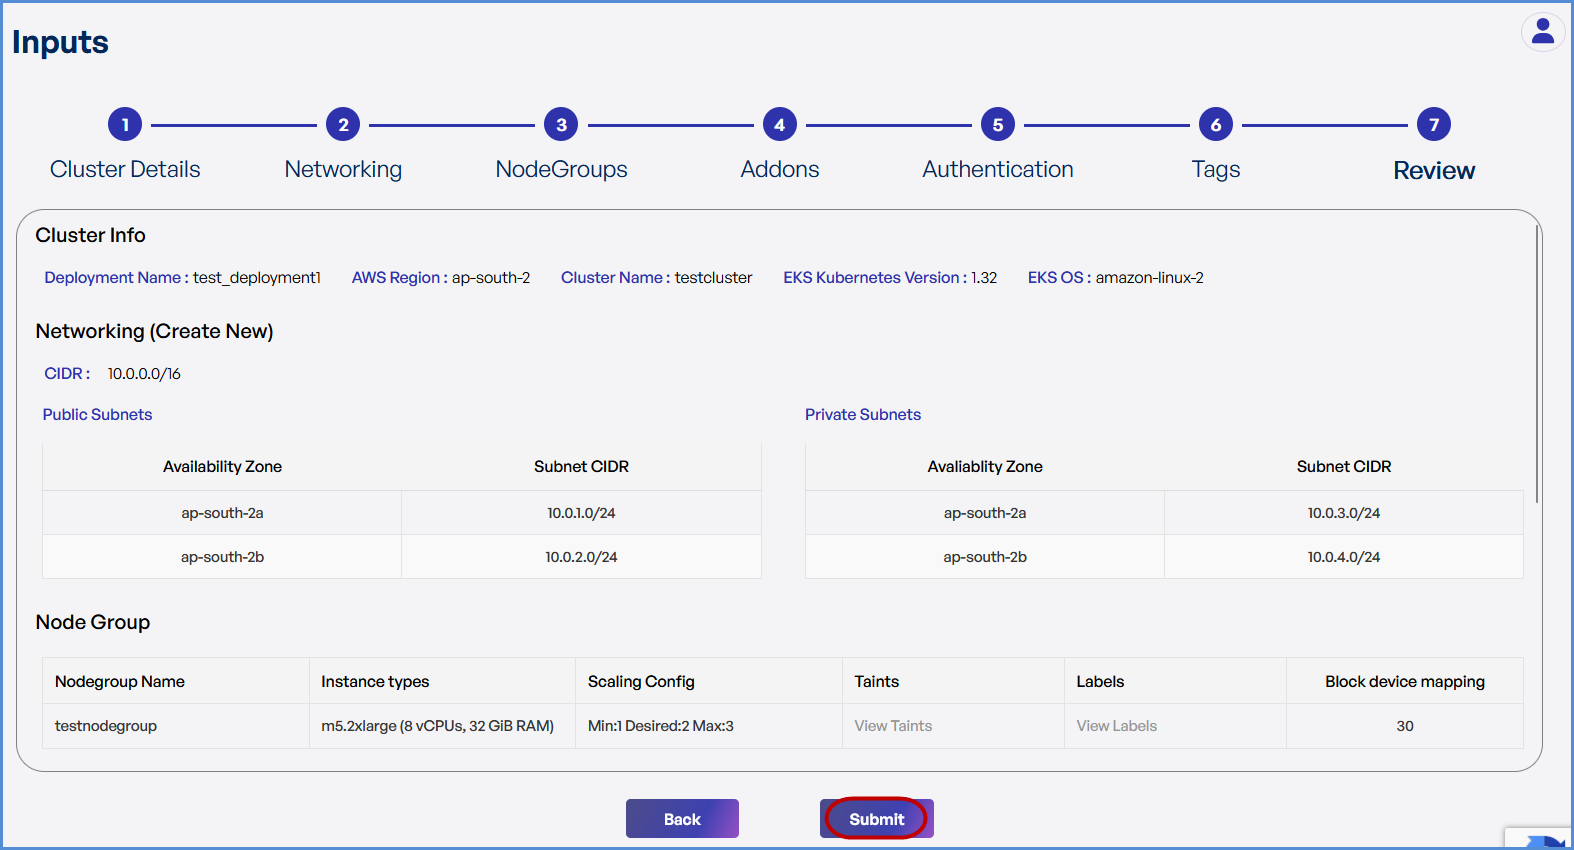
Step 6:7: Review and Deployment
-
Review all configuration details.
-
Click Submit.
-
The system redirects to the Deployments Page, displaying a loader.
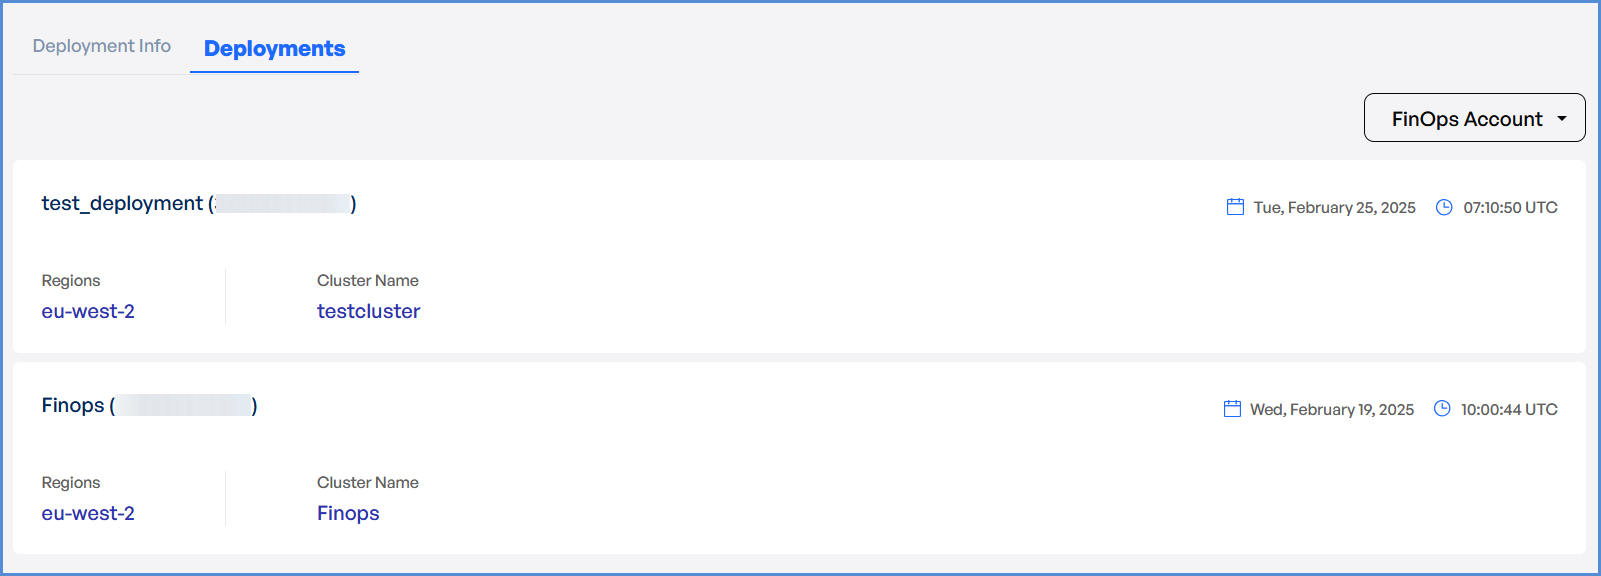
- Once deployment is completed:
- Click on the Deployment to view Inputs, Outputs, Instructions, and Logs.