EKS Deployment Guide
Prerequisites
- Before deploying EKS, ensure that the necessary AWS policies are attached to the user connecting to the AWS account in the XOps portal. The user must have the following policies along with Read-only access policy:
- Before deploying EKS, ensure that the user has the following policies along with Read-only access policy:
{
"Version": "2012-10-17",
"Statement": [
{
"Action": [
"ec2:AuthorizeSecurityGroupIngress",
"ec2:DescribeInstances",
"ec2:AttachInternetGateway",
"iam:PutRolePolicy",
"iam:AddRoleToInstanceProfile",
"ec2:DeleteRouteTable",
"eks:DescribeAddon",
"ec2:RevokeSecurityGroupEgress",
"ec2:CreateRoute",
"ec2:CreateInternetGateway",
"ec2:DeleteInternetGateway",
"iam:ListRolePolicies",
"iam:DeleteOpenIDConnectProvider",
"iam:GetRole",
"iam:GetPolicy",
"ec2:CreateTags",
"iam:ListEntitiesForPolicy",
"iam:DeleteRole",
"ec2:RunInstances",
"ec2:DisassociateRouteTable",
"ec2:ReplaceNetworkAclAssociation",
"ec2:RevokeSecurityGroupIngress",
"ec2:DeleteNatGateway",
"eks:UpdateNodegroupConfig",
"eks:ListClusters",
"iam:GetOpenIDConnectProvider",
"ec2:CreateSubnet",
"ec2:DescribeSubnets",
"ec2:DeleteNetworkAclEntry",
"iam:CreateInstanceProfile",
"ec2:DisassociateAddress",
"ec2:CreateNatGateway",
"ec2:CreateVpc",
"ec2:DescribeAddressesAttribute",
"ec2:DescribeVpcAttribute",
"iam:ListInstanceProfilesForRole",
"iam:PassRole",
"ec2:DescribeAvailabilityZones",
"iam:DeleteRolePolicy",
"sts:DecodeAuthorizationMessage",
"ec2:DeleteLaunchTemplateVersions",
"ec2:DeleteNetworkAcl",
"eks:CreateCluster",
"iam:DeleteInstanceProfile",
"ec2:ReleaseAddress",
"ec2:DeleteLaunchTemplate",
"eks:UntagResource",
"eks:AssociateAccessPolicy",
"eks:UpdateAccessEntry",
"ec2:DescribeSecurityGroups",
"iam:CreatePolicy",
"iam:CreateServiceLinkedRole",
"ec2:CreateLaunchTemplate",
"ec2:DescribeVpcs",
"eks:TagResource",
"eks:CreateAccessEntry",
"iam:UpdateAssumeRolePolicy",
"iam:GetPolicyVersion",
"ec2:DeleteSubnet",
"iam:RemoveRoleFromInstanceProfile",
"iam:CreateRole",
"iam:AttachRolePolicy",
"eks:UpdateClusterConfig",
"ssm:GetParameter",
"ec2:AssociateRouteTable",
"ec2:DescribeInternetGateways",
"eks:DescribeNodegroup",
"iam:DetachRolePolicy",
"iam:ListAttachedRolePolicies",
"ec2:DescribeNetworkAcls",
"ec2:DescribeRouteTables",
"eks:ListNodegroups",
"ec2:DescribeLaunchTemplates",
"ec2:CreateRouteTable",
"ec2:DetachInternetGateway",
"eks:DescribeAccessEntry",
"eks:DeleteCluster",
"eks:DeleteNodegroup",
"ec2:DescribeInstanceTypes",
"eks:CreateAddon",
"eks:DescribeCluster",
"ec2:DeleteVpc",
"eks:DeleteAccessEntry",
"eks:UpdateClusterVersion",
"ec2:DescribeAddresses",
"ec2:DeleteTags",
"iam:DeletePolicy",
"eks:UpdateNodegroupVersion",
"eks:ListAssociatedAccessPolicies",
"ec2:DescribeNetworkInterfaces",
"ec2:CreateSecurityGroup",
"ec2:CreateNetworkAcl",
"ec2:ModifyVpcAttribute",
"ec2:AuthorizeSecurityGroupEgress",
"ec2:DeleteRoute",
"ec2:DescribeLaunchTemplateVersions",
"ec2:DescribeNatGateways",
"eks:CreateNodegroup",
"ec2:AllocateAddress",
"ec2:CreateLaunchTemplateVersion",
"iam:CreateOpenIDConnectProvider",
"ec2:DescribeImages",
"iam:ListPolicyVersions",
"eks:DeleteAddon",
"eks:DescribeUpdate",
"eks:DisassociateAccessPolicy",
"ec2:DeleteSecurityGroup",
"ec2:CreateNetworkAclEntry"
],
"Resource": "*",
"Effect": "Allow",
"Sid": "EksPermissions"
},
{
"Action": [
"lambda:GetFunction",
"secretsmanager:GetSecretValue",
"iam:ListAccessKeys",
"s3:GetObject",
"codecommit:GitPull"
],
"Resource": "*",
"Effect": "Deny",
"Sid": "ExplicitDeny"
}
]
}
- Log in to the Platform
- Access the platform and sign in using your credentials.
- Navigate to CloudOps
-
Locate the Side Navigation Bar on the left-hand side of the screen.
-
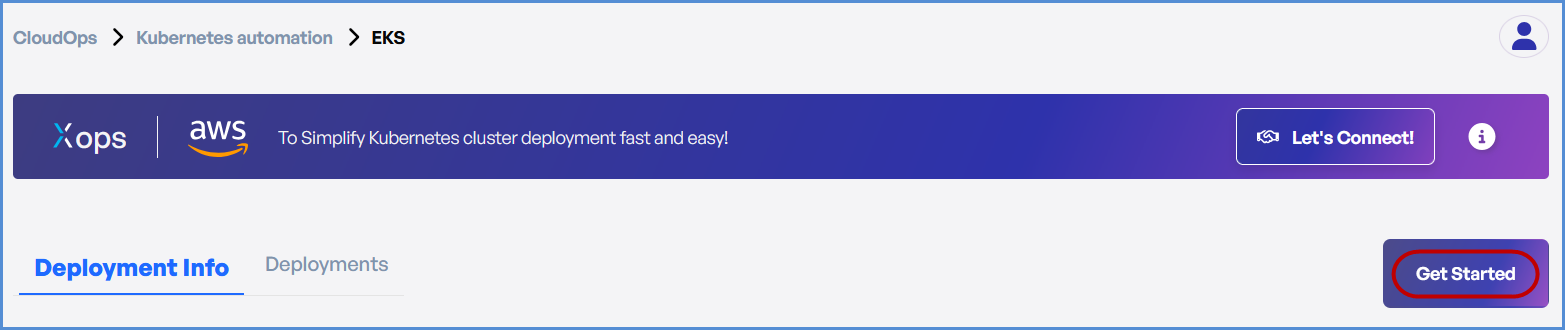
Navigate to Kubernetes Automation, then select EKS.
-

- Click on Get Started on EKS page.
- Based on your requirement:
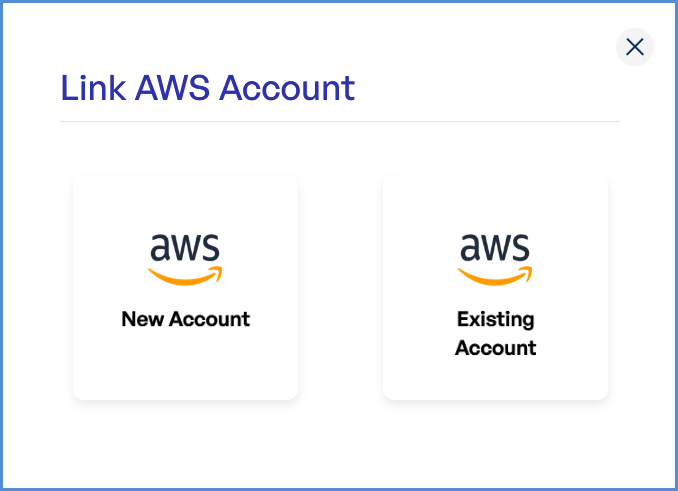
-
- Click on New Account if an AWS account has not been added.
- Click on Add AWS Account and
Note: follow the Initiating Account Integration guide to add a new AWS account.
-
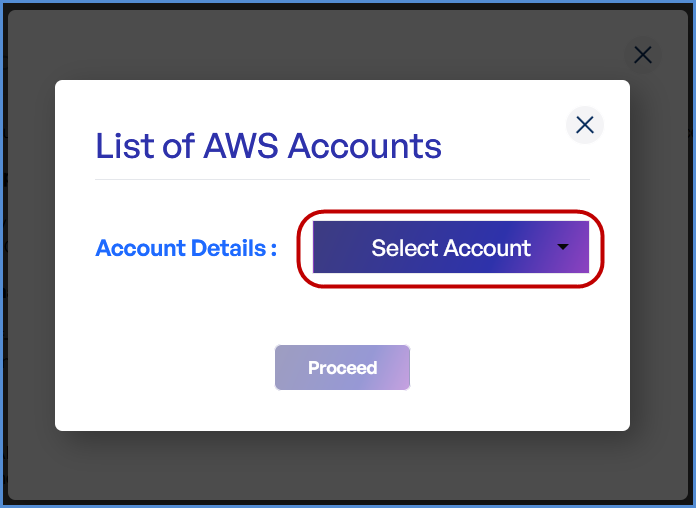
- If an AWS account is already integrated, click on Existing Account.
- In the next screen, select Select Existing Account.
- Choose the desired account from the list and click Proceed.
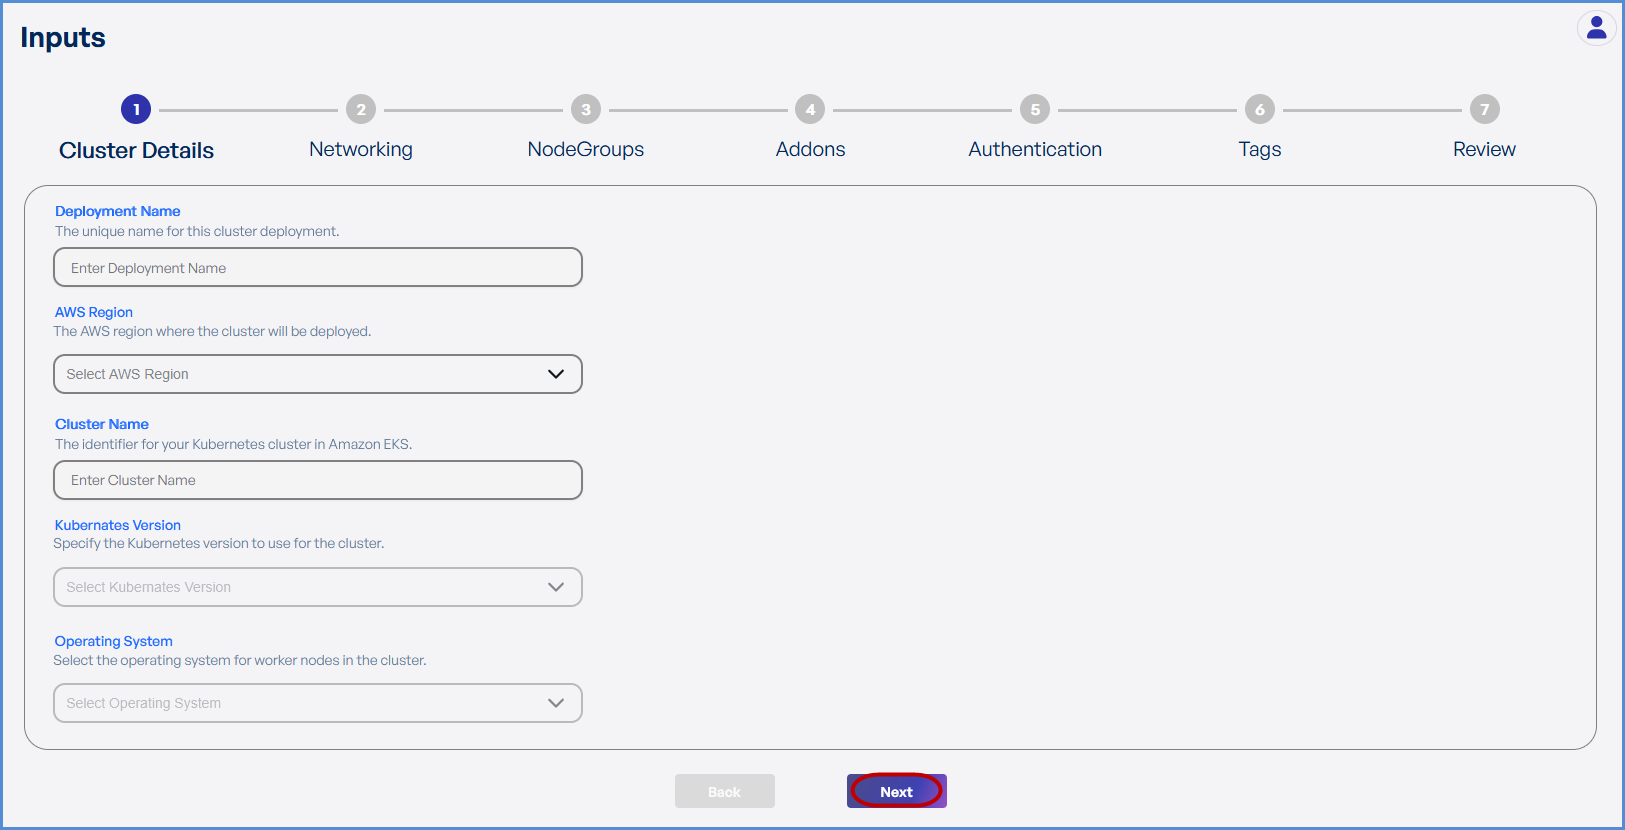
Step 1: Cluster Details
- Enter a unique Deployment Name.
- Select the desired AWS Region from the drop down.
- Enter the preferred Cluster Name.
- Choose the required Kubernetes Version from the drop down.
- Select Amazon Linux 2 as the Operating System.
- Click Next to proceed.
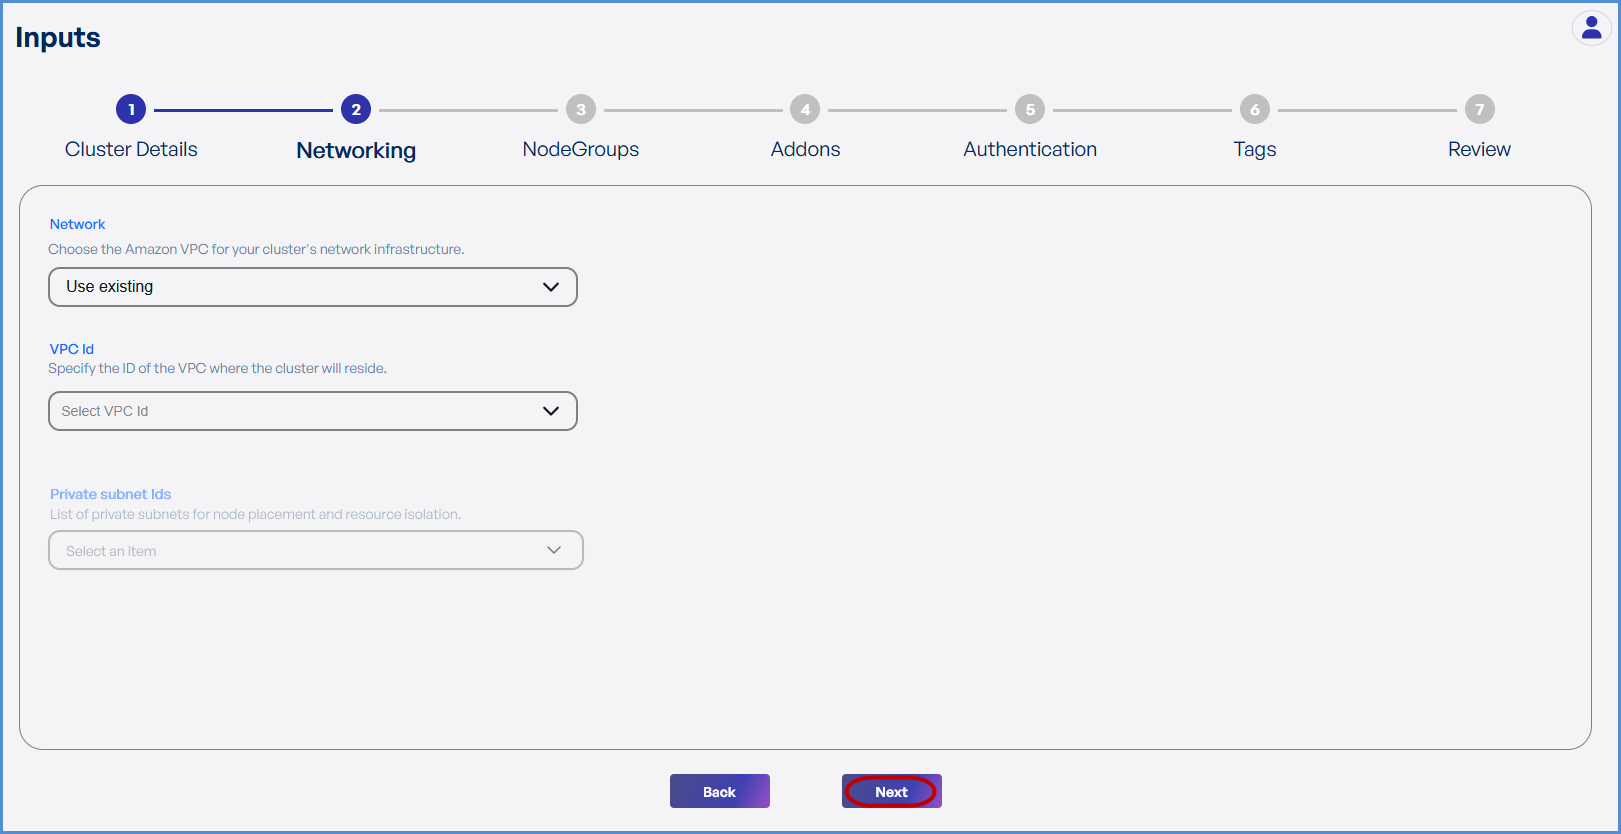
Step 2: Networking
- If an existing VPC is available in the selected region:
- Select Use Existing.
- Choose the VPC ID from the drop down.
- Select two Private Subnets with different Availability Zones from the list all subsets in the drop down.
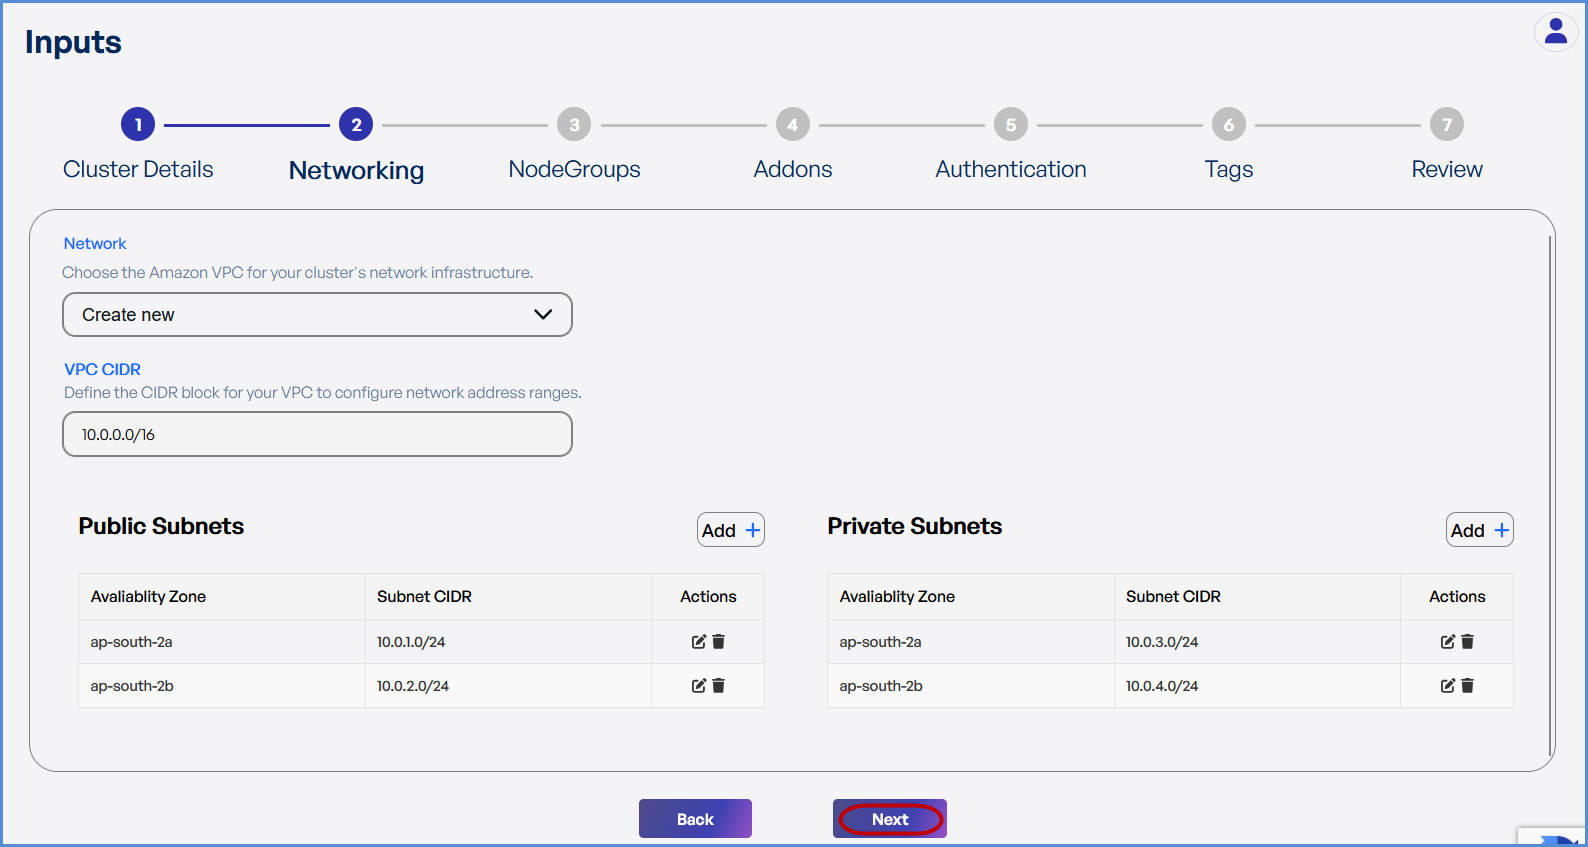
- If a new VPC is required:
- Select Create New.
- Enter the VPC CIDR.
- Add Public and Private Subnets with different Availability Zones.
-
Click Next to continue.
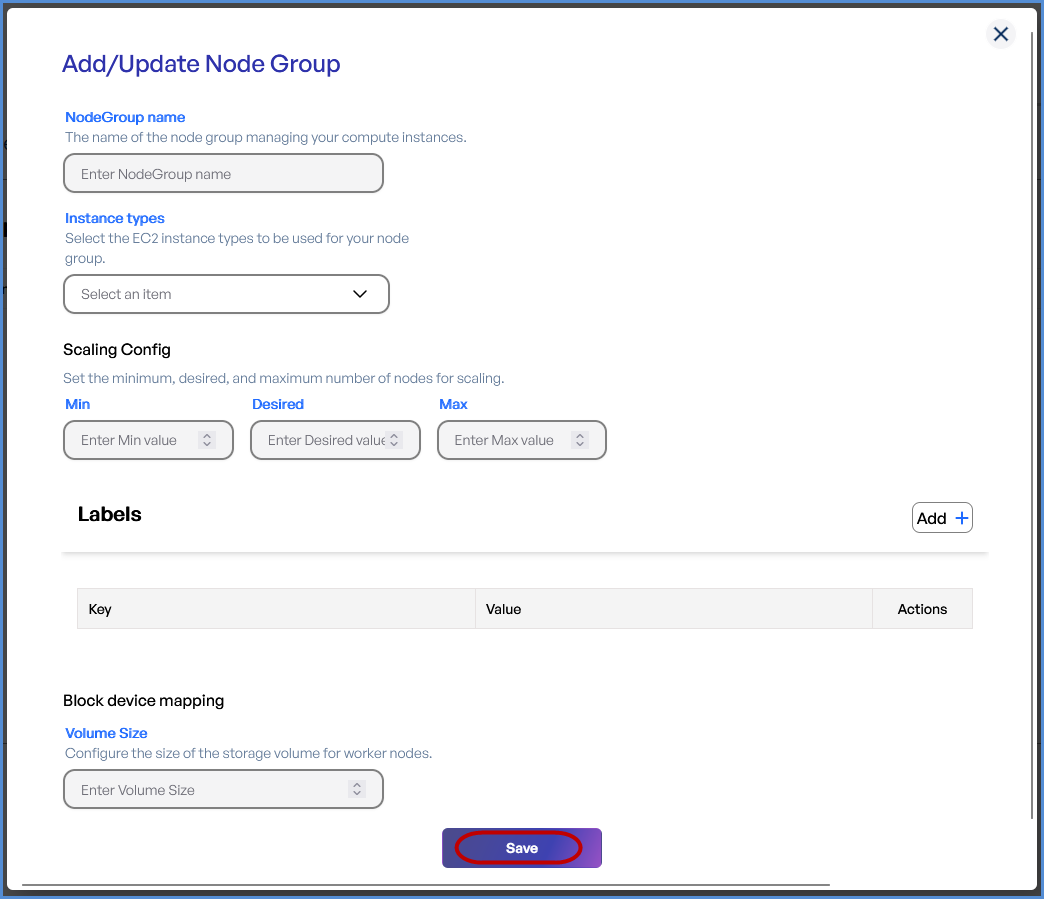
Step 3: Node Groups
- Click Add to Node Group.
-
Provide a Node Group Name.
-
Select the desired Instance Types from the dropdown.
-
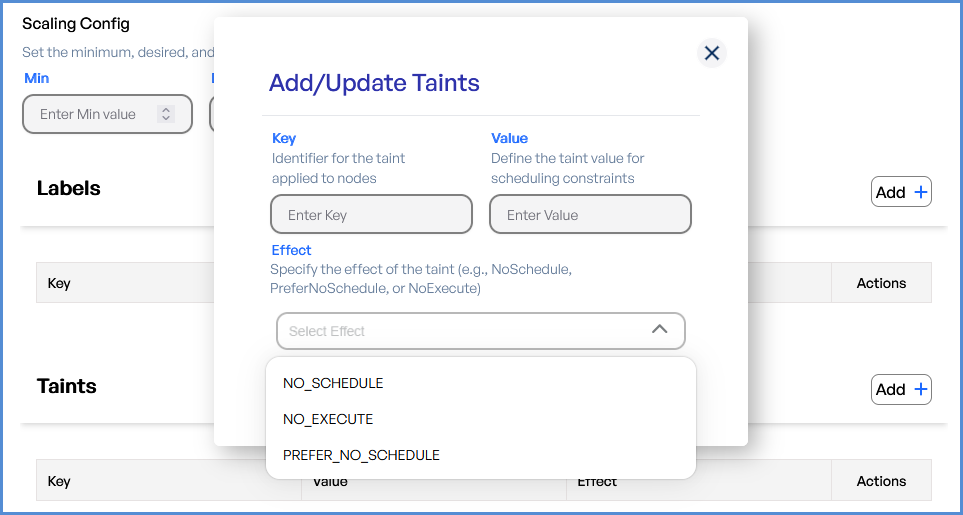
Configure Scaling Settings:
-
Set Minimum, Desired, and Maximum node counts.
-
-
Add Labels by entering Key-Value pairs.
-
Define the Volume Size (Minimum: 30GB).
- Click Save and then Next.
Note: Taints can be applied only to the second node:
- Select the Effect.
- Enter the Key and Value for the Taints.
- This option is not available for the first node.
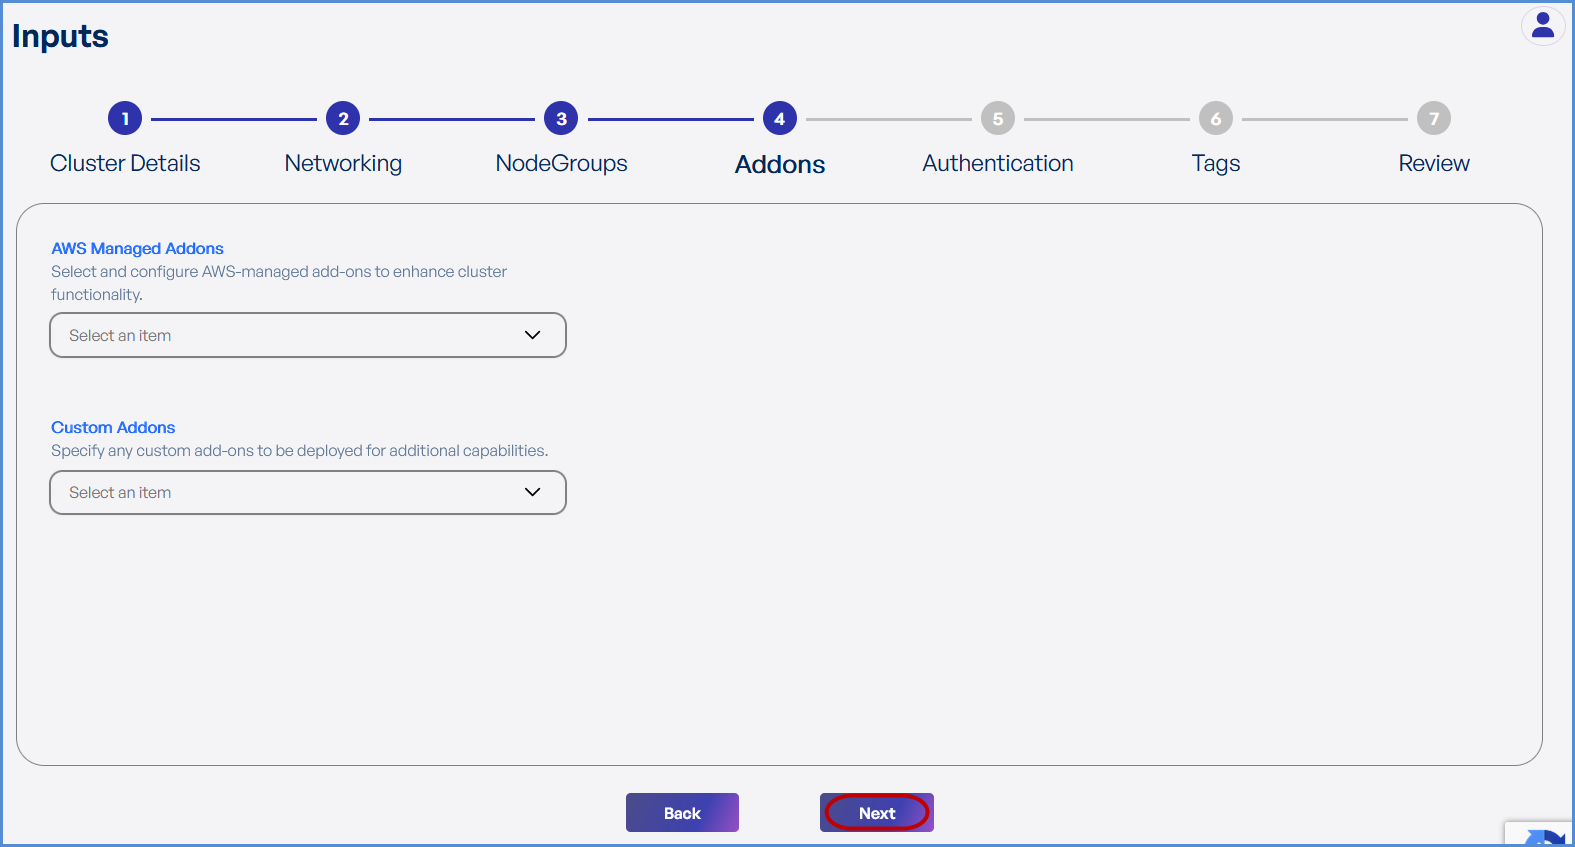
Step 4: Add-ons
-
Select the desired AWS Managed Add-ons from the drop down.
-
Choose the required Custom Add-ons from the drop down.
- Click Next.
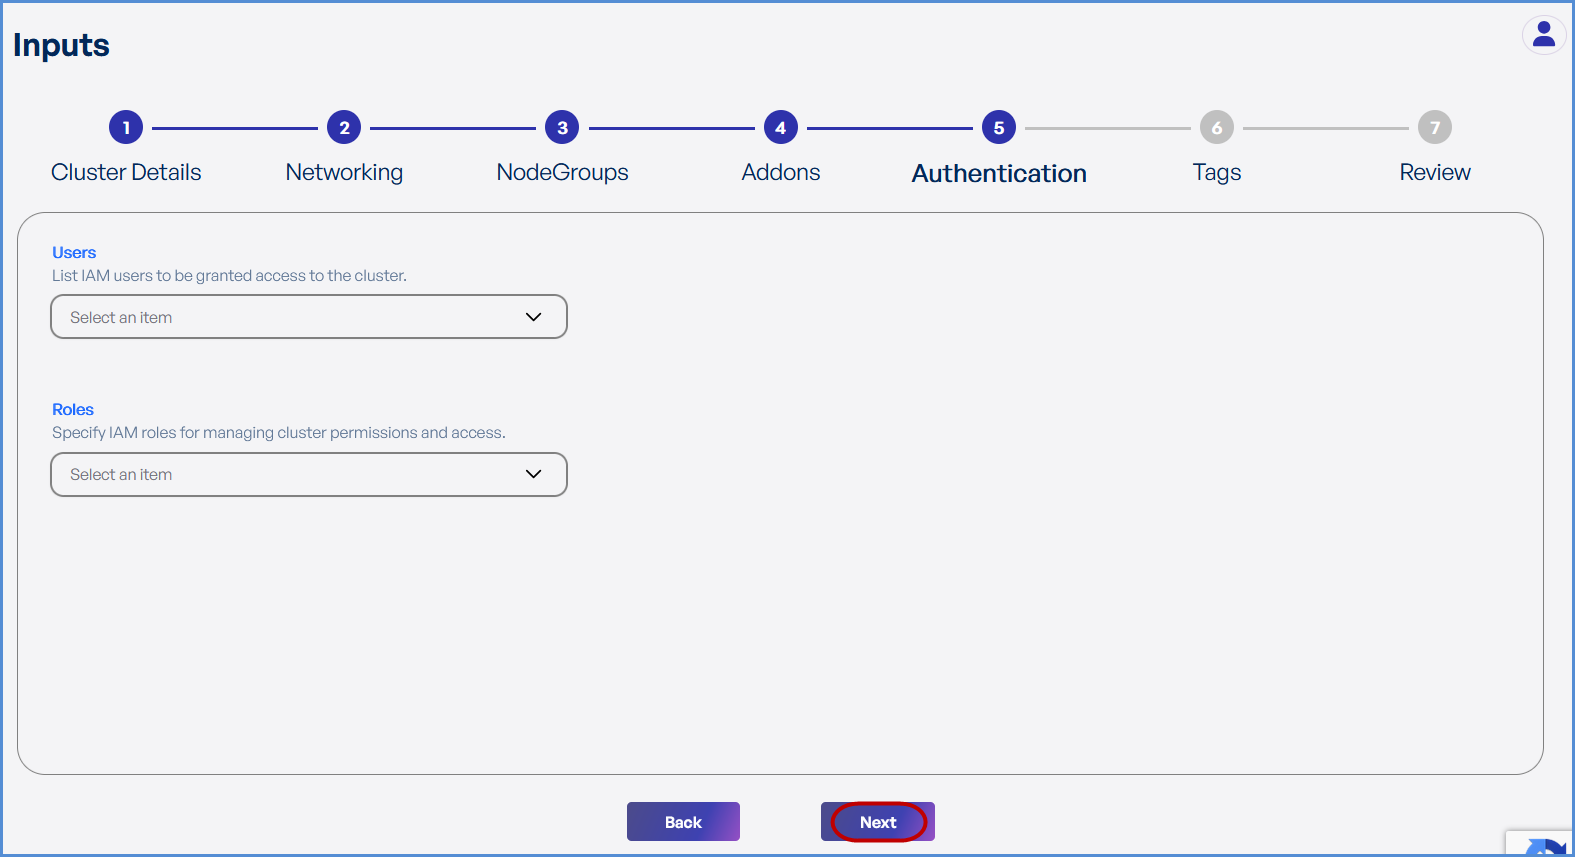
Step 5: Authentication
-
Select IAM Users from the drop down to grant cluster access.
-
Choose IAM Roles for managing cluster permissions and access.
- Click Next.
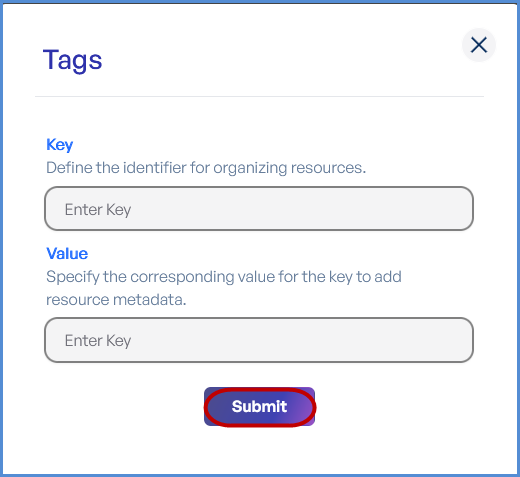
Step 6: Tags
-
Click Add to enter Key-Value pairs for tagging resources.
-
Click Submit and then Next.
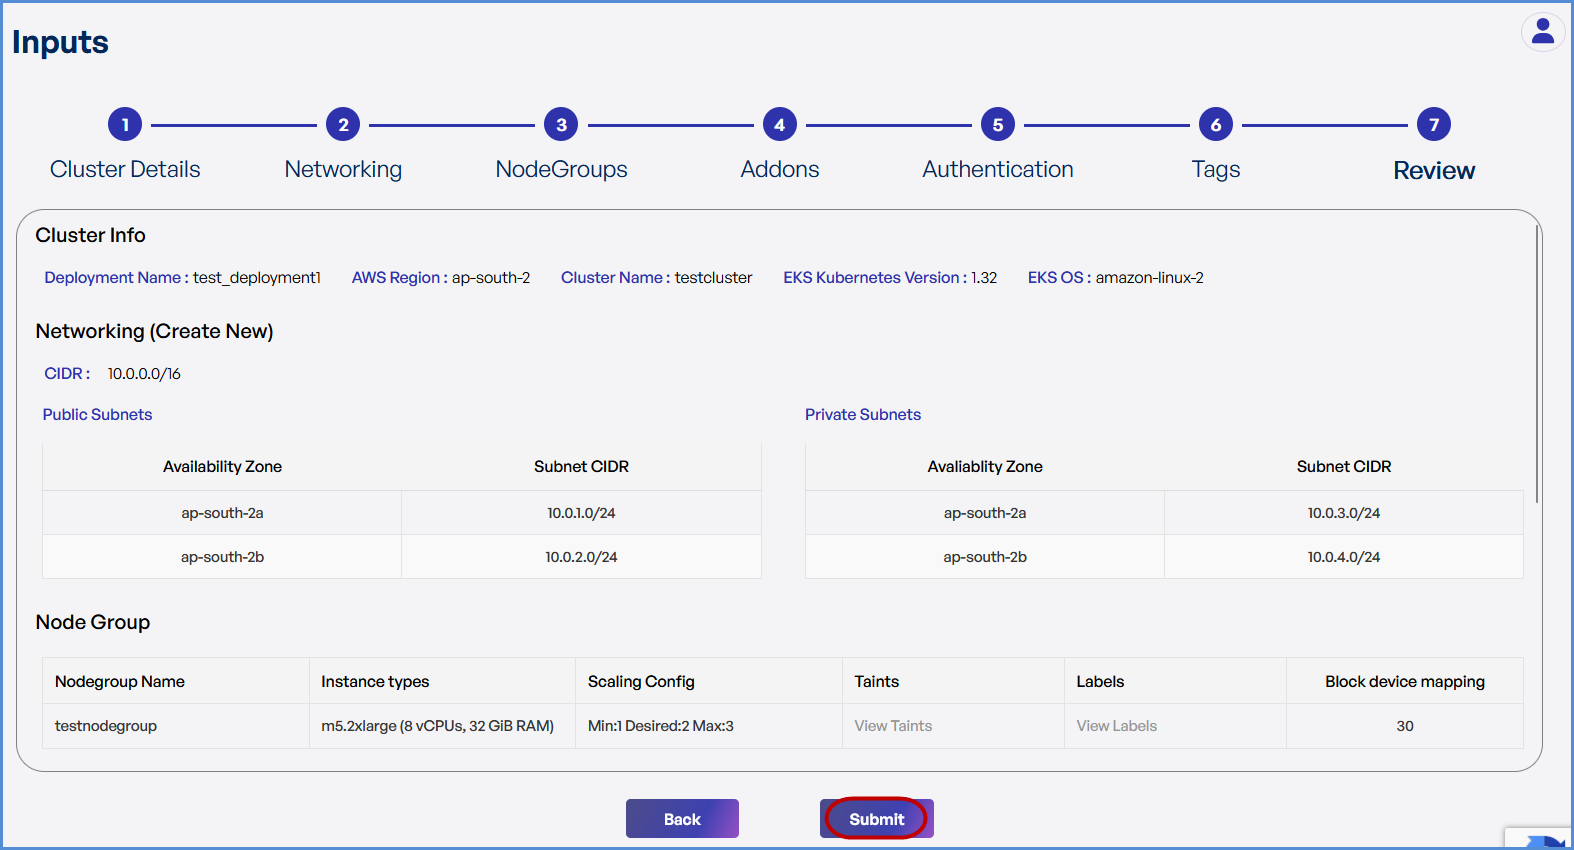
Step 7: Review and Deployment
-
Review all configuration details.
-
Click Submit.
Note: To make modifications, navigate back through each step sequentially and apply the necessary changes before proceeding.
-
The system redirects to the Deployments Page, displaying a loader.
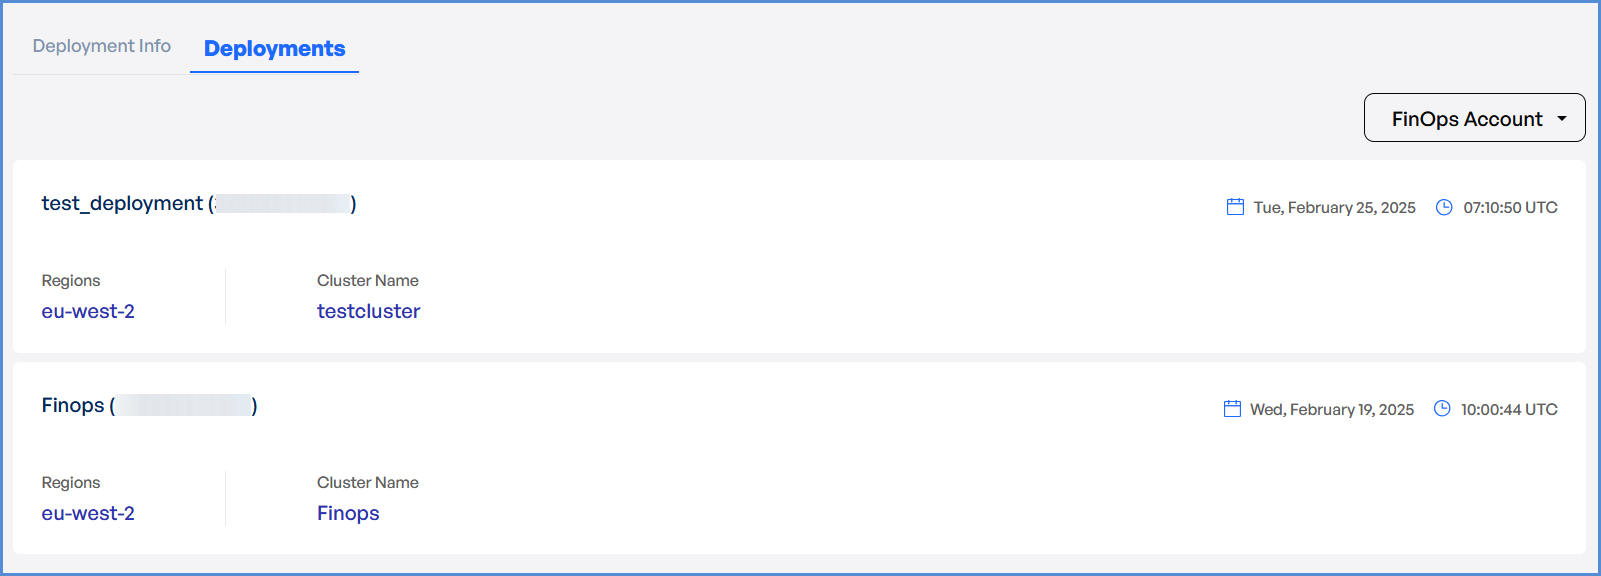
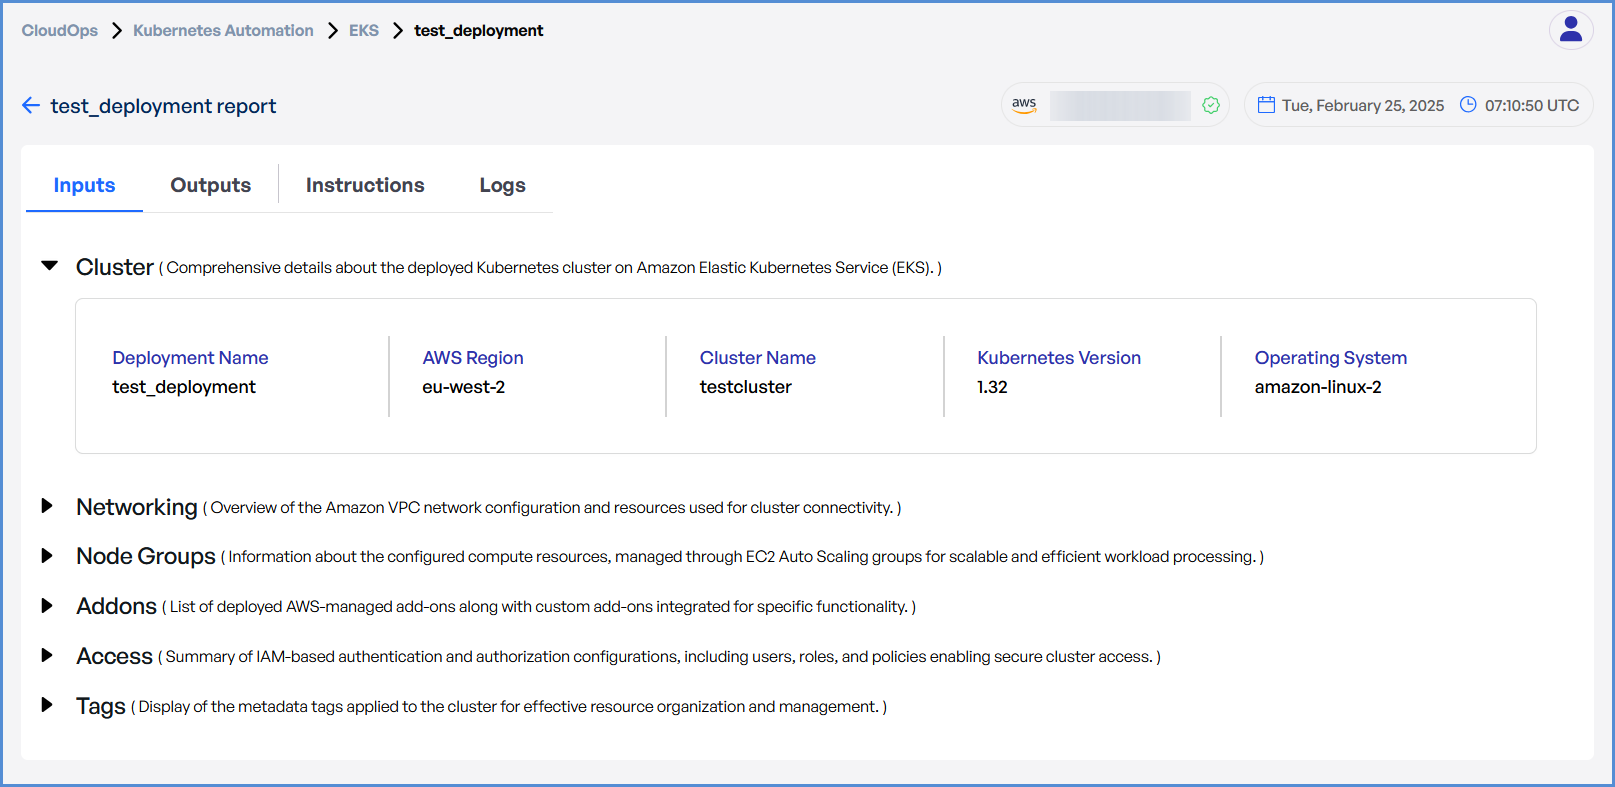
- Once deployment is completed:
- Click on the Deployment to view Inputs, Outputs, Instructions, and Logs.