Microsoft Entra ID Account Integration
Link Microsoft Entra ID Account
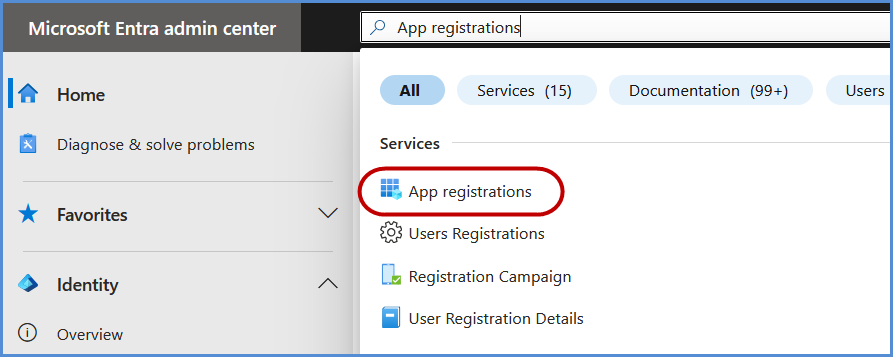
Navigating to the Integrations Page
-
Log in to the Platform
- Access the platform and sign in using your credentials.
-
Open the Integrations Section
- Locate the side navigation panel on the left.
- Click on the Integrations tab.
-
Select Microsoft Integration
- On the Integrations page, you will see available options for AWS, Azure, and Microsoft accounts.
- Click on the Microsoft card then click on M365 to open the “Link a New Microsoft Account” page.

Initiating Entra ID Integration
Registering an Application and configuration in Microsoft Entra Admin center
-
Click on New Registration.
-
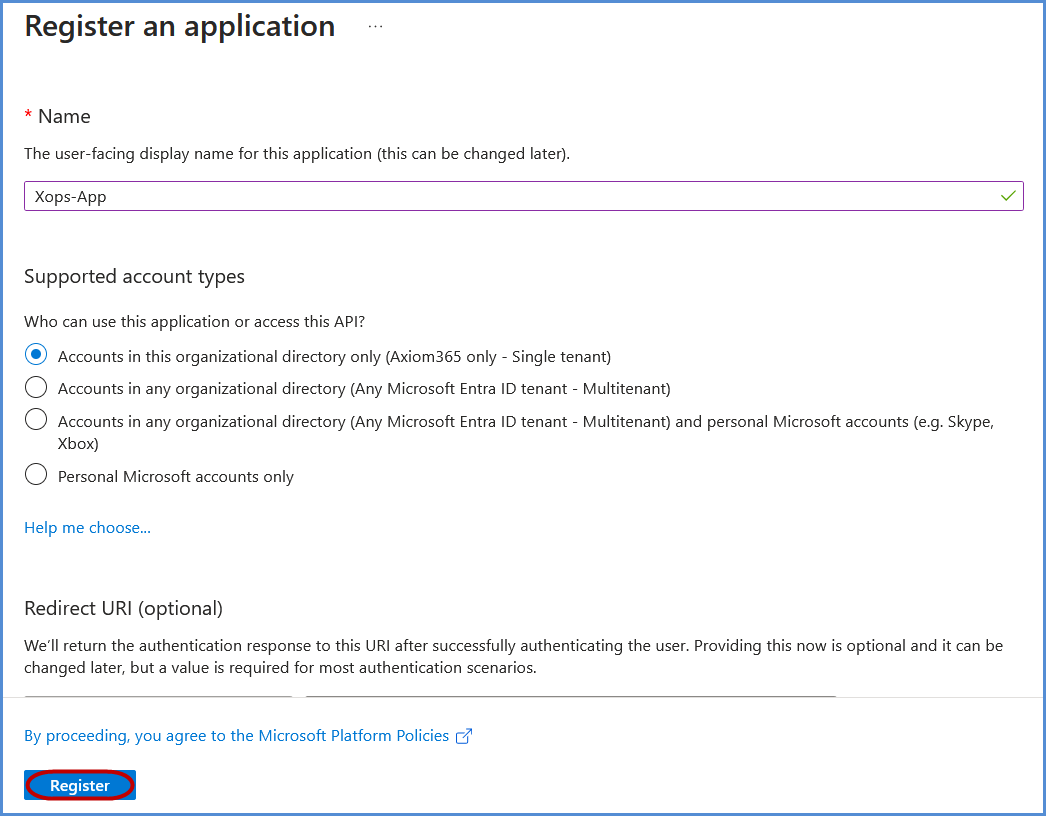
Register the application:
-
Provide a name for the application.
-
Under Supported account types, select Accounts in this organizational directory only if not set by default.
-
Click Register to complete the process.
-
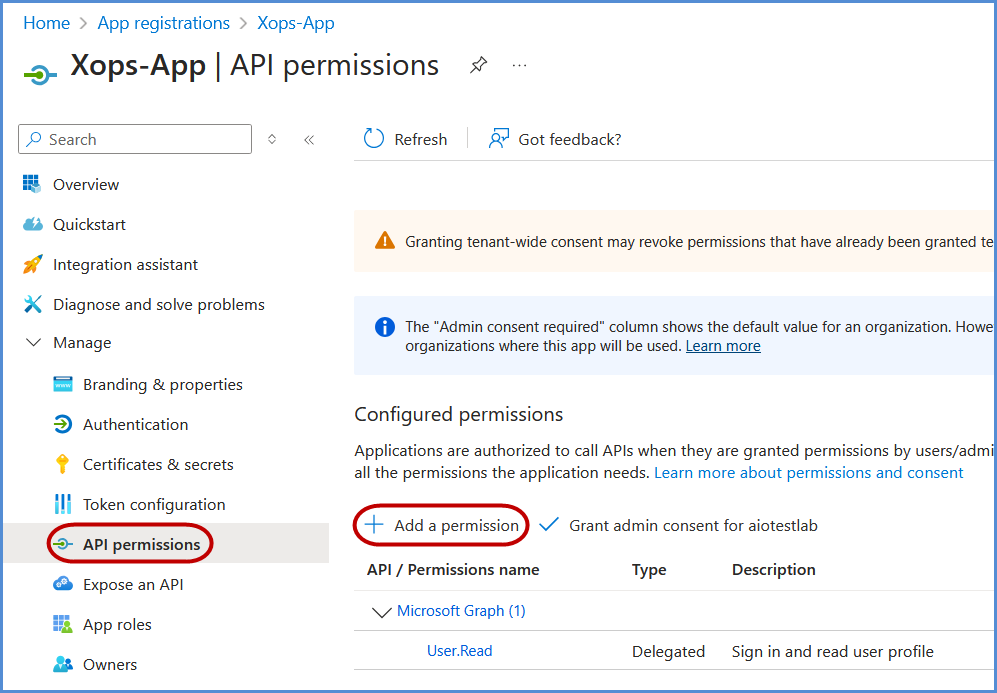
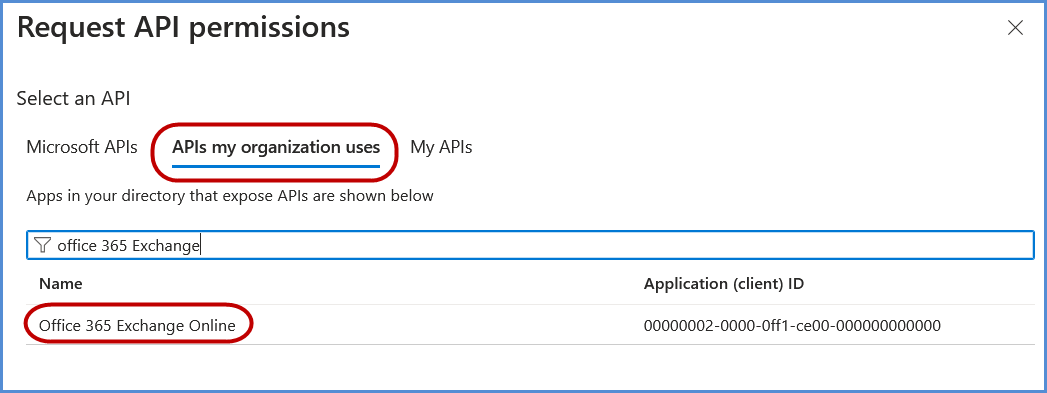
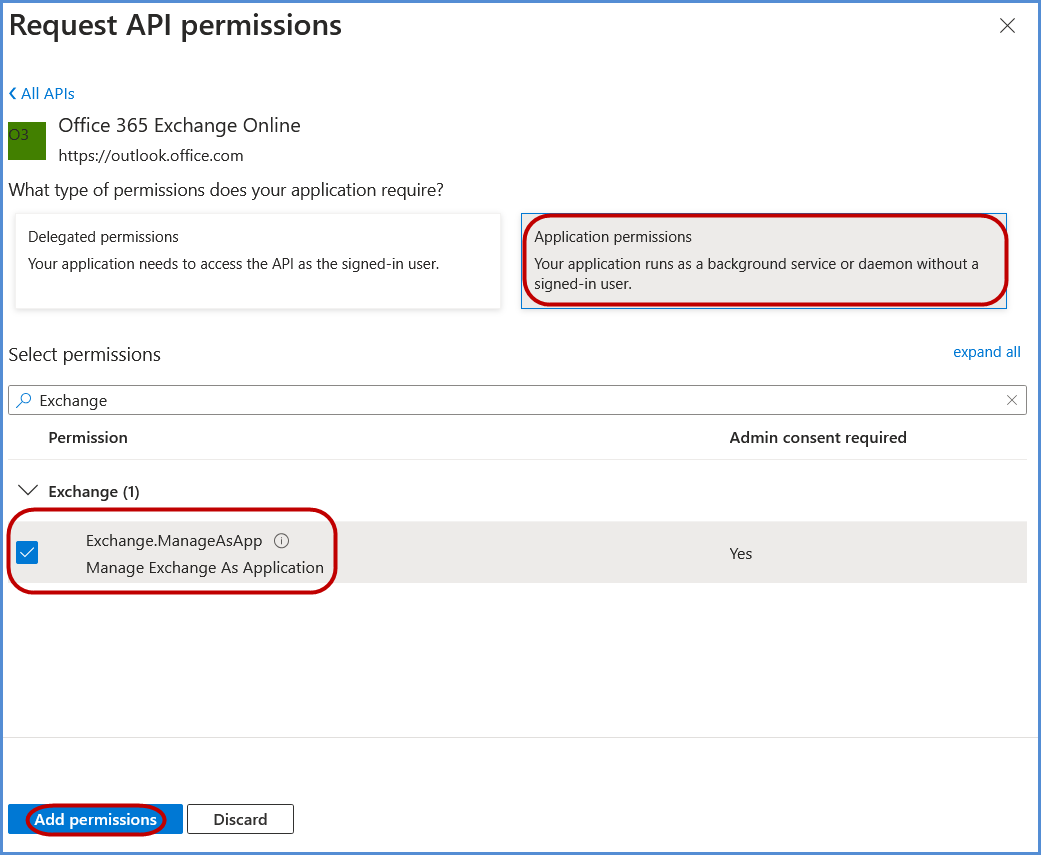
- Select APIs my organization uses and search for Office 365 Exchange Online, then click on it.
- Choose Application permissions, search for Exchange.ManageAsApp, select it, and click Add permissions.
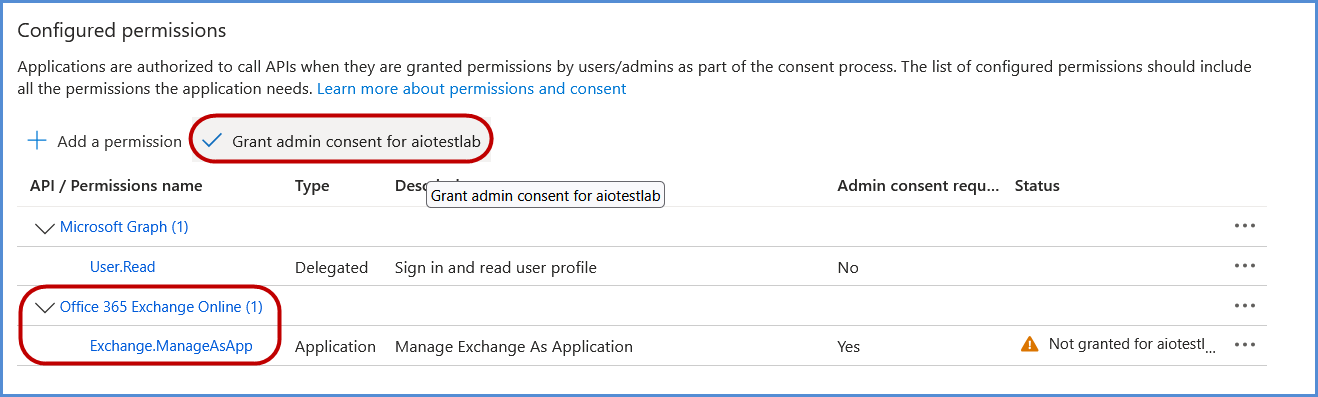
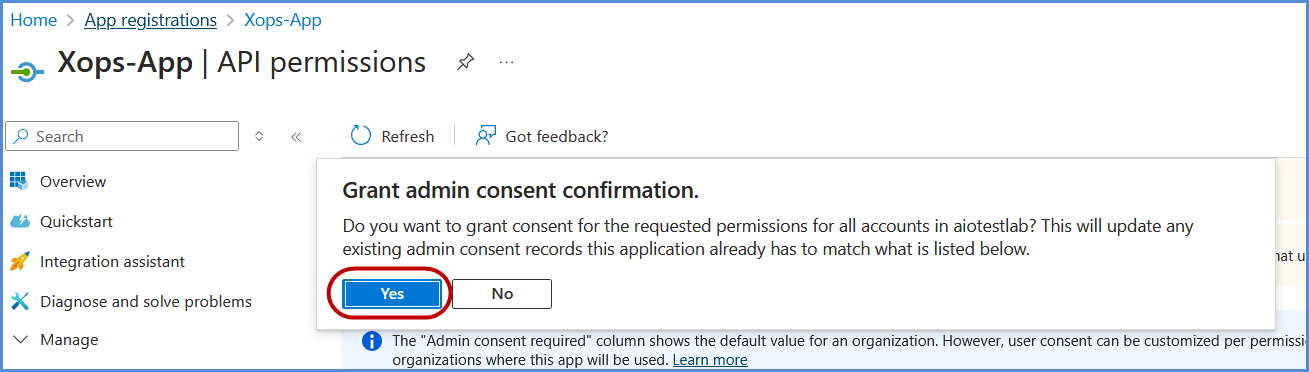
- Click on Grant admin consent and confirm by selecting Yes in the confirmation popup.
Assigning Entra ID Permissions
-
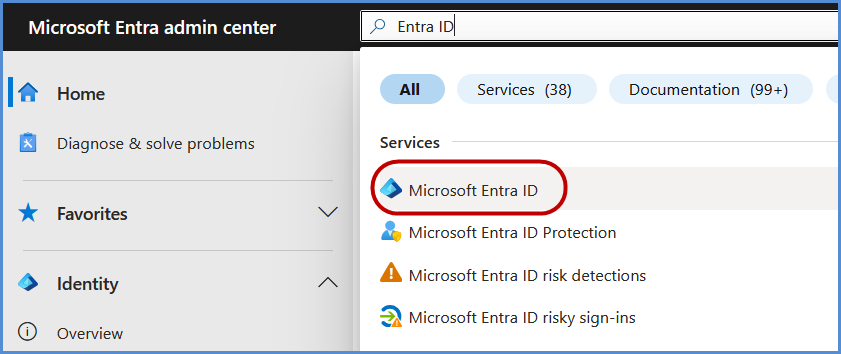
In the Azure Portal, search for Entra ID and select it.
-
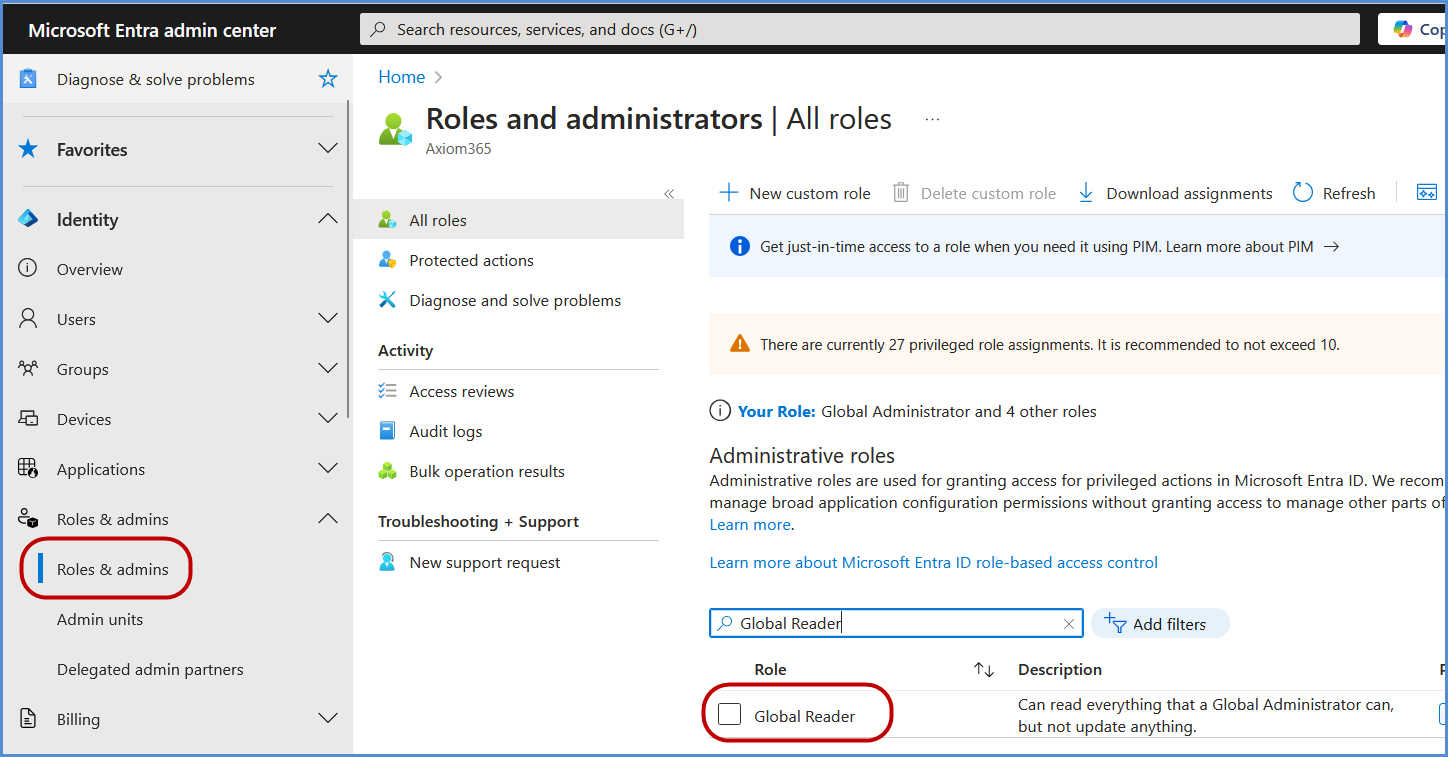
Go to Overview, and in the left navigation pane, click Roles and Administrators.
-
Search for Global Reader and select it.
-
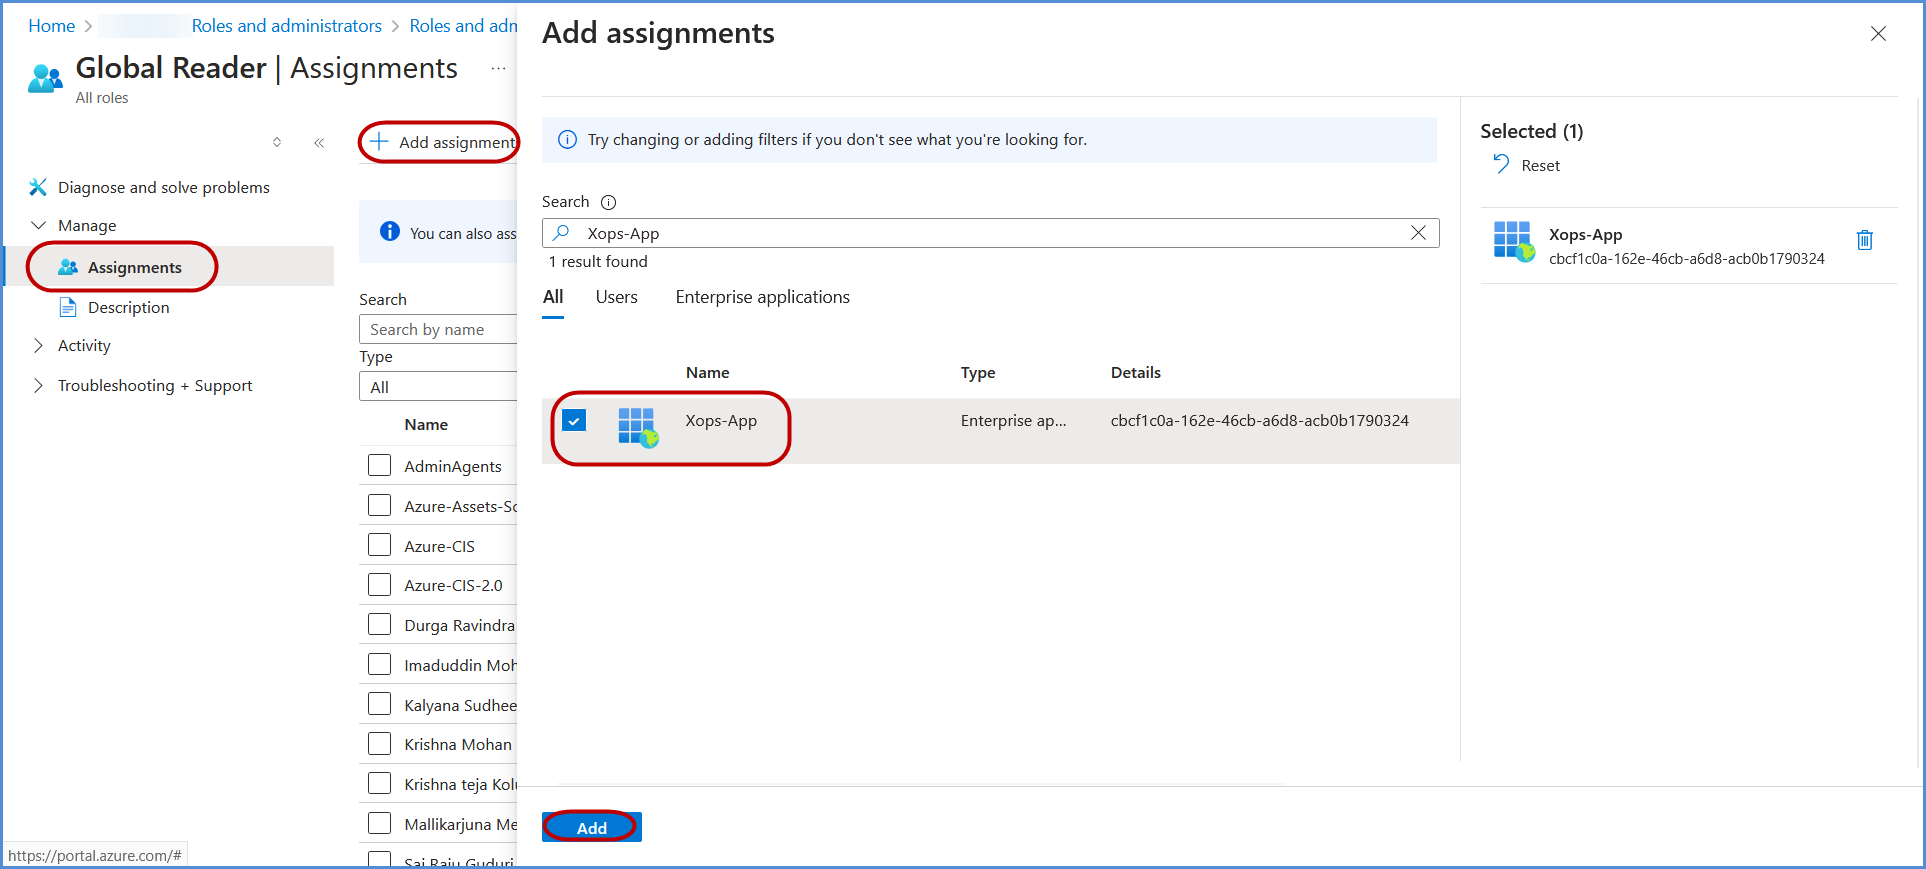
Under Assignments, search for the application registered in the previous step, select it, and click Add to grant the Global Reader role to the application.
Adding a Certificate for Authentication
-
Access the Xops Portal and navigate to Integrations , Select Microsoft icon then click on Add Account for Microsoft.
-
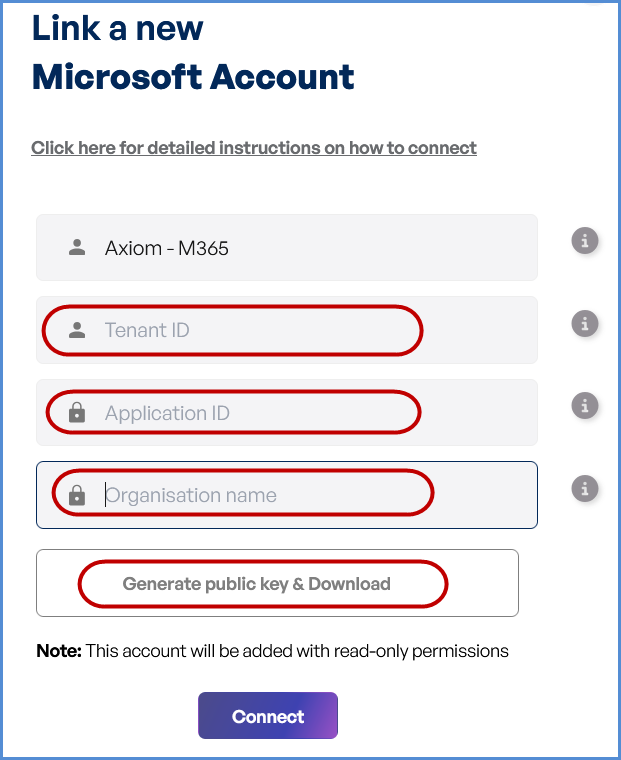
Enter a friendly name for the account.
-
Provide the App ID, Tenant ID copied earlier.
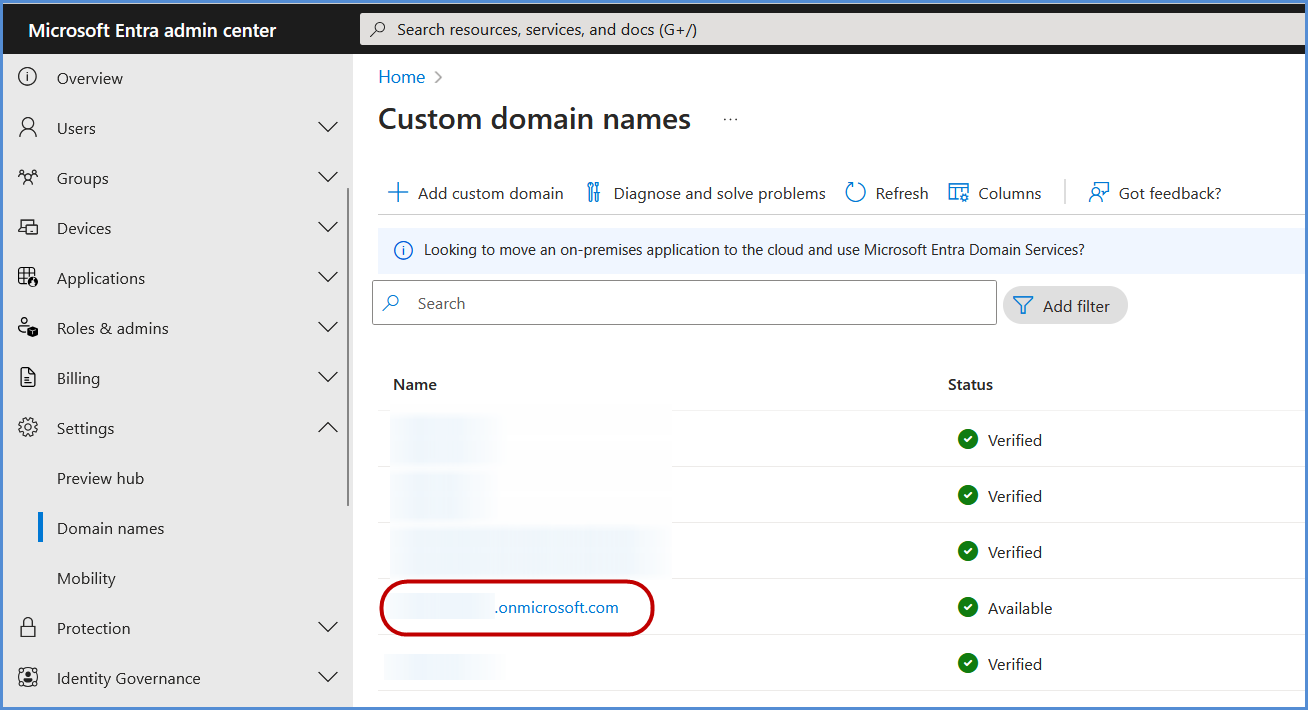
- Provide the Organization ID copied earlier.
-
Click Generate Public Key & Download the generated key.
-
-
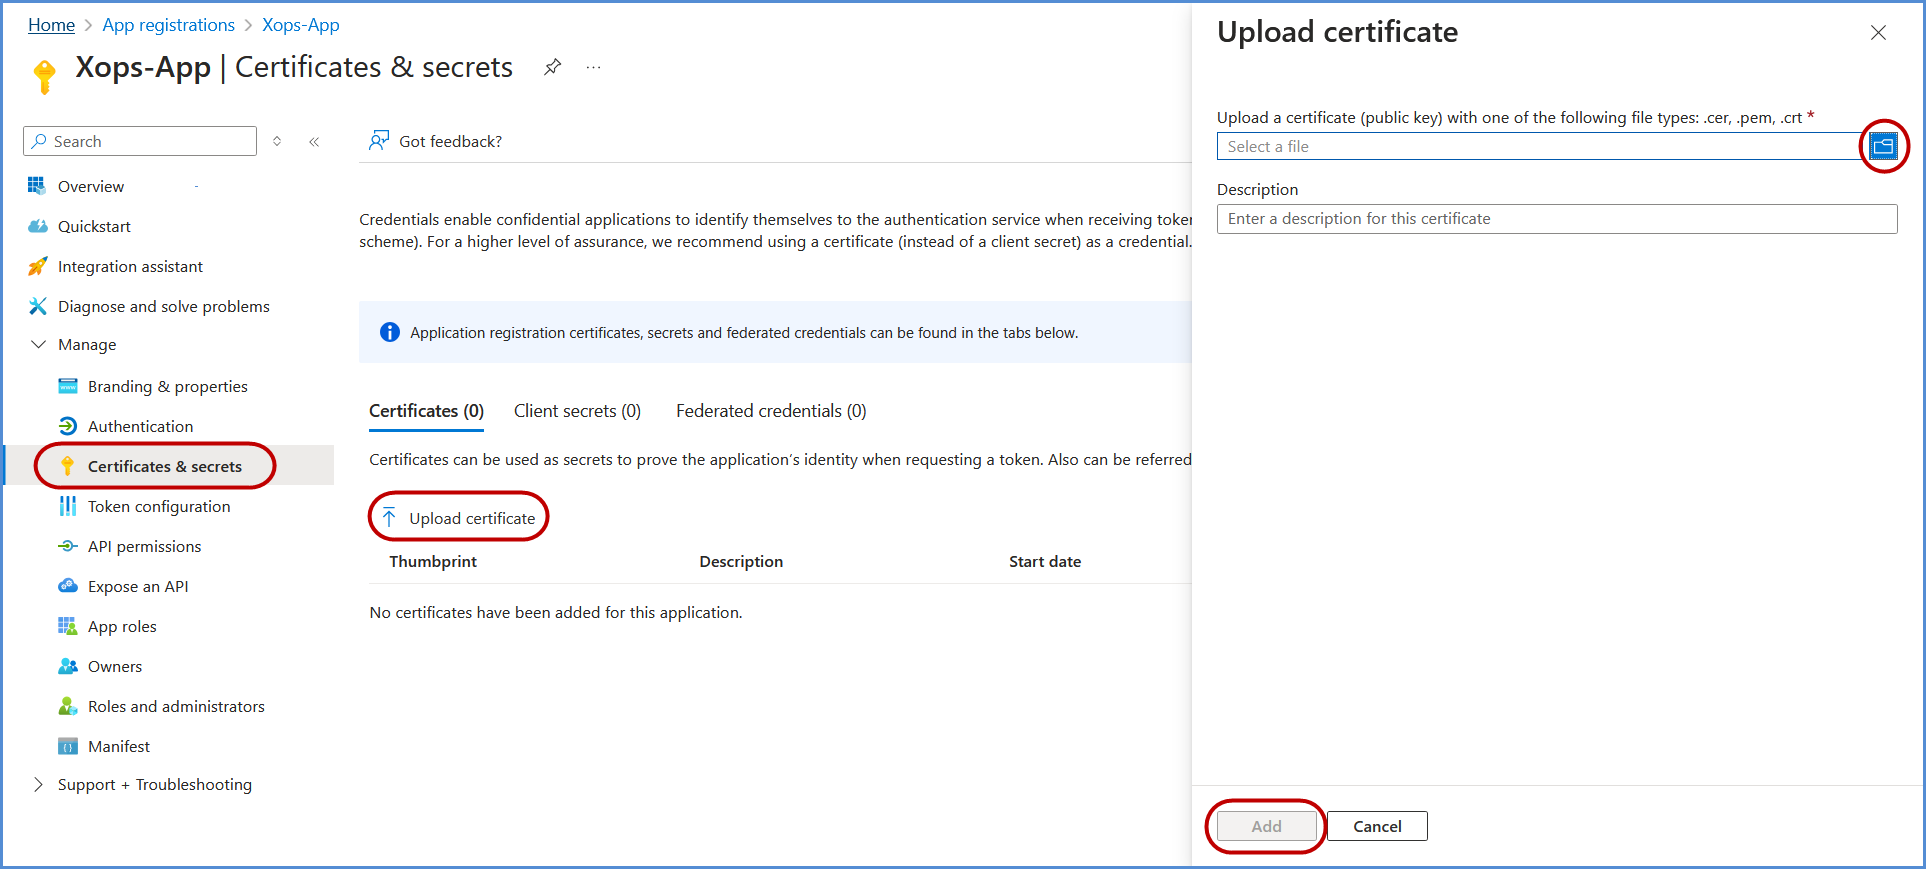
Return to the Microsoft Entra Admin center Portal, open the application, and go to Manage > Certificates & Secrets.
-
Click Upload Certificate, select the certificate file downloaded earlier, and click Add to complete the upload process.
Note:
First-Time Login Experience
- When you log in for the first time, you will be prompted to select your preferred cloud service or platform (AWS, Azure, or Microsoft). This selection is required to establish the initial account connection.
- Once your account is successfully connected to AWS, Azure, or Microsoft, this selection screen will not appear in subsequent logins. Instead, you will be directed automatically to the Home page.
- To manage or modify integrations, navigate to the "Integrations" section from the left panel in the dashboard.